GameFromScratch has a long running “A closer look at” series of articles that take a deep dive into a particular game engine. Hopefully by the end, you the reader will have an idea if this engine is the right fit for you or not.
Today we are looking at the Urho3D engine, a game engine that somehow flew below my radar for a very long time. It started life as Bofh3D but apparently was renamed after a tyrannical fish king ( seriously… and thus the fish in the logo to your right! ) According to Google Translate, Urho is Finnish for “Brave”, while 3D… I hope you know that one by this point! The 3D is a bit of a misnomer though, as like many modern 3D engines, there is a 2D component as well, so you can just as easily make 2D games if that’s what you want to do.
Let’s start straight away with their own description:
Urho3D is a lightweight, cross-platform 2D and 3D game engine implemented in C++ and released under the MIT license. Greatly inspired by OGRE and Horde3D.
Features
- Direct3D9 or OpenGL rendering (Shader Model 2, OpenGL 2.0 or OpenGL ES 2.0 required as minimum)
- HLSL or GLSL shaders + caching of HLSL bytecode
- Configurable rendering pipeline. Default implementations for forward, light pre-pass and deferred rendering
- Component based scene model
- Skeletal (with hardware skinning), vertex morph and node animation
- Automatic instancing on SM3 capable hardware
- Point, spot and directional lights
- Shadow mapping for all light types; cascaded shadow maps for directional lights
- Particle rendering
- Geomipmapped terrain
- Static and skinned decals
- Auxiliary view rendering (reflections etc.)
- Geometry, material & animation LOD
- Software rasterized occlusion culling
- Post-processing
- HDR renderingv1.31
- 2D sprites and particles that integrate into the 3D scenev1.31
- Task-based multithreading
- Hierarchical performance profiler
- Scene and object load/save in binary and XML format
- Keyframe animation of object attributesnew
- Background loading of resourcesnew
- Keyboard, mouse, joystick and touch input (if available)
- Cross-platform support using SDL 2.0 (currently runs on Windows, Linux, Mac OS X, Android, iOS, and Raspberry Piv1.3)
- Physics using Bullet
- 2D physics using Box2Dnew
- Scripting using AngelScript
- Alternative script interface using Luav1.3 or LuaJITv1.31 (on Windows, Linux, Mac OS X, Android, and Raspberry Pi)
- Networking using kNet + possibility to make HTTP requestsv1.3
- Pathfinding using Recast/Detourv1.23
- Image loading using stb_image + DDS / KTX / PVR compressed texture support
- 2D and “3D” audio playback, Ogg Vorbis support using stb_vorbis + WAV format support
- TrueType font rendering using FreeType, AngelCode bitmap fonts are also supported
- Unicode string support
- Inbuilt UI system
- Scene editor and UI-layout editor implemented in script with undo & redo capabilities
- Model/scene/animation/material import from formats supported by Open Asset Import Library
- Alternative model/animation import from OGRE mesh.xml and skeleton.xml files
- Supported build tools and IDEs: Visual Studio, Xcode, Eclipse, CodeBlocks, GCC, LLVM/Clang, MinGW-W64
- Supports both 32-bit and 64-bitv1.3 build
- Build as single external libraryv1.3 (can be linked against statically or dynamically)
The line greatly inspired by Ogre3D seems incredibly accurate to me. On my initial explorations, that is what it most reminded me of, and that is certainly not an insult. My nutshell description of Urho3D is:
A cross platform, open source, C++ based, Lua and AngelScript scripted game engine that runs on Windows, Mac and Linux and can target all those plus iOS, Android and Raspberry Pi.
So the question remains, what’s the developer experience like? Well, let’s find out!
The Source Code
Being open source, Urho3D is available on Github.
I only took a quick browse through the actual code but from what I saw, it’s clean and well written in a modern C++ style. The project is laid out intuitively, the engine and platforms nicely decoupled and things are pretty much where you would expect them to be. The code is fairly sparsely commented, but the things that need to be commented, are. We will touch on the documentation a bit later on.
Getting Started
Getting started is pretty simple. Download the source code archive, extract it and use CMake to build the project files for your platform of choice. I was up and running in a matter of minutes, however I already had all of the required development tools installed and configured. If you’ve never used CMake before you may be in for a bit of a fight and if something goes wrong, CMake starts to feel strangely like black magic. For me though, it mostly just worked. A warning though, download the master branch! The version linked of their main page is outdated to the point that the documentation doesn’t actually work. They really should update the official release version so that it matches their getting started manual!
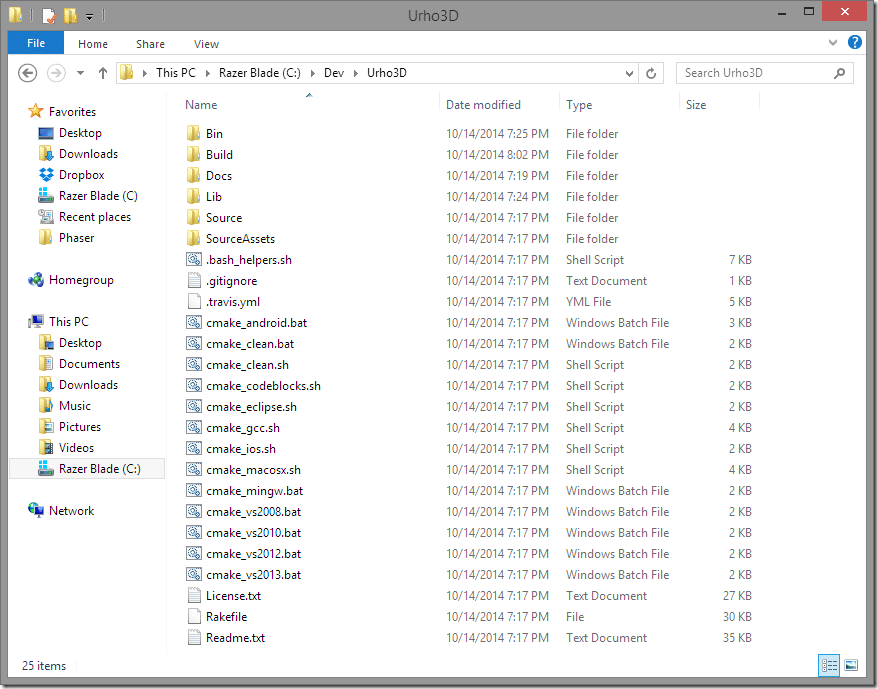
Once unzipped, Urho3D looks something like this:
Simply run the sh or bat file appropriate to your platform and you are good to go. One thing to be aware of up front, Urho3D has samples in both AngelScript and C++, but by default the C++ projects aren’t created by cmake. If you want them, when calling the script, add –DURHO3D_SAMPLES=1. Additionally, Lua support isn’t added out of the box, if you want Lua support as –DURHO3D_LUA=1.
So for example, to get started on Windows using Visual Studio 2013, with Lua and C++ sample support, run:
cmake_vs2013.bat –DURHO3D_SAMPLES=1 –DURHO3D_LUA=1
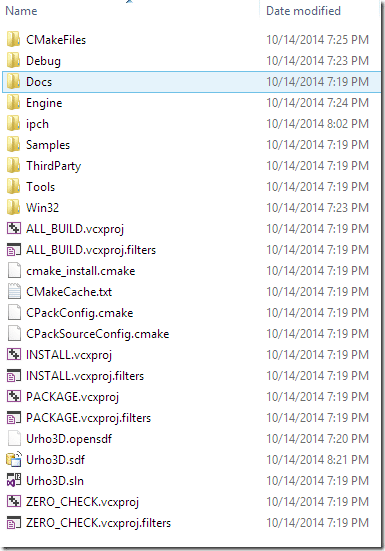
Now if you go into the Build directory, you will see Visual Studio ( or XCode, or Makefile, whatever you chose ) projects.
Simply open Urho3D.sln in Visual Studio and you are done.
Samples Samples and More Samples
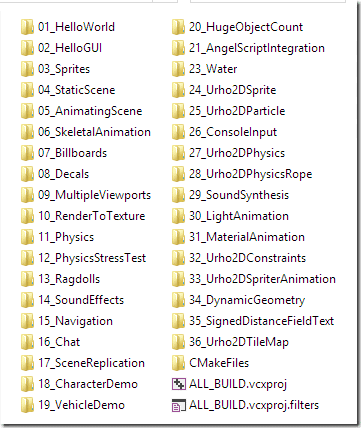
This is one area where Urho3D is well represented. There are a number of included samples, written in both AngelScript and C++. Here they are:
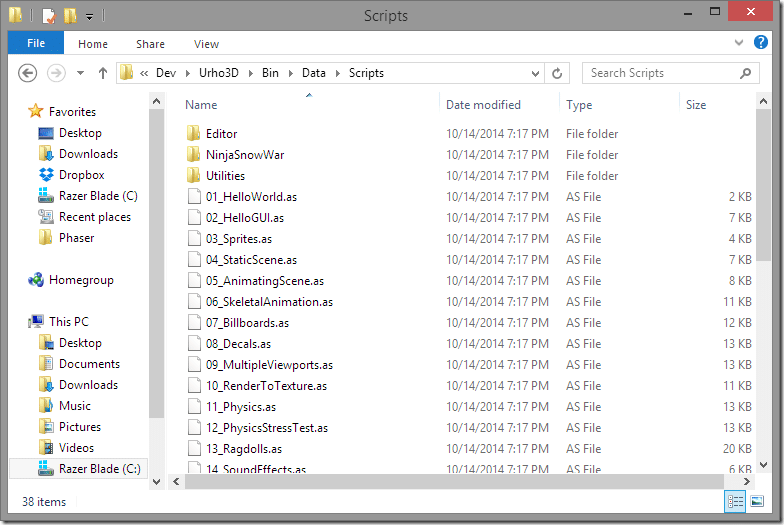
For C++, each sample is a project within your solution. In the case of AngelScript however, each is simply a script file to be run. Once you’ve built the Engine, you should have a tool named Urho3DPlayer ( or Urho3DPlayer_d if you built for debug ). This is a command line utility, simply run it and pass in the path to a script to run. The scripts are located under the Bin folder in the directory /Data/Scripts.
They are the sample examples as the C++, except of course implemented as AngelScript.
From the command line, in the bin folder, running:
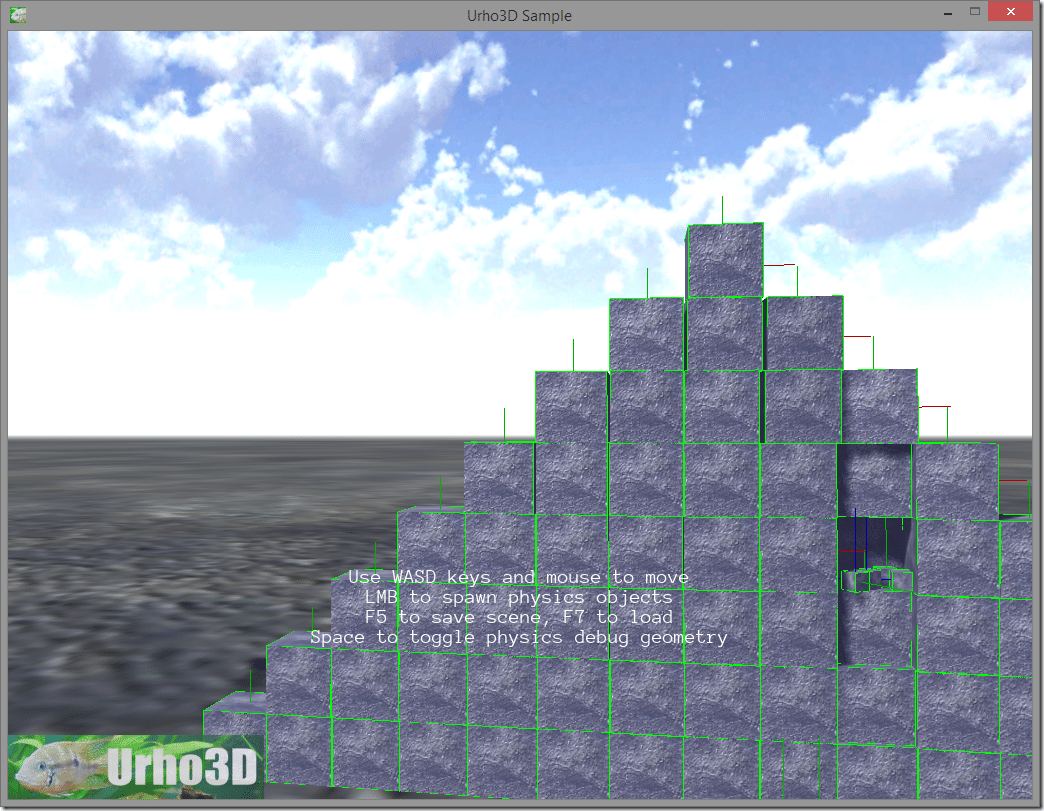
Urho3DPlayer DataScripts11_Physics.as
Will then load and run the script:
It’s worth noting, I also used the –w switch to run the player in Windowed mode so I could take a screen shot. Hit ESC to exit. Oh and Urho3D has annoying behavior of grabbing your mouse cursor, don’t worry when you lose your mouse cursor ( even Windowed ), exit with ESC or alt-tab away and you get your cursor back. I hate really hate when windowed applications take complete control of my mouse!
The code in the samples is well documented, and they cover a wide variety of topics. This is most likely going to be your primary learning source for getting up to speed quick.
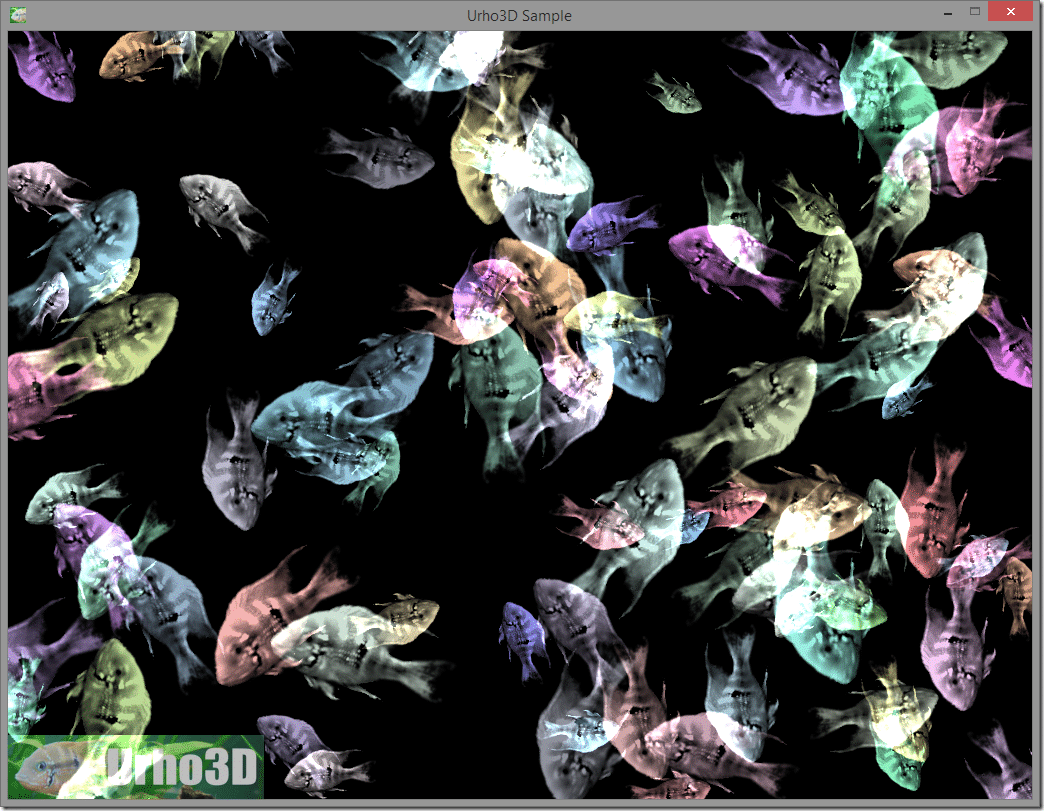
To get an idea of a Urho3D application’s structure, let’s take a look at one of the samples, 03_Sprites. When run, it will do this (except in motion that is):
Now let’s take a look at the corresponding AngelScript and C++ sources.
03_Sprites.as
// Moving sprites example. // This sample demonstrates: // - Adding Sprite elements to the UI // - Storing custom data (sprite velocity) inside UI elements // - Handling frame update events in which the sprites are moved #include "Scripts/Utilities/Sample.as" // Number of sprites to draw const uint NUM_SPRITES = 100; Array<Sprite@> sprites; void Start() { // Execute the common startup for samples SampleStart(); // Create the sprites to the user interface CreateSprites(); // Hook up to the frame update events SubscribeToEvents(); } void CreateSprites() { // Get rendering window size as floats float width = graphics.width; float height = graphics.height; // Get the Urho3D fish texture Texture2D@ decalTex = cache.GetResource("Texture2D", "Textures/UrhoDecal.dds"); for (uint i = 0; i < NUM_SPRITES; ++i) { // Create a new sprite, set it to use the texture Sprite@ sprite = Sprite(); sprite.texture = decalTex; // The UI root element is as big as the rendering window, set random position within it sprite.position = Vector2(Random() * width, Random() * height); // Set sprite size & hotspot in its center sprite.size = IntVector2(128, 128); sprite.hotSpot = IntVector2(64, 64); // Set random rotation in degrees and random scale sprite.rotation = Random() * 360.0f; sprite.SetScale(Random(1.0f) + 0.5f); // Set random color and additive blending mode sprite.color = Color(Random(0.5f) + 0.5f, Random(0.5f) + 0.5f, Random(0.5f) + 0.5f); sprite.blendMode = BLEND_ADD; // Add as a child of the root UI element ui.root.AddChild(sprite); // Store sprite's velocity as a custom variable sprite.vars["Velocity"] = Vector2(Random(200.0f) - 100.0f, Random(200.0f) - 100.0f); // Store sprites to our own container for easy movement update iteration sprites.Push(sprite); } } void MoveSprites(float timeStep) { float width = graphics.width; float height = graphics.height; // Go through all sprites for (uint i = 0; i < sprites.length; ++i) { Sprite@ sprite = sprites[i]; // Rotate float newRot = sprite.rotation + timeStep * 30.0f; sprite.rotation = newRot; // Move, wrap around rendering window edges Vector2 newPos = sprite.position + sprite.vars["Velocity"].GetVector2() * timeStep; if (newPos.x < 0.0f) newPos.x += width; if (newPos.x >= width) newPos.x -= width; if (newPos.y < 0.0f) newPos.y += height; if (newPos.y >= height) newPos.y -= height; sprite.position = newPos; } } void SubscribeToEvents() { // Subscribe HandleUpdate() function for processing update events SubscribeToEvent("Update", "HandleUpdate"); } void HandleUpdate(StringHash eventType, VariantMap& eventData) { // Take the frame time step, which is stored as a float float timeStep = eventData["TimeStep"].GetFloat(); // Move sprites, scale movement with time step MoveSprites(timeStep); } // Create XML patch instructions for screen joystick layout specific to this sample app String patchInstructions = "<patch>" + " <add sel="/element/element[./attribute[@name='Name' and @value='Hat0']]">" + " <attribute name="Is Visible" value="false" />" + " </add>" + "</patch>";
And now the C++ versions:
Sprite.h
#pragma once #include "Sample.h" /// Moving sprites example. /// This sample demonstrates: /// - Adding Sprite elements to the UI /// - Storing custom data (sprite velocity) inside UI elements /// - Handling frame update events in which the sprites are moved class Sprites : public Sample { // Enable type information. OBJECT(Sprites); public: /// Construct. Sprites(Context* context); /// Setup after engine initialization and before running the main loop. virtual void Start(); protected: /// Return XML patch instructions for screen joystick layout for a specific sample app, if any. virtual String GetScreenJoystickPatchString() const { return "<patch>" " <add sel="/element/element[./attribute[@name='Name' and @value='Hat0']]">" " <attribute name="Is Visible" value="false" />" " </add>" "</patch>"; } private: /// Construct the sprites. void CreateSprites(); /// Move the sprites using the delta time step given. void MoveSprites(float timeStep); /// Subscribe to application-wide logic update events. void SubscribeToEvents(); /// Handle the logic update event. void HandleUpdate(StringHash eventType, VariantMap& eventData); /// Vector to store the sprites for iterating through them. Vector<SharedPtr<Sprite> > sprites_; };
Sprite.cpp
#include "CoreEvents.h" #include "Engine.h" #include "Graphics.h" #include "ResourceCache.h" #include "Sprite.h" #include "Texture2D.h" #include "UI.h" #include "Sprites.h" #include "DebugNew.h" // Number of sprites to draw static const unsigned NUM_SPRITES = 100; // Custom variable identifier for storing sprite velocity within the UI element static const StringHash VAR_VELOCITY("Velocity"); DEFINE_APPLICATION_MAIN(Sprites) Sprites::Sprites(Context* context) : Sample(context) { } void Sprites::Start() { // Execute base class startup Sample::Start(); // Create the sprites to the user interface CreateSprites(); // Hook up to the frame update events SubscribeToEvents(); } void Sprites::CreateSprites() { ResourceCache* cache = GetSubsystem<ResourceCache>(); Graphics* graphics = GetSubsystem<Graphics>(); UI* ui = GetSubsystem<UI>(); // Get rendering window size as floats float width = (float)graphics->GetWidth(); float height = (float)graphics->GetHeight(); // Get the Urho3D fish texture Texture2D* decalTex = cache->GetResource<Texture2D>("Textures/UrhoDecal.dds"); for (unsigned i = 0; i < NUM_SPRITES; ++i) { // Create a new sprite, set it to use the texture SharedPtr<Sprite> sprite(new Sprite(context_)); sprite->SetTexture(decalTex); // The UI root element is as big as the rendering window, set random position within it sprite->SetPosition(Vector2(Random() * width, Random() * height)); // Set sprite size & hotspot in its center sprite->SetSize(IntVector2(128, 128)); sprite->SetHotSpot(IntVector2(64, 64)); // Set random rotation in degrees and random scale sprite->SetRotation(Random() * 360.0f); sprite->SetScale(Random(1.0f) + 0.5f); // Set random color and additive blending mode sprite->SetColor(Color(Random(0.5f) + 0.5f, Random(0.5f) + 0.5f, Random(0.5f) + 0.5f)); sprite->SetBlendMode(BLEND_ADD); // Add as a child of the root UI element ui->GetRoot()->AddChild(sprite); // Store sprite's velocity as a custom variable sprite->SetVar(VAR_VELOCITY, Vector2(Random(200.0f) - 100.0f, Random(200.0f) - 100.0f)); // Store sprites to our own container for easy movement update iteration sprites_.Push(sprite); } } void Sprites::MoveSprites(float timeStep) { Graphics* graphics = GetSubsystem<Graphics>(); float width = (float)graphics->GetWidth(); float height = (float)graphics->GetHeight(); // Go through all sprites for (unsigned i = 0; i < sprites_.Size(); ++i) { Sprite* sprite = sprites_[i]; // Rotate float newRot = sprite->GetRotation() + timeStep * 30.0f; sprite->SetRotation(newRot); // Move, wrap around rendering window edges Vector2 newPos = sprite->GetPosition() + sprite->GetVar(VAR_VELOCITY).GetVector2() * timeStep; if (newPos.x_ < 0.0f) newPos.x_ += width; if (newPos.x_ >= width) newPos.x_ -= width; if (newPos.y_ < 0.0f) newPos.y_ += height; if (newPos.y_ >= height) newPos.y_ -= height; sprite->SetPosition(newPos); } } void Sprites::SubscribeToEvents() { // Subscribe HandleUpdate() function for processing update events SubscribeToEvent(E_UPDATE, HANDLER(Sprites, HandleUpdate)); } void Sprites::HandleUpdate(StringHash eventType, VariantMap& eventData) { using namespace Update; // Take the frame time step, which is stored as a float float timeStep = eventData[P_TIMESTEP].GetFloat(); // Move sprites, scale movement with time step MoveSprites(timeStep); }
EDIT: And the Lua example as well:
03_Sprites.lua
-- Moving sprites example. -- This sample demonstrates: -- - Adding Sprite elements to the UI -- - Storing custom data (sprite velocity) inside UI elements -- - Handling frame update events in which the sprites are moved require "LuaScripts/Utilities/Sample" local numSprites = 100 local sprites = {} -- Custom variable identifier for storing sprite velocity within the UI element local VAR_VELOCITY = StringHash("Velocity") function Start() -- Execute the common startup for samples SampleStart() -- Create the sprites to the user interface CreateSprites() -- Hook up to the frame update events SubscribeToEvents() end function CreateSprites() local decalTex = cache:GetResource("Texture2D", "Textures/UrhoDecal.dds") local width = graphics.width local height = graphics.height for i = 1, numSprites do -- Create a new sprite, set it to use the texture local sprite = Sprite:new() sprite.texture = decalTex sprite:SetFullImageRect() -- The UI root element is as big as the rendering window, set random position within it sprite.position = Vector2(Random(width), Random(height)) -- Set sprite size & hotspot in its center sprite:SetSize(128, 128) sprite.hotSpot = IntVector2(64, 64) -- Set random rotation in degrees and random scale sprite.rotation = Random(360.0) sprite.scale = Vector2(1.0, 1.0) * (Random(1.0) + 0.5) -- Set random color and additive blending mode sprite:SetColor(Color(Random(0.5) + 0.5, Random(0.5) + 0.5, Random(0.5) + 0.5, 1.0)) sprite.blendMode = BLEND_ADD -- Add as a child of the root UI element ui.root:AddChild(sprite) -- Store sprite's velocity as a custom variable sprite:SetVar(VAR_VELOCITY, Variant(Vector2(Random(200.0) - 100.0, Random(200.0) - 100.0))) table.insert(sprites, sprite) end end function SubscribeToEvents() -- Subscribe HandleUpdate() function for processing update events SubscribeToEvent("Update", "HandleUpdate") end function MoveSprites(timeStep) local width = graphics.width local height = graphics.height for i = 1, numSprites do local sprite = sprites[i] sprite.rotation = sprite.rotation + timeStep * 30 local newPos = sprite.position newPos = newPos + sprite:GetVar(VAR_VELOCITY):GetVector2() * timeStep if newPos.x >= width then newPos.x = newPos.x - width elseif newPos.x < 0 then newPos.x = newPos.x + width end if newPos.y >= height then newPos.y = newPos.y - height elseif newPos.y < 0 then newPos.y = newPos.y + height end sprite.position = newPos end end function HandleUpdate(eventType, eventData) local timeStep = eventData:GetFloat("TimeStep") MoveSprites(timeStep) end -- Create XML patch instructions for screen joystick layout specific to this sample app function GetScreenJoystickPatchString() return "<patch>" .. " <add sel="/element/element[./attribute[@name='Name' and @value='Hat0']]">" .. " <attribute name="Is Visible" value="false" />" .. " </add>" .. "</patch>" end
As you can see, the code is clean enough and well enough documented to learn from. Unfortunately there aren’t equivalent Lua examples right now.
EDIT: Ok, my bad. Fortunately there are in fact Lua examples as well! They were just very well hidden in the /Bin/Data/LuaScript folder.
Hello World
Urho3D commits a common sin and one that drives me absolutely nuts with game engines. It’s Hello World, in fact, all of it’s C++ examples are built over a “Sample” class. This means when the reader wants to start from scratch on their own project, they have to tear through the base class to figure out what goes into a core application. I get why they do this, so they can focus on the feature they want to show, but at least one example should be as complete as possible with no underlying class to build on. Fortunately I have done this for you. The following is basically the “minimum usable” Urho3D application:
TestMain.h
#pragma once #include "Application.h" using namespace Urho3D; class TestMain : public Urho3D::Application { OBJECT(TestMain); public: TestMain(Urho3D::Context*); virtual void Setup(); virtual void Start(); virtual void Stop() {} private: void onKeyDown(StringHash, VariantMap&); };
TestMain.cpp
#include "TestMain.h" #include "Engine.h" #include "Graphics.h" #include "Input.h" #include "InputEvents.h" #include "ResourceCache.h" #include "UI.h" #include "Font.h" #include "Text.h" using namespace Urho3D; DEFINE_APPLICATION_MAIN(TestMain) TestMain::TestMain(Urho3D::Context* context) : Application(context){ } void TestMain::Setup(){ engineParameters_["FullScreen"] = false; } void TestMain::Start(){ SubscribeToEvent(E_KEYDOWN, HANDLER(TestMain,onKeyDown)); SharedPtr<Text> text(new Text(context_)); text->SetText("Hello Cruel World!"); text->SetColor(Color::WHITE); text->SetFont(GetSubsystem<ResourceCache>()->GetResource<Font>("Fonts/BlueHighway.ttf"), 42); text->SetHorizontalAlignment(HA_CENTER); text->SetVerticalAlignment(VA_CENTER); GetSubsystem<UI>()->GetRoot()->AddChild(text); } void TestMain::onKeyDown(StringHash event, VariantMap& data){ engine_->Exit(); }
It creates a windowed Hello World application, displays the text “Hello Cruel World” in white, centered to the screen and waits for any key to be pressed before exiting.
While basic, it should give you some idea how Urho3D works. There are times, like when trying to figure out parameters engineParameters takes that you really wish for better reference documentation, but it was fairly simple to get things up and running. I did have a bit of a struggle with life cycle, when I tried to put more logic into Setup() instead of Start() but otherwise things mostly worked how I expected. Speaking of documentation…
The Documentation
So what’s the documentation like? It’s split in to two parts, the documentation that has been written covering the various aspects, tasks and systems in Urho3D. There is also an auto generated class reference. You can read the documentation here.
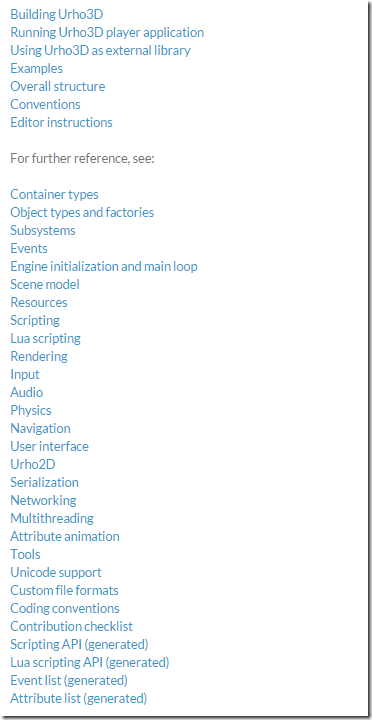
As you can see, most of the major systems are covered:
The documentation is well written in clear English, and for the most part covers what you would expect it to. For an open source project I have to say, the overall documentation level is very good. The only area I was somewhat let down by was the reference material.
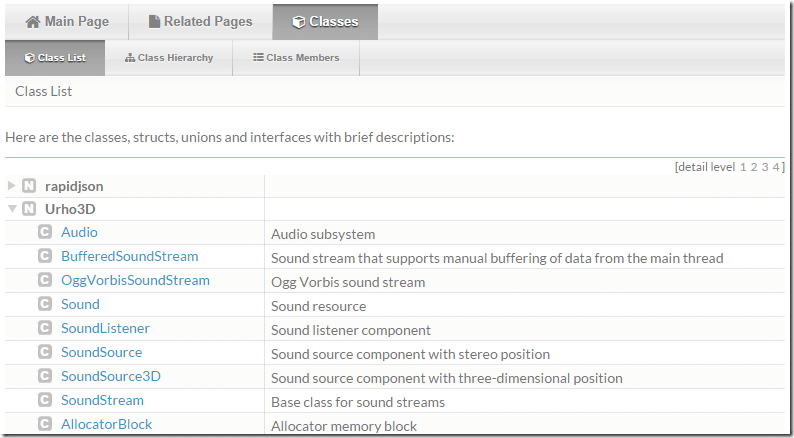
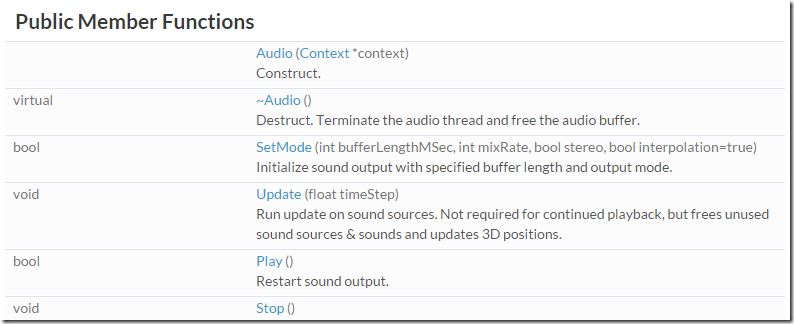
There is an automatically generated class reference available:
But the details are pretty sparse:
So, for example, if you are hunting down say… what audio formats are supported, this information can be a bit hard to find and may result in you having to jump into the source code. I do wish there was more implementation specific details in the reference materials.
Perhaps I am nit picking at this point… working so much in Java lately, JavaDoc has really spoiled me.
In summary, the documentation is solid, great in fact for an open source project. I would however appreciate more detail in the reference material.
Tools
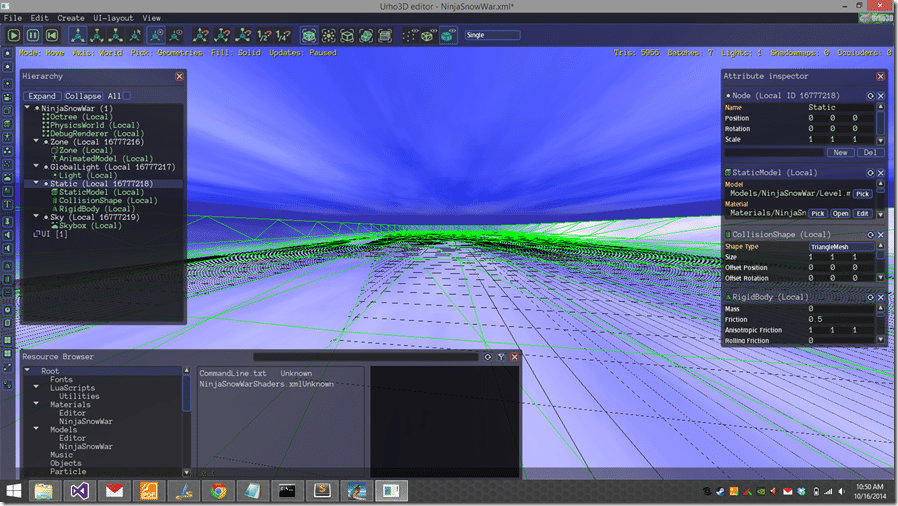
Part of what makes an engine and engine is the tooling it supports. Urho3D is no exception. We already mentioned Urho3DPlayer, but there are several other tools, one of which is actually run in the player. There is a full blown 3D level editor:
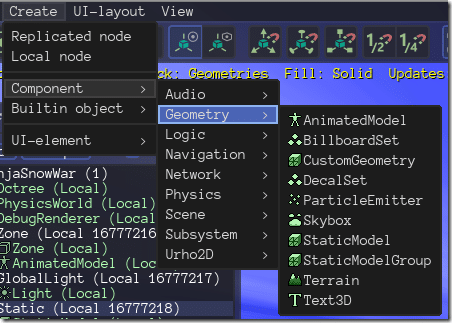
The editor enables you to create and edit several node types:
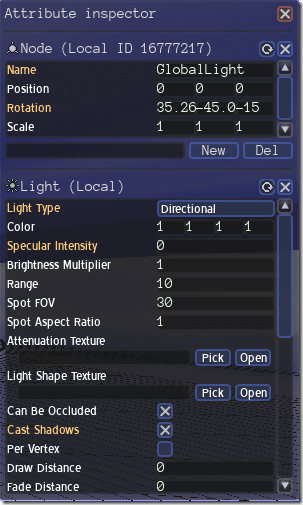
And provides context appropriate property editing:
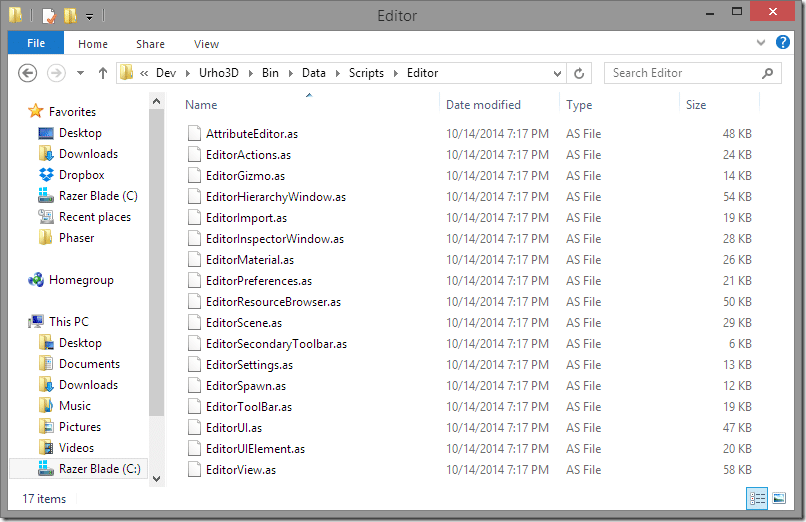
It’s not going to win any beauty pageants, but it is a full functioning 3D world editor written entirely in AngelScript. So if it doesn’t have functionality you want, simply add it. The code is all available in the BinDataScriptsEditor folder:
With full code access, you should easily be able to extend the editor to fit whatever type of game you are looking at creating.
In addition to the editor, there are a number of other tools. There is AssetImporter from the Assimp project, for importing 3D assets. There is also a tool for importing Ogre3D assets. PackageTool, for pulling your assets all together, a shader compiler, lightmap generator and more.
Summary
Urho3D is an impressive, well documented, cross platform game engine with clean accessible code and a ton of examples. There are of course some negatives too. The tools aren’t nearly as polished as you see in many commercial engines, the reference material could be a bit more extensive and the community isn’t huge. I can’t speak to performance as I never dove in that deeply. Is it worth checking out for your own game project? Well, if control and open source are important to you and you like C++, AngelScript and/or Lua, I would most certainly give it a look.
What do you think, does Urdo3D look interesting to you? Would you like to see more in depth tutorials from GameFromScratch.com? Let me know!


