We all start somewhere and for programmers that somewhere is often Hello World.
In the first GameFromScratch.com Project Anarchy tutorial, we are going to do exactly that. If you’ve got no idea what Project Anarchy is, you can start here. This tutorial assumes you’ve got Project Anarchy installed and nothing more. This ultra simple project is going to simply display Hello World to the user. Each following tutorial will assume you have read or are familiar with all of the details of the previous tutorial, so everything we have covered in detail here will only be briefly mentioned in subsequent tutorials!
In this tutorial we will cover:
- Creating a new project
- Creating a new scene
- Creating a script
- Running/stopping your application
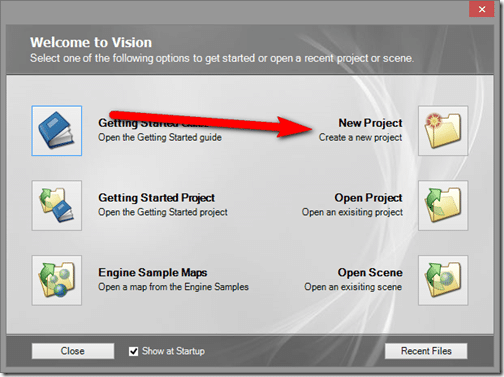
Fire up vForge, the heart of the Vision Engine. In the welcome dialog, select “New Project” or select File->New Project:
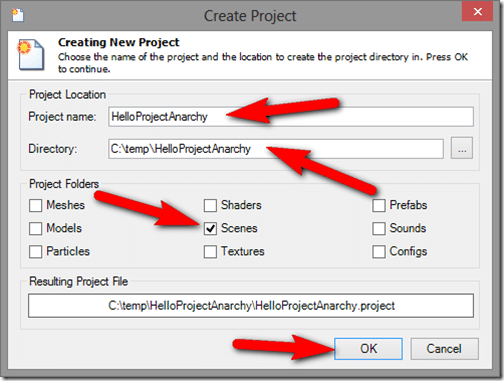
In the Create Project Dialog, pick a Project name (HelloProjectAnarchy) and Directory (C:tempHelloProjectAnarchy) then in Project Folders, select Scenes. Click OK.
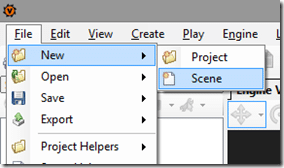
Now we need at lease one scene to include in our project. Select File->New->Scene:
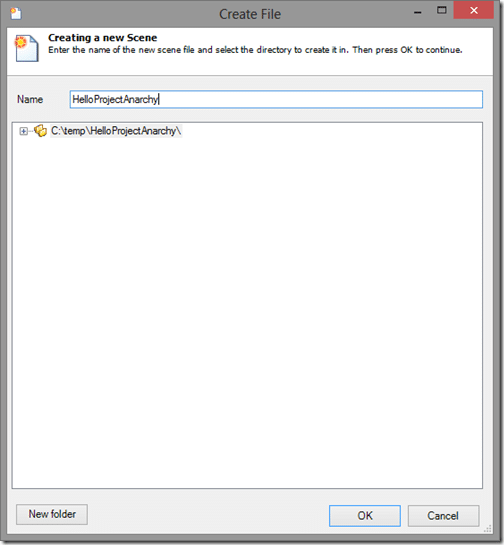
Name the scene (HelloProjectAnarchy) then press OK:
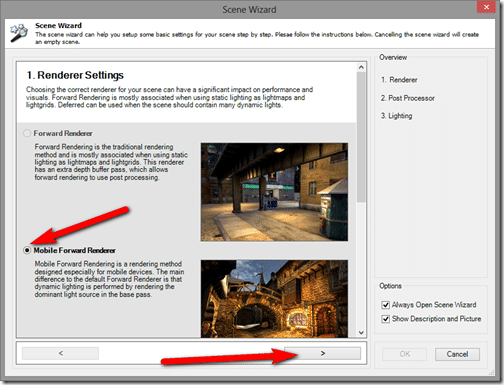
The wizard is going to ask you how you want the renderer to work. These values can be re-configured later, for now the defaults are all fine. Select Mobile Forward Renderer then click the > button.
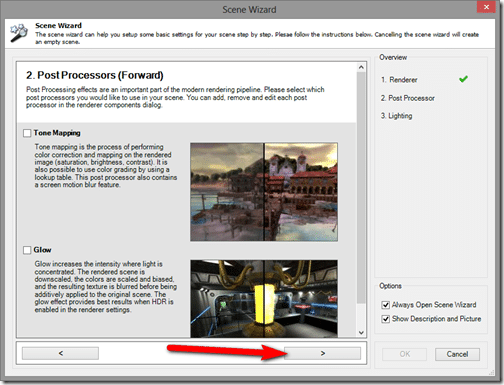
The next dialog is to configure post processing effects. These are applied after the scene is rendered but before it is presented to the user. The defaults (nothing) are fine, simply click >.
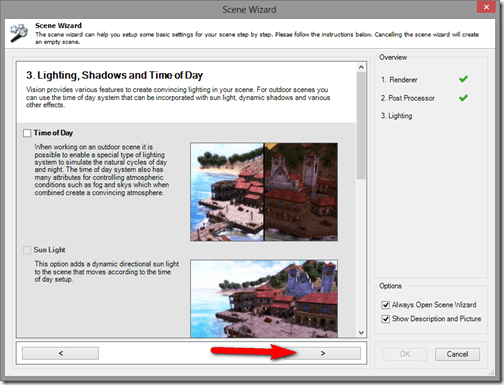
The final dialog is the Light, Shadows and Time of Day. None of these matter right now, and all can be changed after the fact, simply click >.
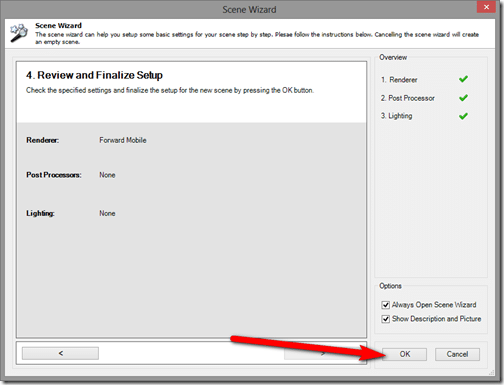
We are now done the new scene wizard, click OK.
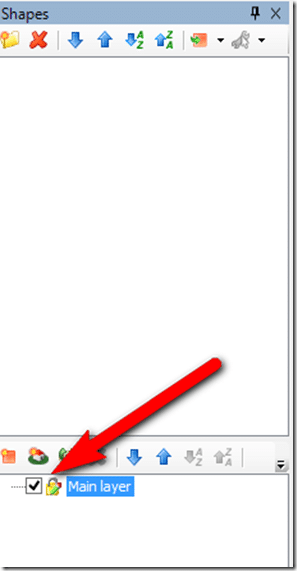
On the left hand side, select Main Layer:
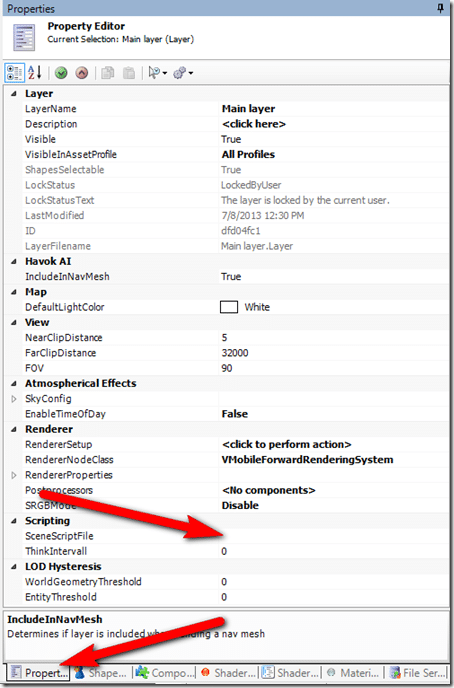
Then on the right, select the Properties Tab and locate Scripting->SceneScriptFile. If properties is empty, you do not have Main layer highlighted.
In the empty space to the right, left click to select, then pull down and select New…
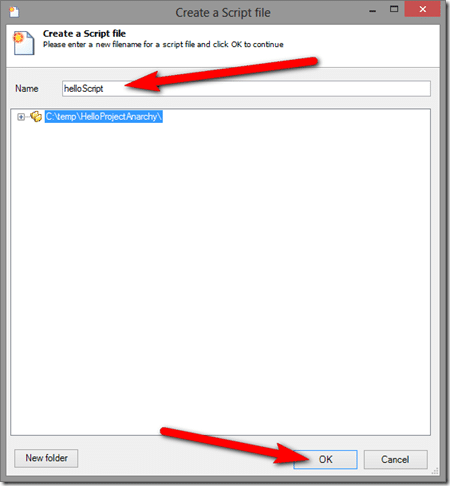
In the Create a script dialog, name it(helloScript) then press OK.
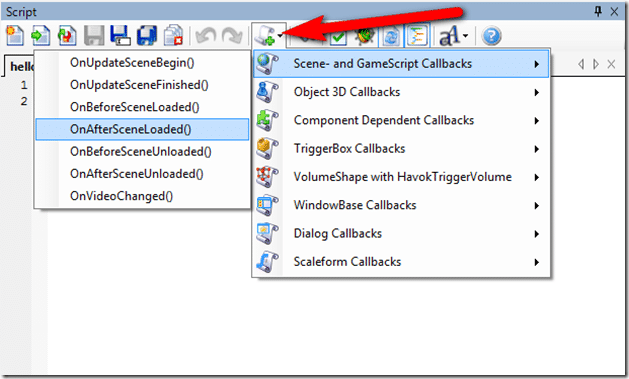
Locate the Script Panel. If you don’t have a Script panel, select View->Panels->Script Panels.
At the top of the Script Panel, click the Insert a Code snippet button and select Scene and GameScript Callbacks->OnAfterSceneLoaded()
Edit the script with the following simple Debug:PrintLine() method. Note, Lua is case sensitive.
This code will predictably enough, be evoked after your scene is loaded. Now let’s run your application. In the Engine View toolbar, click the Play button.
Your application will run. The debug test will be displayed immediately. Look quickly, it will go away.
As you can see, the Play button has been replaced with a Stop button. Use this to stop your application from running.
Congratulations, you’ve just created your very first Project Anarchy application! Stay tuned for the next tutorial where we make your application a bit more impressive. Remember, in following tutorials we will assume you have read all prior tutorials, so we will not go into anywhere near the same level of detail on those topics.

