In the previous tutorial, we look at the process of using sprites in SFML. Today we are going to look instead at using a sprite sheet or texture atlas. The process is very similar to working with a normal sprite, except that you have multiple sprites on a single texture. Loading and swapping textures in memory is an expensive operation, so holding multiple sprites together can greatly improve the speed of your game.
As always there is an HD video version of this tutorial available here.
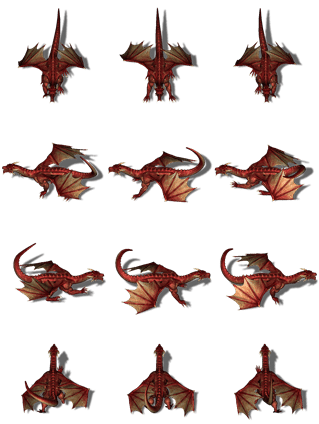
Many game engines have implicit support for spritesheets and sprite animation, however, SFML does not. There are however libraries built on top of SFML that provide this functionality or you can roll the required functionality yourself with relative ease. Before we can continue we need a sprite sheet, which is simply one or more images with multiple frames of animation. This is the one I am using:
This isn’t the full-sized image, however. The source file is actually 900×1200 pixels in size. It should be noted that this site isn’t actually ideal. Power of two texture dimensions should be preferred ( such as 512×256, 1024×1024, 2048×2048, etc. ). In an earlier version of OpenGL including OpenGL ES 1.x, a power of two texture was actually required. These days, it is no longer a requirement, but a PoT texture generally will perform better. As to file dimensions, you can fairly safely go up to 2048×2048 and support even rudimentary GPU’s like the Intel HD3000 series, but sizes of 4096×4096 are generally possible on most modern desktop and mobile GPUs. You can notice from this image that it contains 12 textures, each 300×400 pixels in size.
Now we need code to extract a single frame from the texture and as you will see, it’s actually remarkably easy:
// Demonstrate creating a spritesheet
#include "SFML/Graphics.hpp"

int main(int argc, char ** argv){
  sf::RenderWindow renderWindow(sf::VideoMode(640, 480), "Demo Game");

  sf::Event event;
  sf::Texture texture;
  texture.loadFromFile("images/dragonFrames.png");

  sf::Sprite sprite(texture,sf::IntRect(0,0,300,400));


  while (renderWindow.isOpen()){
    while (renderWindow.pollEvent(event)){
      if (event.type == sf::Event::EventType::Closed)
        renderWindow.close();
    }

    renderWindow.clear();
    renderWindow.draw(sprite);
    renderWindow.display();
  }
}
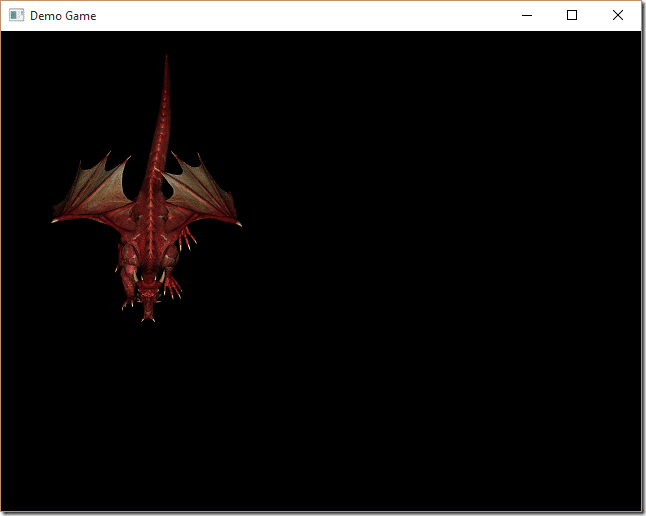
This will draw just a small rectangular portion of our source texture, representing the first frame, like so:
Really that’s all that there is to it. To add animation, we simply change the rectangular source after the fact, like so:
// Demonstrate creating a spritesheet
#include "SFML/Graphics.hpp"

int main(int argc, char ** argv){
  sf::RenderWindow renderWindow(sf::VideoMode(640, 480), "Demo Game");

  sf::Event event;
  sf::Texture texture;
  texture.loadFromFile("images/dragonFrames.png");

  sf::IntRect rectSourceSprite(300, 0, 300, 400);
  sf::Sprite sprite(texture,rectSourceSprite);
  sf::Clock clock;

  while (renderWindow.isOpen()){
    while (renderWindow.pollEvent(event)){
      if (event.type == sf::Event::EventType::Closed)
        renderWindow.close();
    }

    if (clock.getElapsedTime().asSeconds() > 1.0f){
      if (rectSourceSprite.left == 600)
        rectSourceSprite.left = 0;
      else
        rectSourceSprite.left += 300;

      sprite.setTextureRect(rectSourceSprite);
      clock.restart();
    }


    renderWindow.clear();
    renderWindow.draw(sprite);
    renderWindow.display();
  }
}
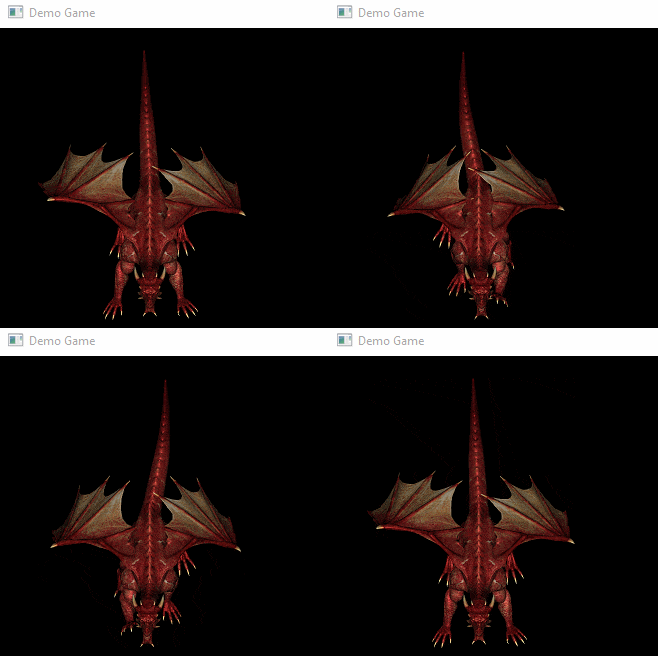
And when run:
You may notice right away that animation doesn’t look right and that’s a keen eye you’ve got there. In this example, we are simply going across the top three frames of animation from left to right. The proper animation should actually be 0,1,2,1,0 not 0,1,2,0,1,2. That said, in a proper game you would either roll your own animation class or use an existing one. When we get to the process of creating a complete game, we will cover this process in detail.
In the above example, we change frames of animation by changing the sprites source texture rect with a call to setTextureRect(). As I mentioned in the previous tutorial you could actually generate a new sprite per frame if preferred, as the sf::Sprite class is very light weight.
The Video


