In this chapter we are going to explore handling input from the keyboard, mouse and gamepad in your MonoGame game. XNA/MonoGame also have support for mobile specific input such as motion and touch screens, we will cover theses topics in a later topic.
There is an HD video of this chapter available here.
XNA input capabilities were at once powerful, straightforward and a bit lacking. If you come from another game engine or library you may be shocked to discovered there is no event driven interface out of the box for example. All input in XNA is done via polling, if you want an event layer, you build it yourself or use one of the existing 3rd party implementations. On the other hand, as you are about to see, the provided interfaces are incredibly consistent and easy to learn.
Handling Keyboard Input
Let’s start straight away with a code sample:
using Microsoft.Xna.Framework;
using Microsoft.Xna.Framework.Graphics;
using Microsoft.Xna.Framework.Input;
using System.Text;

namespace Example1
{
    public class Game1 : Game
    {
        GraphicsDeviceManager graphics;
        SpriteBatch spriteBatch;
        Vector2 position;
        Texture2D texture;

        public Game1()
        {
            graphics = new GraphicsDeviceManager(this);
            Content.RootDirectory = "Content";
        }

        protected override void Initialize()
        {
            base.Initialize();
            position = new Vector2(graphics.GraphicsDevice.Viewport.
                       Width / 2 -64,
                                    graphics.GraphicsDevice.Viewport.
                                    Height / 2 -64);
        }

        protected override void LoadContent()
        {
            spriteBatch = new SpriteBatch(GraphicsDevice);
            texture = this.Content.Load<Texture2D>("logo128");
        }

        protected override void UnloadContent()
        {
        }

        protected override void Update(GameTime gameTime)
        {
            // Poll for current keyboard state
            KeyboardState state = Keyboard.GetState();

            // If they hit esc, exit
            if (state.IsKeyDown(Keys.Escape))
                Exit();

            // Print to debug console currently pressed keys
            System.Text.StringBuilder sb = new StringBuilder();
            foreach (var key in state.GetPressedKeys())
                sb.Append("Key: ").Append(key).Append(" pressed ");

            if (sb.Length > 0)
                System.Diagnostics.Debug.WriteLine(sb.ToString());
            else
                System.Diagnostics.Debug.WriteLine("No Keys pressed");

            // Move our sprite based on arrow keys being pressed:
            if (state.IsKeyDown(Keys.Right))
                position.X += 10;
            if (state.IsKeyDown(Keys.Left))
                position.X -= 10;
            if (state.IsKeyDown(Keys.Up))
                position.Y -= 10;
            if (state.IsKeyDown(Keys.Down))
                position.Y += 10;

            base.Update(gameTime);
        }

        protected override void Draw(GameTime gameTime)
        {
            GraphicsDevice.Clear(Color.CornflowerBlue);

            spriteBatch.Begin();
            spriteBatch.Draw(texture, position);
            spriteBatch.End();
            base.Draw(gameTime);
        }
    }
}
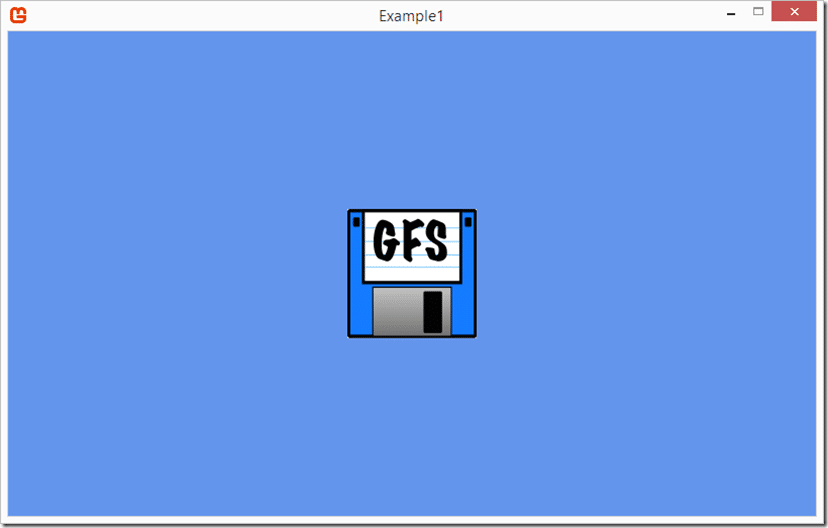
We are going to re-use the same basic example for all the examples in this chapter. It simply draws a sprite centered to the screen, then we manipulate the position in Update()

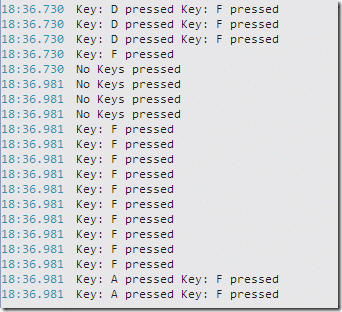
In this particular example, when the user hits keys, they are logged to the debug console:

Now let’s take a look at the keyboard specific code. It all starts with a call to Keyboard.GetState(), this returns a struct containing the current state of the keyboard, including modifier keys like Control or Shift. It also contains a method named GetPressedKeys() which returns an array of all the keys that are currently pressed. In this example we simply loop through the pressed keys, writing them out to debug. Finally we poll the pressed state of the arrow keys and move our position accordingly.
Handling Key State Changes
One thing you might notice with XNA is you are simply checking the current state of a key. So if a key is pressed or not. What if you only want to respond when the key is first pressed? This requires a bit of work on your behalf.
    public class Game1 : Game
    {
        GraphicsDeviceManager graphics;
        SpriteBatch spriteBatch;
        Vector2 position;
        Texture2D texture;
        KeyboardState previousState;

        public Game1()
        {
            graphics = new GraphicsDeviceManager(this);
            Content.RootDirectory = "Content";
        }

        protected override void Initialize()
        {
            base.Initialize();
            position = new Vector2(graphics.GraphicsDevice.Viewport.
                       Width / 2 -64,
                                    graphics.GraphicsDevice.Viewport.
                                    Height / 2 -64);

            previousState = Keyboard.GetState();
        }

        protected override void LoadContent()
        {
            spriteBatch = new SpriteBatch(GraphicsDevice);
            texture = this.Content.Load<Texture2D>("logo128");
        }

        protected override void Update(GameTime gameTime)
        {
            KeyboardState state = Keyboard.GetState();

            // If they hit esc, exit
            if (state.IsKeyDown(Keys.Escape))
                Exit();

            // Move our sprite based on arrow keys being pressed:
            if (state.IsKeyDown(Keys.Right) & !previousState.IsKeyDown(
                Keys.Right))
                position.X += 10;
            if (state.IsKeyDown(Keys.Left) & !previousState.IsKeyDown(
                Keys.Left))
                position.X -= 10;
            if (state.IsKeyDown(Keys.Up))
                position.Y -= 10;
            if (state.IsKeyDown(Keys.Down))
                position.Y += 10;

            base.Update(gameTime);

            previousState = state;
        }

        protected override void Draw(GameTime gameTime)
        {
            GraphicsDevice.Clear(Color.CornflowerBlue);

            spriteBatch.Begin();
            spriteBatch.Draw(texture, position);
            spriteBatch.End();
            base.Draw(gameTime);
        }
    }
The changes to our code are highlighted. Essentially if you want to check for changes in input state ( this applies to gamepad and mouse events too ), you need to track them yourself. This is a matter of keeping a copy of the previous state, then in your input check you check not only if a key is pressed, but also if it was pressed in the previous state. If it isn’t this is a new key press and we respond accordingly. In the above example on Left or Right arrow presses, we only respond to new key presses, so moving left or right requires repeatedly hitting and releasing the arrow key.
Handling Mouse Input
Next we explore the process of handling Mouse input. You will notice the process is almost identical to keyboard handling. Once again, let’s jump right in with a code example.
using Microsoft.Xna.Framework;
using Microsoft.Xna.Framework.Graphics;
using Microsoft.Xna.Framework.Input;
using System.Text;

namespace Example2
{
    public class Game1 : Game
    {
        GraphicsDeviceManager graphics;
        SpriteBatch spriteBatch;
        Vector2 position;
        Texture2D texture;

        public Game1()
        {
            graphics = new GraphicsDeviceManager(this);
            Content.RootDirectory = "Content";
        }

        protected override void Initialize()
        {
            base.Initialize();
            position = new Vector2(graphics.GraphicsDevice.Viewport.
                       Width / 2 ,
                                    graphics.GraphicsDevice.Viewport.
                                    Height / 2 );


        }

        protected override void LoadContent()
        {
            spriteBatch = new SpriteBatch(GraphicsDevice);
            texture = this.Content.Load<Texture2D>("logo128");
        }

        protected override void Update(GameTime gameTime)
        {
            MouseState state = Mouse.GetState();

            // Update our sprites position to the current cursor
            location
            position.X = state.X;
            position.Y = state.Y;

            // Check if Right Mouse Button pressed, if so, exit
            if (state.RightButton == ButtonState.Pressed)
                Exit();

            base.Update(gameTime);
        }

        protected override void Draw(GameTime gameTime)
        {
            GraphicsDevice.Clear(Color.CornflowerBlue);

            spriteBatch.Begin();
            spriteBatch.Draw(texture, position, origin:new Vector2(64,
                             64));
            spriteBatch.End();
            base.Draw(gameTime);
        }
    }
}
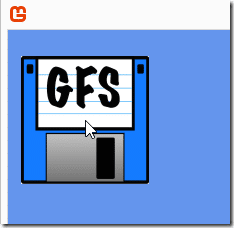
When you run this example, the texture will move around relative to the location of the mouse. When the user clicks right, the application exits. The logic works almost identically to handling Keyboard input. Each frame you check the MouseState by calling Mouse.GetState(). This MouseState struct contains the current mouse X and Y as well as the status of the left, right and middle mouse buttons and the scroll wheel position. You may notice there are also values for XButton1 and XButton2, these buttons can change from device to device, but generally represent a forward and back navigation button. On devices with no mouse support, X and Y will always be 0 while each button state will always be set to ButtonState.Released. If you are dealing with a multi touch device this code will continue to work, although the values will only reflect the primary (first) touch point. We will discuss mobile input in more detail in a later chapter. As with handling Keyboard events, if you want to track changes in event state, you will have to track them yourself.
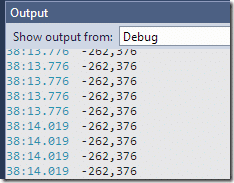
If you add the following code to your update, you will notice some interesting things about the X,Y position of the mouse:
        protected override void Update(GameTime gameTime)
        {
            MouseState state = Mouse.GetState();

            // Update our sprites position to the current cursor
            location
            position.X = state.X;
            position.Y = state.Y;

            System.Diagnostics.Debug.WriteLine(position.X.ToString() +
                                   "," + position.Y.ToString());
            // Check if Right Mouse Button pressed, if so, exit
            if (state.RightButton == ButtonState.Pressed)
                Exit();

            base.Update(gameTime);
        }
The X and Y values are relative to the Window’s origin. That is (0,0) is the top left corner of the drawable portion of the window, while (width,height) is the bottom right corner. However, if you are in a Windowed app, the mouse pointer location continues to be updated, still relative to the top left corner of the application window.

You can also set the position of the cursor in code using the following line:
            if(state.MiddleButton == ButtonState.Pressed)
                Mouse.SetPosition(graphics.GraphicsDevice.Viewport.
                                  Width / 2,
                    graphics.GraphicsDevice.Viewport.Height / 2);
This code will center the mouse position to the middle of the screen when the user presses the middle button.
Finally its common to want to display the mouse cursor, this is easily accomplished using:
IsMouseVisible = true;
This member of the Game class toggles the visibility of the system mouse cursor.

Handling Gamepad Input
Now we will look at handling input from a gamepad or joystick controller. You probably wont be surprised to discover the process is remarkably consistent.
using Microsoft.Xna.Framework;
using Microsoft.Xna.Framework.Graphics;
using Microsoft.Xna.Framework.Input;
using System.Text;

namespace Example3
{
    public class Game1 : Game
    {
        GraphicsDeviceManager graphics;
        SpriteBatch spriteBatch;
        Vector2 position;
        Texture2D texture;

        public Game1()
        {
            graphics = new GraphicsDeviceManager(this);
            Content.RootDirectory = "Content";
        }

        protected override void Initialize()
        {
            base.Initialize();
            position = new Vector2(graphics.GraphicsDevice.Viewport.
                       Width / 2,
                                    graphics.GraphicsDevice.Viewport.
                                    Height / 2);
        }

        protected override void LoadContent()
        {
            spriteBatch = new SpriteBatch(GraphicsDevice);
            texture = this.Content.Load<Texture2D>("logo128");
        }

        protected override void Update(GameTime gameTime)
        {
            if (Keyboard.GetState().IsKeyDown(Keys.Escape)) Exit();

            // Check the device for Player One
            GamePadCapabilities capabilities = GamePad.GetCapabilities(
                                               PlayerIndex.One);

            // If there a controller attached, handle it
            if (capabilities.IsConnected)
            {
                // Get the current state of Controller1
                GamePadState state = GamePad.GetState(PlayerIndex.One);

                // You can check explicitly if a gamepad has support
                for a certain feature
                if (capabilities.HasLeftXThumbStick)
                {
                    // Check teh direction in X axis of left analog
                    stick
                    if (state.ThumbSticks.Left.X < -0.5f)
                        position.X -= 10.0f;
                    if (state.ThumbSticks.Left.X > 0.5f)
                        position.X += 10.0f;
                }

                // You can also check the controllers "type"
                if (capabilities.GamePadType == GamePadType.GamePad)
                {
                    if (state.IsButtonDown(Buttons.A))
                        Exit();
                }
            }
            base.Update(gameTime);
        }

        protected override void Draw(GameTime gameTime)
        {
            GraphicsDevice.Clear(Color.CornflowerBlue);

            spriteBatch.Begin();
            spriteBatch.Draw(texture, position, origin: new Vector2(64,
                             64));
            spriteBatch.End();
            base.Draw(gameTime);
        }
    }
}
When you run this example, if there is a controller attached, pressing left or right on the analog stick with move the sprite accordingly. Hitting the A button (or pressing Escape for those without a controller) will cause the game to exit.
The logic here is remarkably consistent with Mouse and Keyboard event handling. The primary difference is the number of controllers attached and the capabilities of each controller can vary massively, so the code needs to responding appropriately. In the above example, we check only for the first controller attached, by passing PlayerIndex to our GetEvents call. You can have up to 4 controllers attached, and each needs to be polled separately.
Supported Gamepads
On the PC there are a plethora of devices available with a wide range of capabilities. You can have up to 4 different controllers attached, each accesible by passing the appropriate PlayerIndex to GetEvents(). The following device types can be returned:
- AlternateGuitar
- ArcadeStick
- BigButtonPad
- DancePad
- DrumKit
- FlightStick
- GamePad
- Guitar
- Unknown
- Wheel
Obviously each devices supports a different set of features, which can be polled invdividually using the GamePadCapabilities struct returned by Gamepad.GetCapabilities().
Buttons on a GamePad controller are treated just like Keys and MouseButtons, with a value of Pressed or Released. Once again, if you want to track changes in state you need to code this functionality yourself. When dealing with Analog sticks, the value returned is a Vector2 representing the current position of the stick. A value of 1.0 represents a stick that is fully up or right, while a value of –1.0f represents a stick that is full left or down. A stick at 0,0 is un-pressed.
There is a small challenge with dealing with analog controls however that you should be aware of. Even when a stick is not pressed, it is almost never at the position (0.0f,0.0f), the sensors often return very small fluctuations from complete zero. This means if you respond directly to input without taking into account these small variations, your sprites will “twitch” while they are supposed to be stationary. This is worked around using something called a dead zone. This is a range of motions, or motion values, that are considered too small to be registered. You can think of a deadzone as a value that is “close enough to zero to be considered zero”.
You have a couple options with XNA/MonoGame for dealing with deadzones. The default is IndependentAxis, which compares each axis against the deadzone separately, Circular which combines the X and Y values together before comparison to the dead zone (recommended for controls the use both axis together, such as a thumbstick controlling 3D view), and finally None, which ignores the deadzone completely. You would generally choose None if you don’t care about a dead zone, or wish to implement it yourself.
           GamePadState state = GamePad.GetState(PlayerIndex.One,
                                 GamePadDeadZone.Circular);
As you can see, XNA’s Input handling is somewhat sparse compared to other game engines, but does provide the building blocks to make more complex systems if required. The approach to handling input across devices is remarkably consistent, making it easier to use and hopefully resulting in less unexpected behavior and bugs.
