In the previous part we looked at we look in a bit more detail at working with Sprites, now we are going to get a bit more… animated. In this tutorial we are going to look at using Spritesheets, named Flipbooks in Unreal Engine, to create sprite animations.
A bit of a warning before we jump in, as of writing this process is a bit buggy and needing improvement. Hopefully by the time you read this, the Unreal team have ironed out some of the kinks. If you want more details on creating the spritesheets and a bit more exposure to some of the Unreal Engine faults, be sure to check out the video version, it goes into much greater detail.
This tutorial is available in an HD video here.
Importing a Spritesheet
A Spritesheet is simply a texture with multiple sprites on it. This is the one I am using for this example:

It is a power of 2 resolution PNG file containing 25 frames of a walk cycle animation. A bit of a warning however, I HAVE HAD NO SUCCESS WITH PNGs in Unreal. To get this to work I had to convert to tga format before importing. Regardless to how the PNG is made, the results are almost always mangled once imported to UE4.
To get started, simply drag the texture in as normal. The critical part of this equation is that your file must have an alpha channel, as the alpha channel is used to calculate each sprites location in the next portion.
Now that we’ve added our spritesheet to our textures, simply right click and select Extract Sprites:
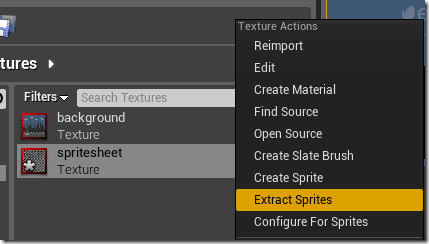
Using the alpha channel, it will automatically create a sprite for each image in the spritesheet, like so:
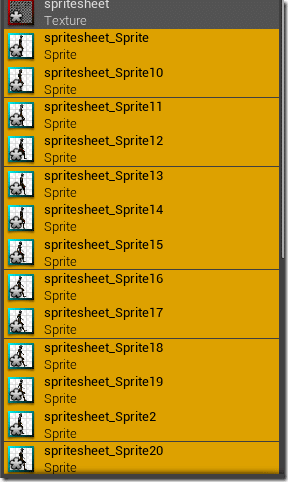
With all of the generated sprites selected, I now moved them into their own folder in the Sprites folder. This step is of course strictly optional.
Now a bit of a bug/problem with Unreal Engine… Each of the generated sprites is automatically named, but the names themselves make no sense. First off, they are named FILENAME_Sprite###. However, the Content Browser doesn’t sort properly for alpha numeric, meaning that Sprite11 and Sprite12 come before Sprite2 and Sprite3, which makes things particularly painful to work with.
Even worse, the order they are created in makes absolutely no sense right now… so the process of creating a flipbook is needlessly complicated. You’ll see what I mean in a moment.
First lets look at a generated sprite and suddenly Edit Source Region will make a ton more sense. Simply double click a sprite to bring it up in the Sprite Editor. Here is the very first sprite in the sequence opened in the editor.
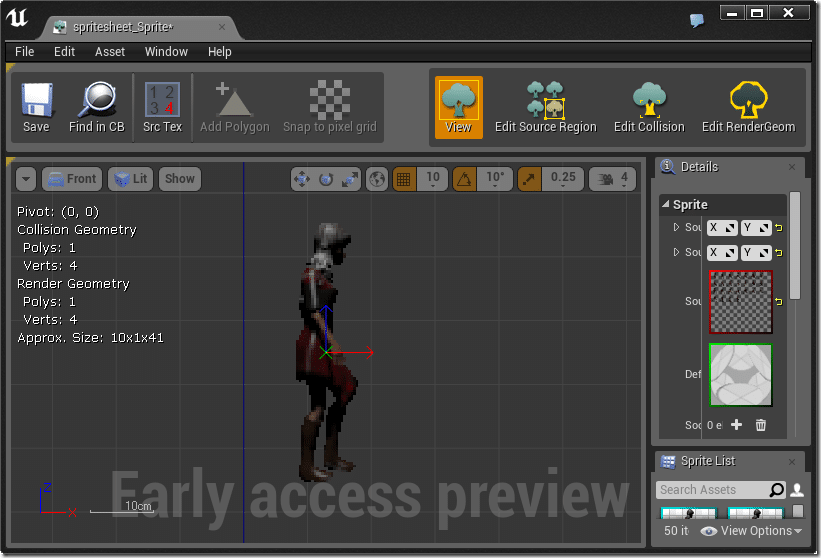
Now click Edit Source Region and you will see how multiple sprites can be stored in a single texture:
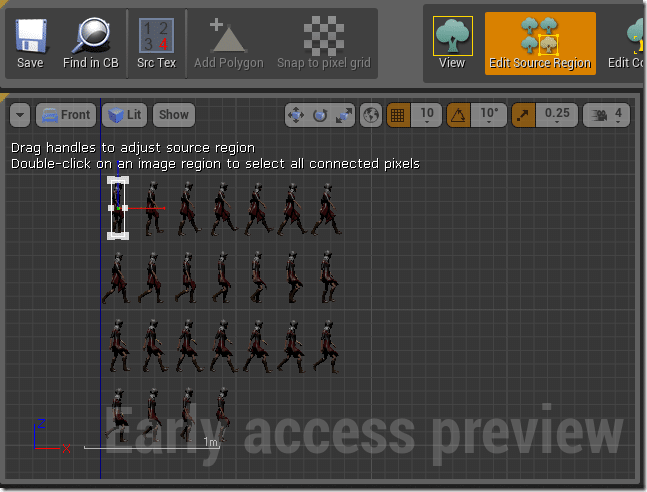
As you can see, our sprite is actually just a very small portion of the over all texture. We would expect the next sprite to be Sprite2, 3, 4, etc… but sadly, they aren’t. I honestly cant make rhyme or reason of the naming convention Unreal used for automatically parsed sprites. Sadly you will need to figure them out in order to deal with the next part of the process. Hopefully this all gets fixed soon, as it’s extremely irritating. For now select each sprite and figure out where it is in the order… mine basically went
Row1: sprite, 2,3,4,5,6,7
Row2: 12,13,14,11,10,8,9
Row3: 15,16,17,18,19,20
Row4: 24,25,23,22
… if you see the logic there, good on you! Ultimately once you figure the order out, the names really don’t matter, but you can rename them to make sense if you want. Or you could change the UV values of each so the existing names actually make sense. Me, I’ll just wait for Unreal to fix this mess.
Creating a Flipbook Animation
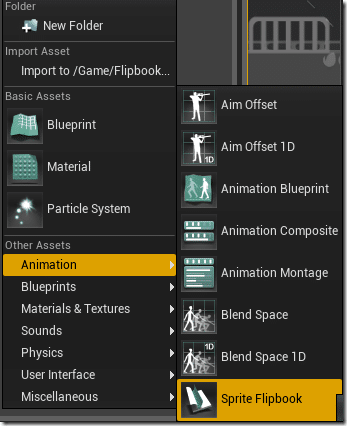
Anyways, once you’ve figured out your sprite frame orders, it’s time to create a new Flipbook. Simply select New->Animation->Sprite Flipbook, like so:
A new flipbook will be created, feel free to rename it. Then double click it to bring up the Flipbook Editor:
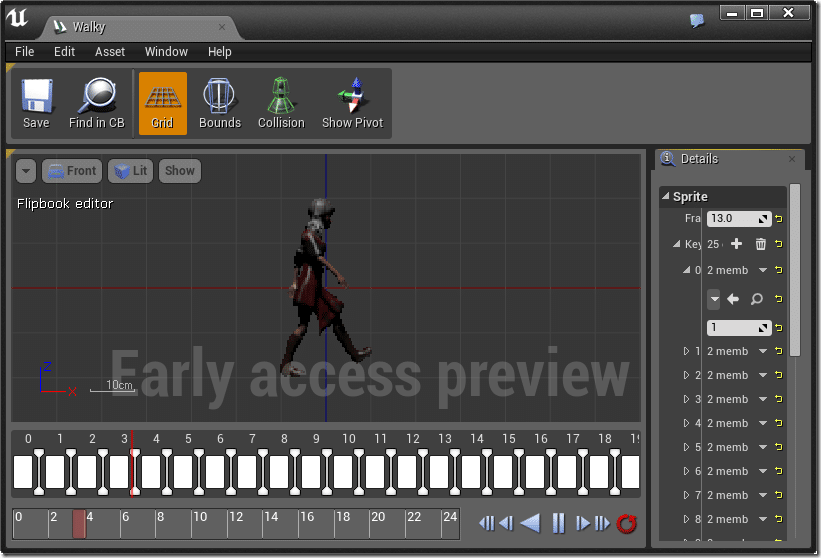
Now what you want to do is drag each Sprite over to the bottom of the page, in the order of the animation frames ( that’s the list I made above. Basically if your spritesheet is like mine you want the top row, left to right, then the next, and the next, etc ). The order they are dragged is the order they are played in the sequence:

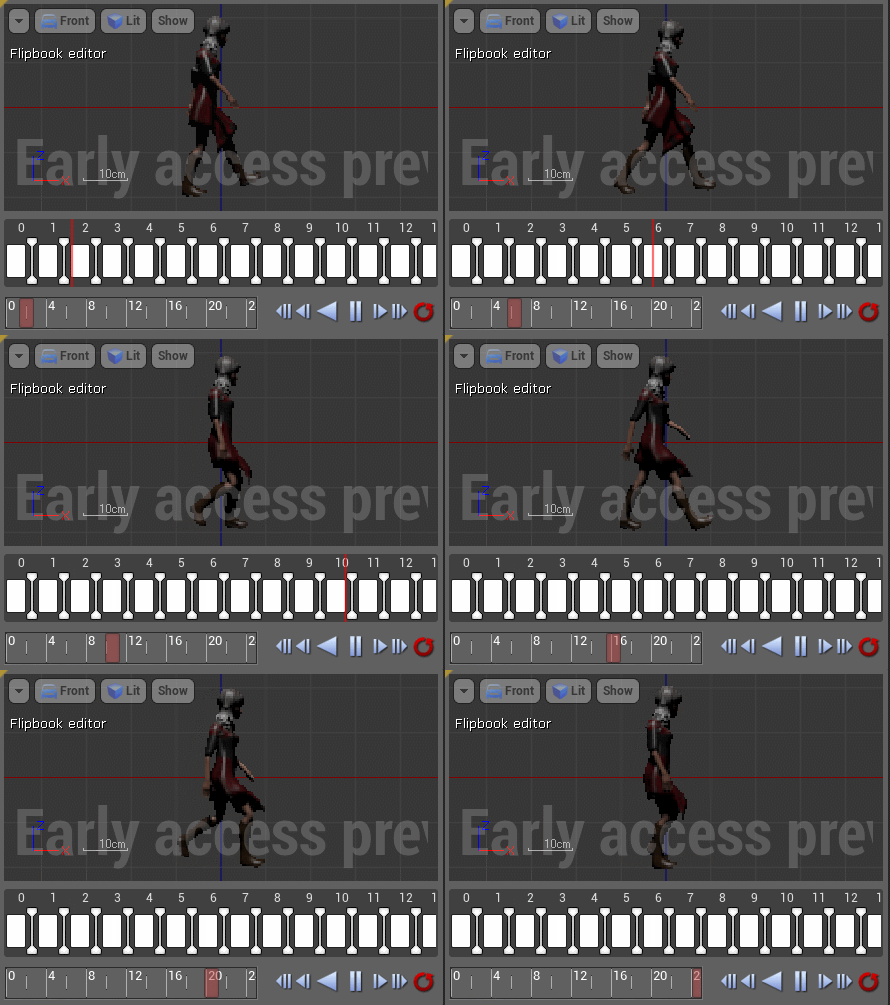
You will see a real-time preview of your animation as you drag sprites in:
You can change the over all speed of your animation here:
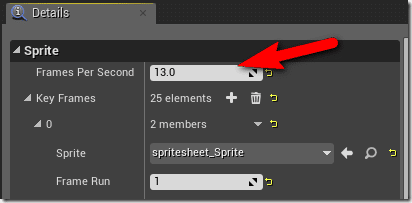
That is the number of frames that will be shown each second. So a 26 frame animation would take 2 seconds to complete. You can also set the duration of each frame, here:
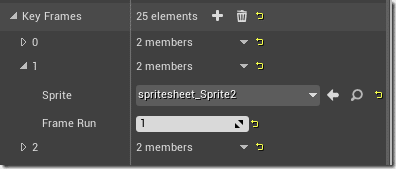
Frame Run is how many frames this animation frame will be shown for. For example, if you had Frames Per Second set to 10 and Frame 1 set to a Frame Run of 5, that particular frame would be shown for 1/2 a second.
Now your animated sprite can be added to the scene just as easily as a normal sprite, simply drag the flipbook in to your scene:
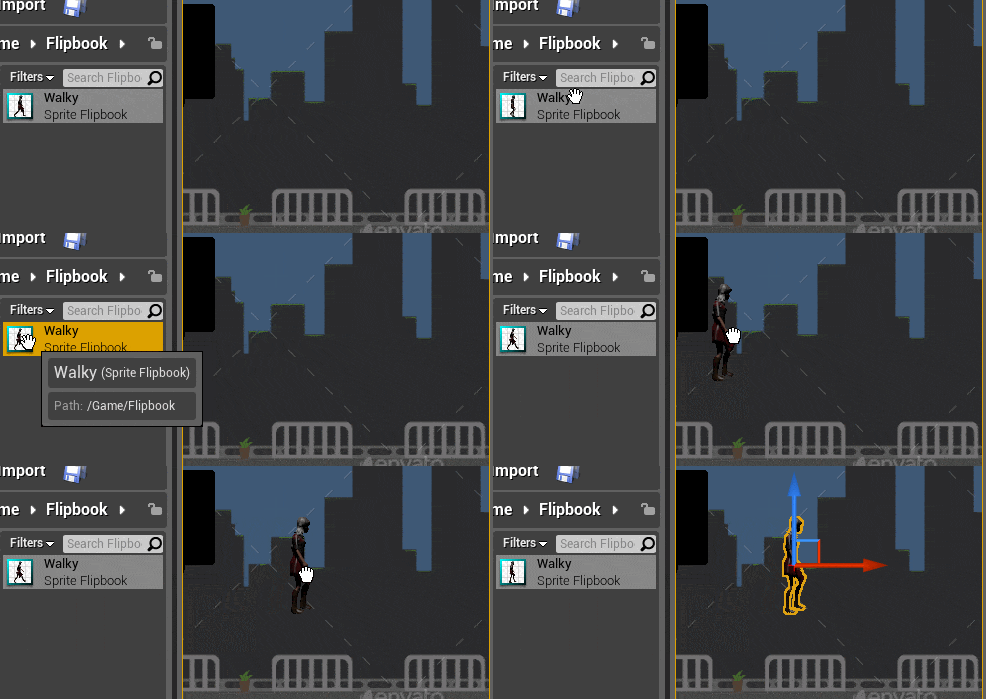
Truth is however, you will rarely use a Flipbook this way, instead they will generally be owned by an Actor, which we will cover in the next portion.
