In the previous tutorial we looked at how to use a camera with LibGDX to abstract away resolution differences so you are no longer using pixel coordinates. This however doesn’t really help you all that much if your aspect ratios are massively different. Fortunately LibGDX implements the concepts of Viewports, which can be considered the coding equivalent of the Aspect button on your HDTV, controlling how non-native content is scaled to be displayed on your TV.
There are a number of different Viewports available:
Or of course you can inherit Viewport and create your own.
We are going to use the following image ( click for full resolution, no squished version ) taken from here.
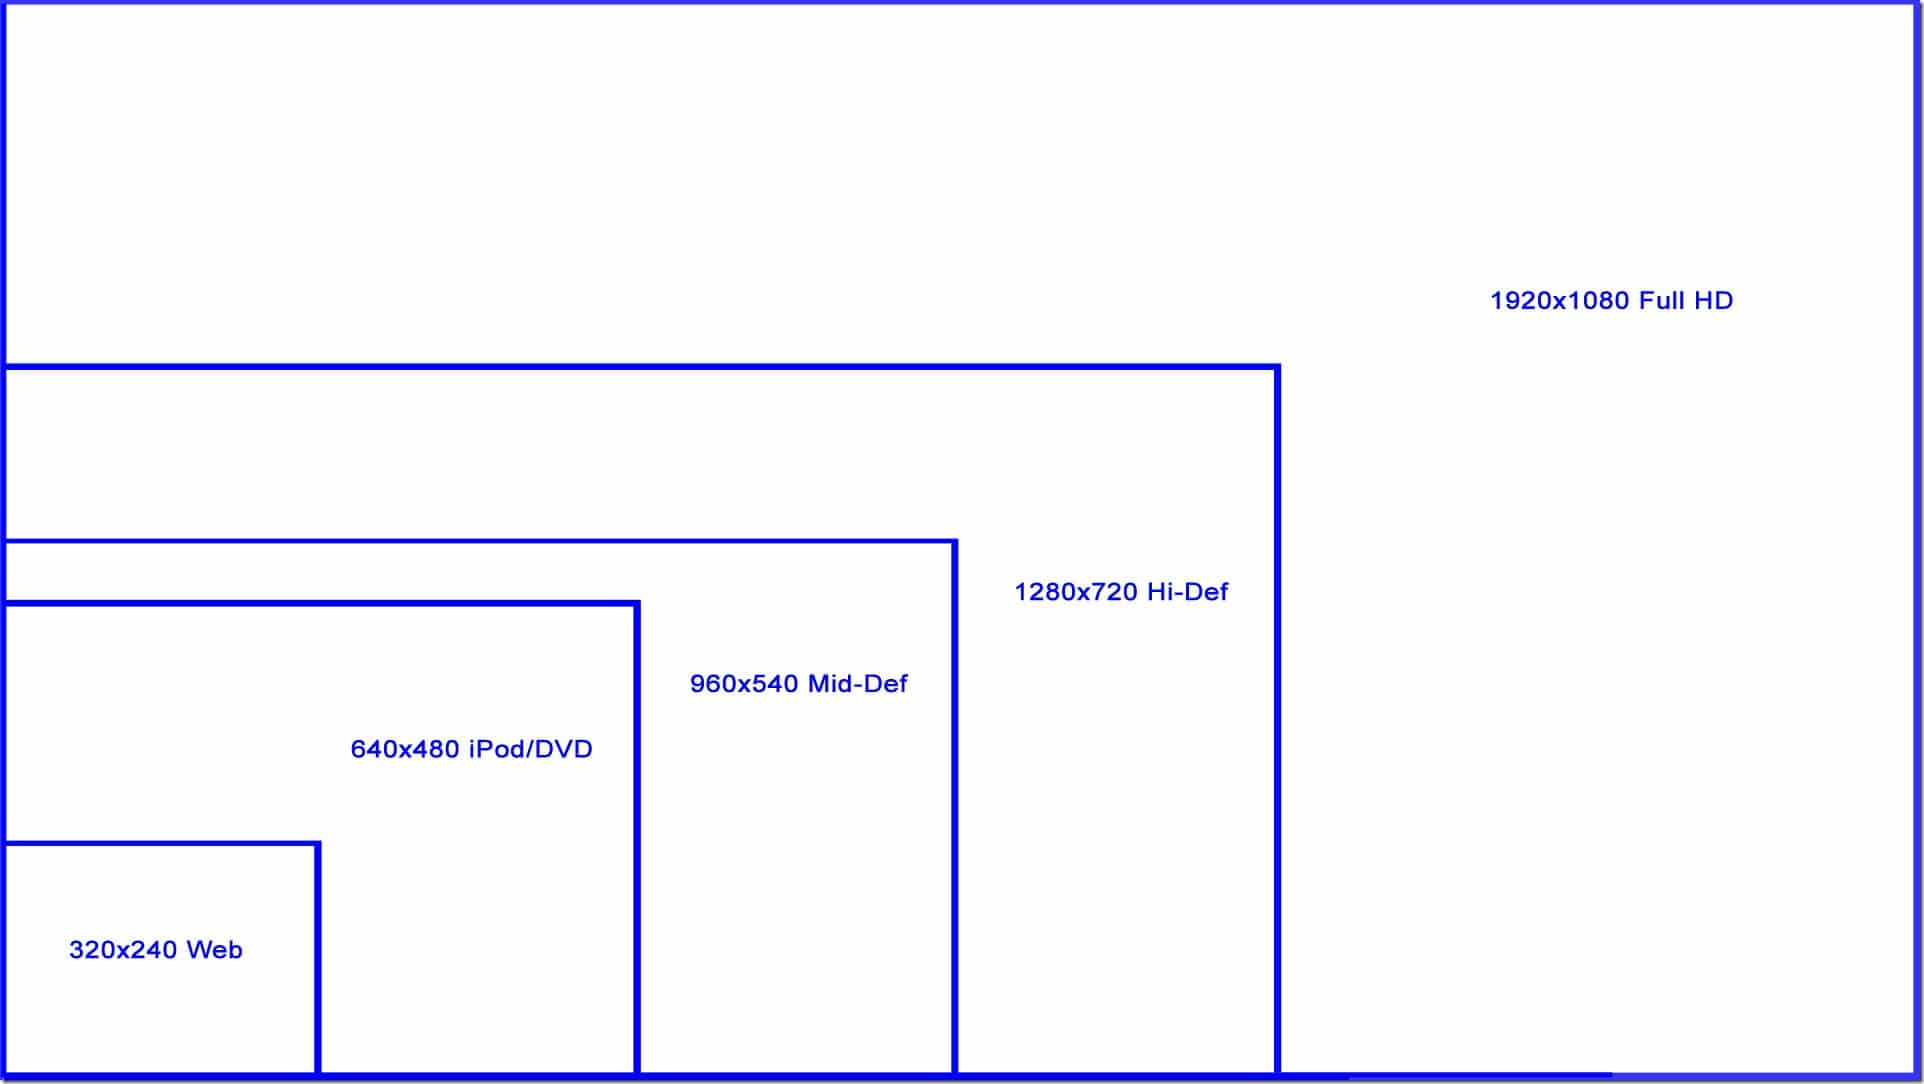
Here is the code for creating a FillViewport, which results in behavior very similar to using no Viewport at all:
package com.gamefromscratch;

import com.badlogic.gdx.ApplicationAdapter;
import com.badlogic.gdx.Gdx;
import com.badlogic.gdx.graphics.GL20;
import com.badlogic.gdx.graphics.OrthographicCamera;
import com.badlogic.gdx.graphics.Texture;
import com.badlogic.gdx.graphics.g2d.Sprite;
import com.badlogic.gdx.graphics.g2d.SpriteBatch;
import com.badlogic.gdx.utils.viewport.FillViewport;
import com.badlogic.gdx.utils.viewport.Viewport;

public class ViewportDemo extends ApplicationAdapter {
   SpriteBatch batch;
   Sprite aspectRatios;
   OrthographicCamera camera;
   Viewport viewport;

   @Override
   public void create () {
      batch = new SpriteBatch();
      aspectRatios = new Sprite(new Texture(Gdx.files.internal("Aspect.jpg")));
      aspectRatios.setPosition(0,0);
      aspectRatios.setSize(100,100);

      camera = new OrthographicCamera();
      viewport = new FillViewport(100,100,camera);
      viewport.apply();

      camera.position.set(camera.viewportWidth/2,camera.viewportHeight/2,0);
   }

   @Override
   public void render () {

      camera.update();
      Gdx.gl.glClearColor(1, 0, 0, 1);
      Gdx.gl.glClear(GL20.GL_COLOR_BUFFER_BIT);

      batch.setProjectionMatrix(camera.combined);
      batch.begin();
      aspectRatios.draw(batch);
      batch.end();
   }

   @Override
   public void dispose(){
      aspectRatios.getTexture().dispose();
   }

   @Override
   public void resize(int width, int height){
      viewport.update(width,height);
      camera.position.set(camera.viewportWidth/2,camera.viewportHeight/2,0);
   }
}
The code is pretty straight forward but has a few caveats to be aware of. Most importantly, you absolutely need to update the viewport in the ApplicationAdapter’s resize method or the viewport will not work. Standard process is to create your camera, then create the viewport passing in the viewport resolution as well as the camera to apply to. For the technically minded, the Viewport ultimately manipulates the GL viewport behind the scenes. Now let’s look at the various viewport options, we simply replace one line of code in each example:
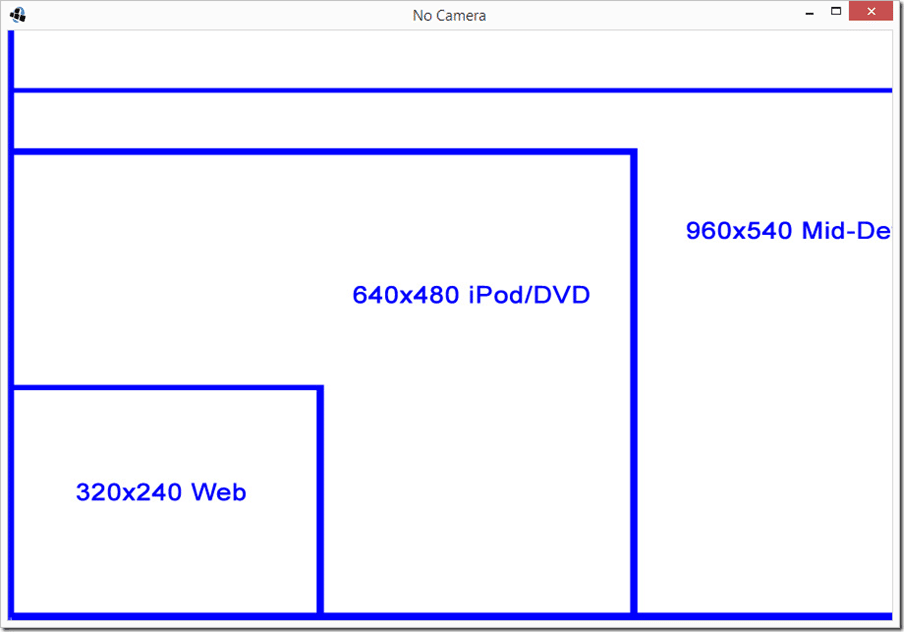
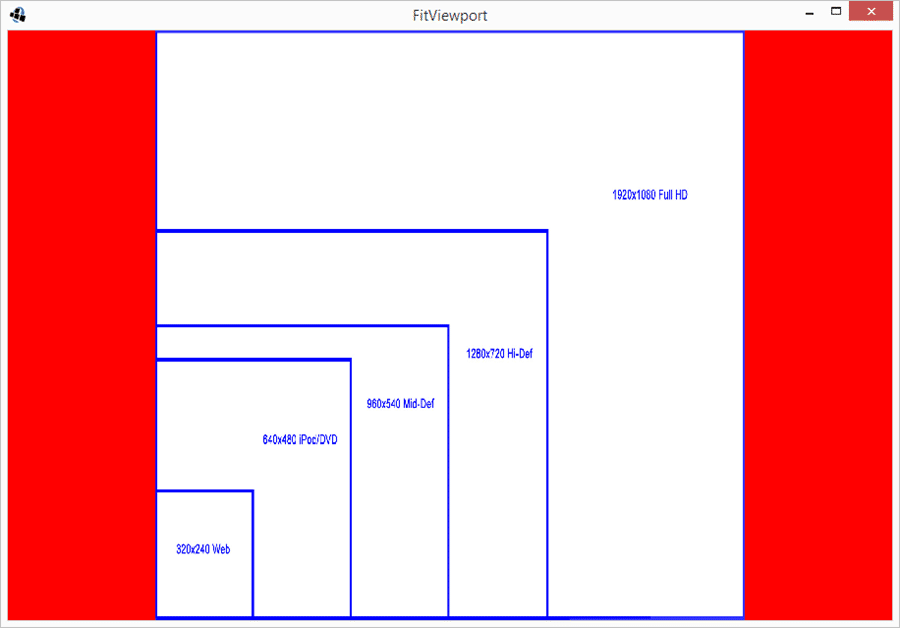
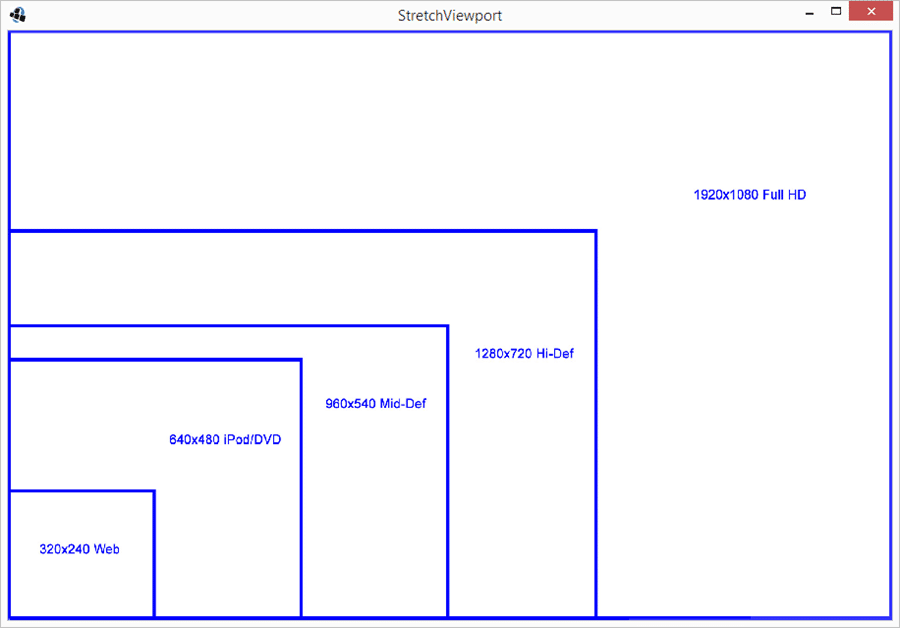
Here are the results of various options running at 900×600 resolution:
No Camera or Viewport
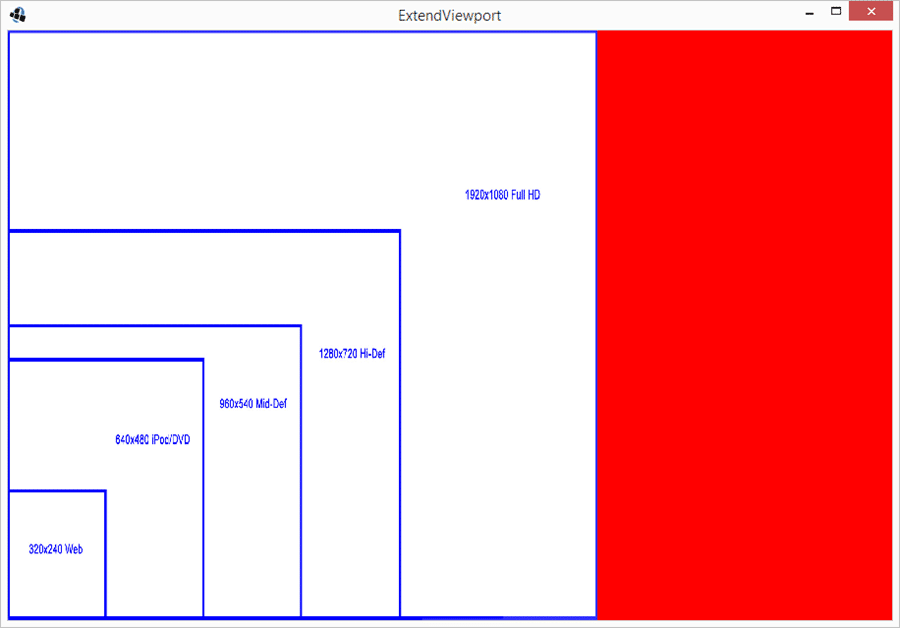
viewport = new ExtendViewport(100,100,camera);
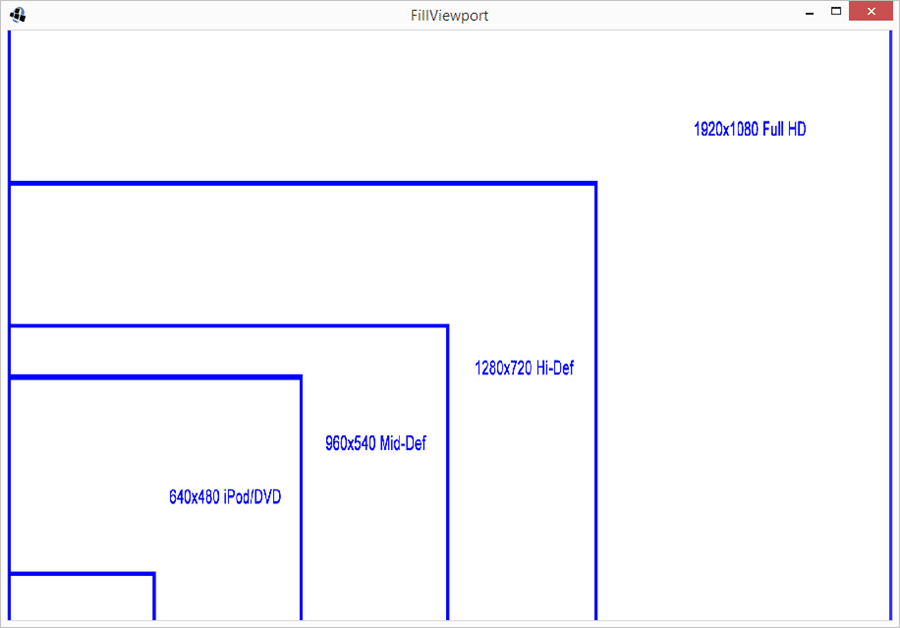
viewport = new FillViewport(100,100,camera);
viewport = new FitViewport(100,100,camera);
viewport = new StretchViewport(100,100,camera);
viewport = new ScreenViewport(camera);
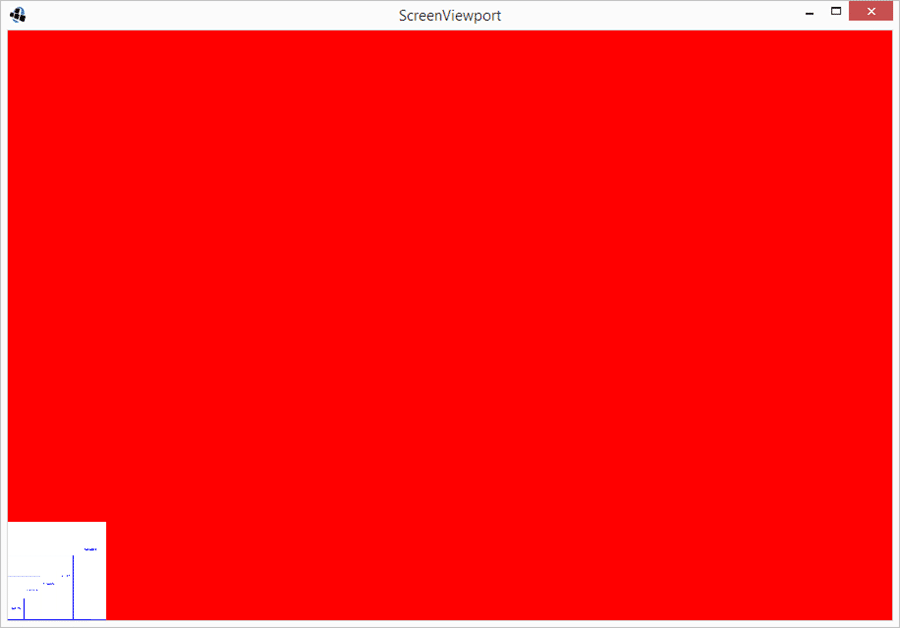
The behavior of most of those viewports should be evident from the results but a few certainly require a bit of explanation. The oddest result is most likely ScreenViewport. When you use ScreenViewport you are simply saying “create a viewport the same size as the screen resolution”. However, we also told our game that the sprite is 100×100 in size, but instead of being treated in our arbitrary camera units, this value is now relative to actual pixels, so as a result, our background is drawn as a 100 x 100 pixel rectangle.
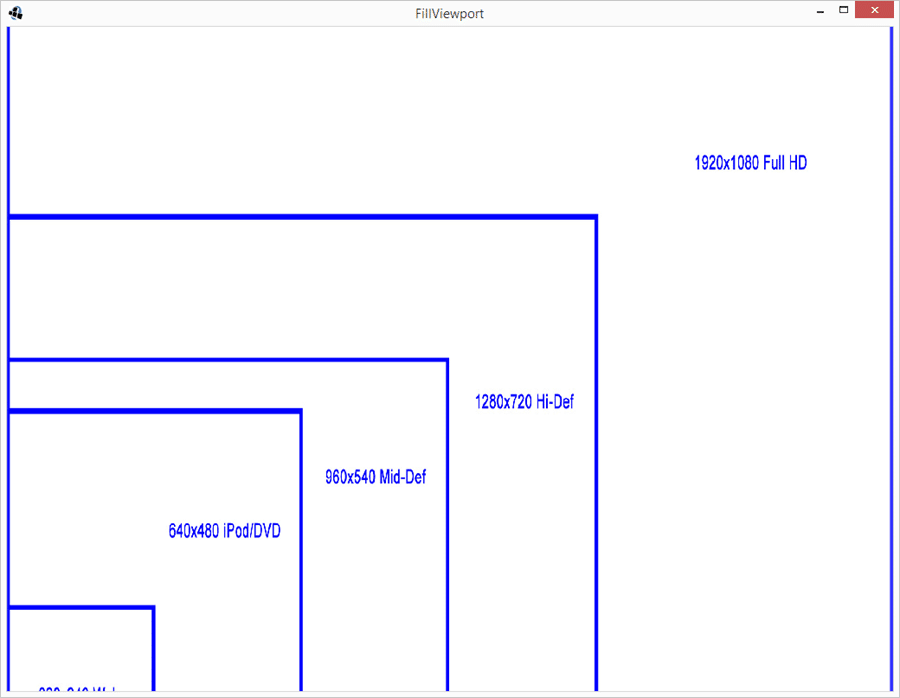
You may also be wondering what the difference between Fill and Stretch is. It isn’t obvious because our source image and our resolution are both widescreen. When you run in a 4:3 aspect ratio, such as 1024×768 of the iPad, the results become more obvious:
FillViewport @ 1024×768
StetchViewport @ 1024×768
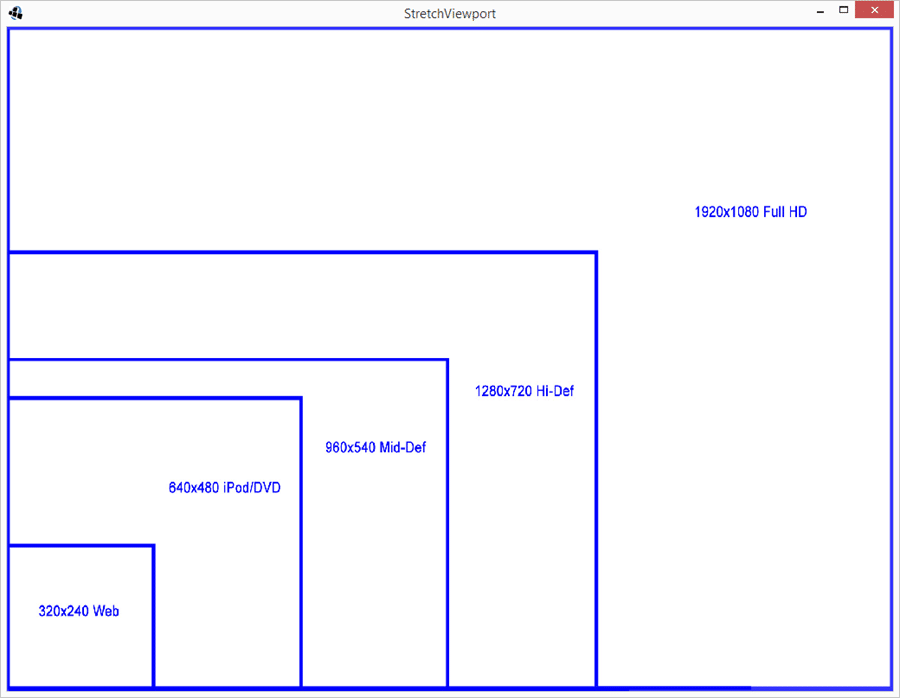
Fill will always fill the viewport, even if it means have to crop part of the image. As you can see in the first image, the blue border at the top and bottom is not visible. IMHO, this is the worst looking of all scaling options.
Stretch on the other hand, stretches the result to fit the screen width and height, however it also results in some distortion. This mode is probably the easiest to implement, but the results depend heavily on your games art style.
Mapping To And From Camera to Screen Coordinates
One last quick thing to touch upon with Cameras and Viewports… how do you handle converting coordinates, such as touch or click events from our arbitrary camera coordinates to screen coordinates? Fortunately it’s quite easy.
package com.gamefromscratch;

import com.badlogic.gdx.ApplicationAdapter;
import com.badlogic.gdx.Gdx;
import com.badlogic.gdx.InputProcessor;
import com.badlogic.gdx.graphics.GL20;
import com.badlogic.gdx.graphics.OrthographicCamera;
import com.badlogic.gdx.graphics.Texture;
import com.badlogic.gdx.graphics.g2d.Sprite;
import com.badlogic.gdx.graphics.g2d.SpriteBatch;
import com.badlogic.gdx.math.Vector3;
import com.badlogic.gdx.utils.viewport.StretchViewport;
import com.badlogic.gdx.utils.viewport.Viewport;

public class mouseproject extends ApplicationAdapter implements InputProcessor {
   SpriteBatch batch;
   Sprite aspectRatios;
   OrthographicCamera camera;
   Viewport viewport;

   @Override
   public void create () {
      batch = new SpriteBatch();
      aspectRatios = new Sprite(new Texture(Gdx.files.internal("Aspect.jpg")));
      aspectRatios.setPosition(0,0);
      aspectRatios.setSize(100,100);

      camera = new OrthographicCamera();
      viewport = new StretchViewport(100,100,camera);
      viewport.apply();

      camera.position.set(camera.viewportWidth/2,camera.viewportHeight/2,0);
      Gdx.input.setInputProcessor(this);
   }

   @Override
   public void render () {

      camera.update();
      Gdx.gl.glClearColor(1, 0, 0, 1);
      Gdx.gl.glClear(GL20.GL_COLOR_BUFFER_BIT);

      batch.setProjectionMatrix(camera.combined);
      batch.begin();
      aspectRatios.draw(batch);
      batch.end();
   }

   @Override
   public void dispose(){
      aspectRatios.getTexture().dispose();
   }

   @Override
   public void resize(int width, int height){
      viewport.update(width, height);
      camera.position.set(camera.viewportWidth / 2, camera.viewportHeight / 2, 0);
   }

   @Override
   public boolean keyDown(int keycode) {
      return false;
   }

   @Override
   public boolean keyUp(int keycode) {
      return false;
   }

   @Override
   public boolean keyTyped(char character) {
      return false;
   }

   @Override
   public boolean touchDown(int screenX, int screenY, int pointer, int button) {

      Gdx.app.log("Mouse Event","Click at " + screenX + "," + screenY);
      Vector3 worldCoordinates = camera.unproject(new Vector3(screenX,screenY,0));
      Gdx.app.log("Mouse Event","Projected at " + worldCoordinates.x + "," + worldCoordinates.y);
      return false;
   }

   @Override
   public boolean touchUp(int screenX, int screenY, int pointer, int button) {
      return false;
   }

   @Override
   public boolean touchDragged(int screenX, int screenY, int pointer) {
      return false;
   }

   @Override
   public boolean mouseMoved(int screenX, int screenY) {
      return false;
   }

   @Override
   public boolean scrolled(int amount) {
      return false;
   }
}
It’s simply a matter of using Camera.unproject to convert a screen coordinate to your world coordinate, and Camera.project to do the reverse. There is more to Viewports and Cameras, but that covers enough to get you going in most cases. Keep in mind, you don’t need to use either, but they both certainly make making a game that runs across devices a lot easier.
