Or…
How to take a Blender model you downloaded from the web and make it actually usable in your game in 28 easy steps!
… granted, the second title doesn’t have the same flow to it, does it?
I just had to run through this process and I figured I would share it as it is something that occurs fairly often. When working with Blender, there are dozens of behavioural textures available that can make for some very nice results quickly. The only problem is, when you get your asset out of Blender and into your game engine, things suddenly go horribly wrong. The problem is, those textures only make sense inside of Blender. Fortunately through the magic of baking, you can easily convert them into a texture map usable in any game engine.
Let’s take a look how.
First we need a model. I am using a beautiful new model that was recently added to Blend-Swap. It’s a free download but you need to register. Don’t worry, you can use a real email address, they don’t spam, or at least haven’t so far. The model in question looks like this:
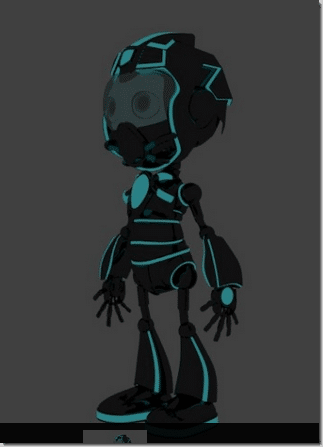
Unfortunately when we load it in Blender we quickly learn this model is in no way game ready. Let’s take a look:
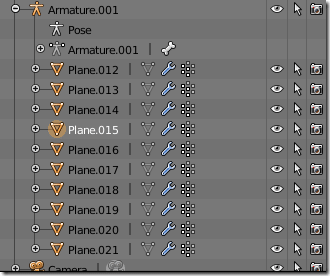
Ick. So instead of a single Mesh, we have a dozen individual meshes. Problem is, we need to unwrap them as a single object, so let’s join them all together. First let’s get the camera out of the default layer.
If you look at the way this particular Blend is setup, there are currently two layers, the second contains the armature, the first contains everything else.

Lets get the camera out of there. Select the camera object then hit the M key. Then select the layer you want to move the camera to, like so:
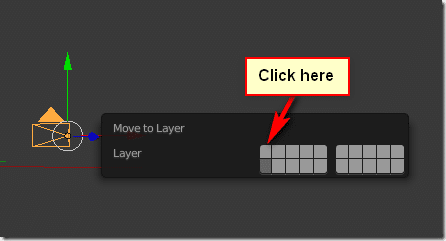
Now click the first layer ( bottom left box ) and it should now only contain geometry.
We want to join everything together. Press ‘A’ to select everything in the layer, then hit “Ctrl + J” to join everything into a single set of geometry. Now it should look something like this:

Perfect, now we can unwrap our model. Switch in to EDIT mode
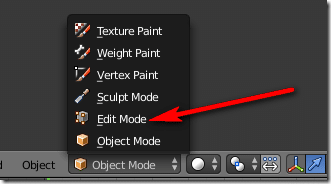
Press ‘A’ again, until all faces are selected, like so:
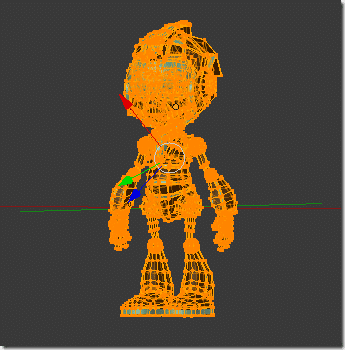
Now we unwrap our model. Select Mesh->UV Unwrap-> Unwrap ( or Smart UV Project ).
Switch your view to UV/Image Editor
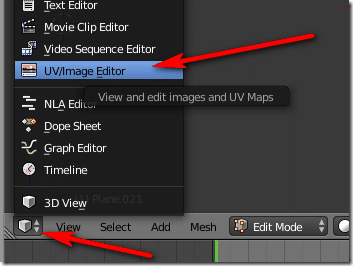
It should look something like this:
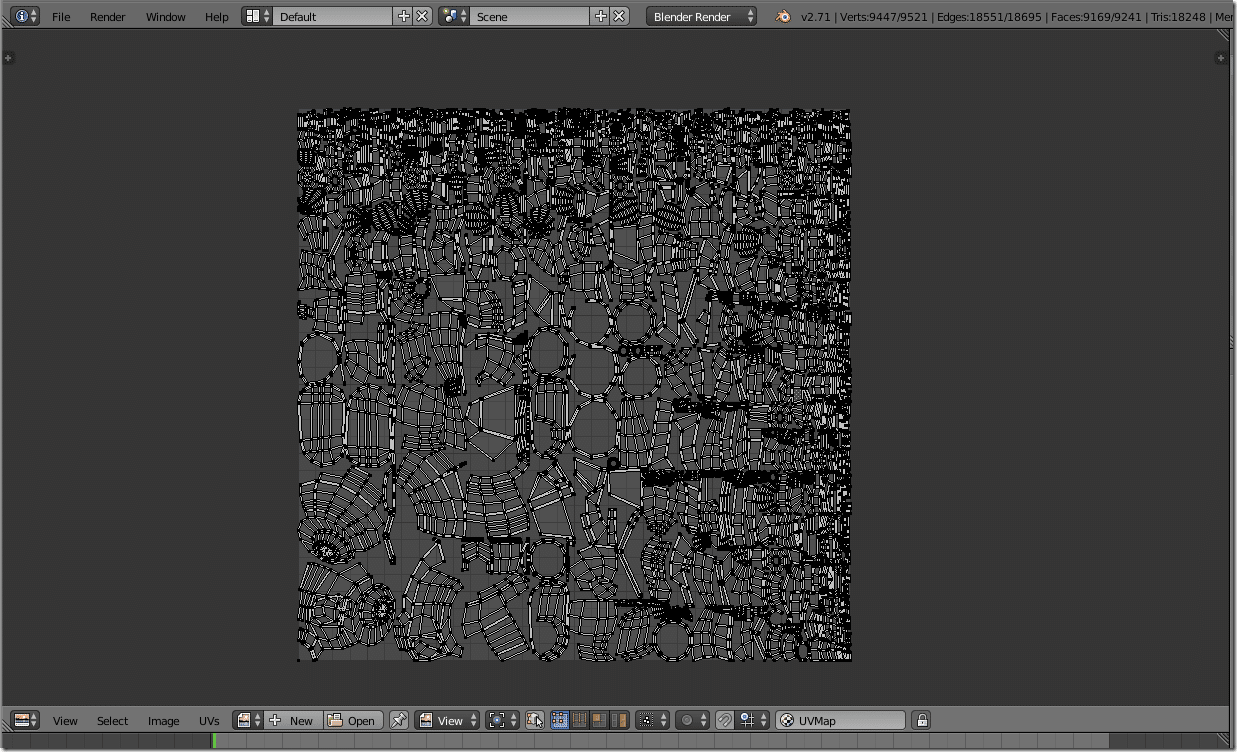
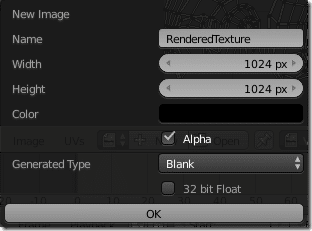
Now create a New Image:

This image is where we are going to render our texture to. Here are the settings I used. Remember, games like Power of 2 textures.
Ok, now let’s look at the actual render to texture part. Take a quick look at how the model is currently shaded:
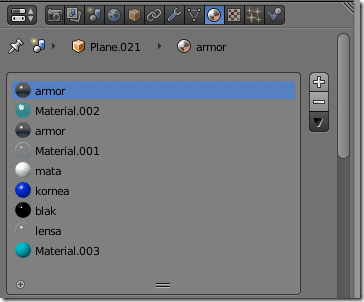
Frankly none of those are really game engine friendly. So let’s render all of those materials out to a single texture. Go to the render tab

Scroll down and locate Bake.
In the UV Editor window, make sure everything is selected ( using ‘A’. They should be highlighted in yellow ). At this point, with your generated image and all the UV’s selected, it should look like:
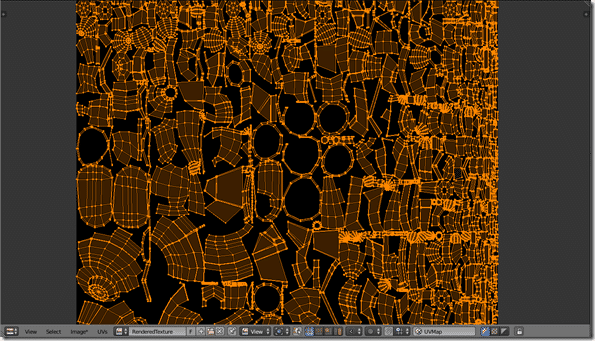
Now under bake, set the following settings:
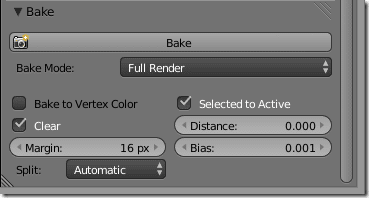
The key values being Bake Mode = Full Render and Selected to Active checked. Now click the Bake button.
Up in your top part of Blender, you should see a progress bar like so:

Now if you go back to the UV/Image viewer, and select your image RenderedTexture, you should see:
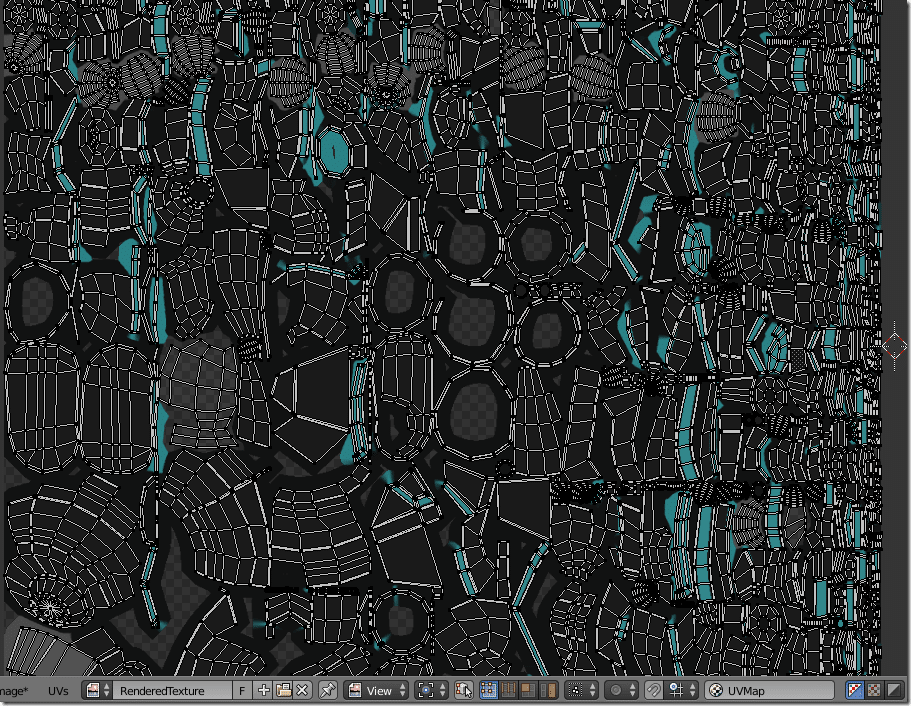
Cool!
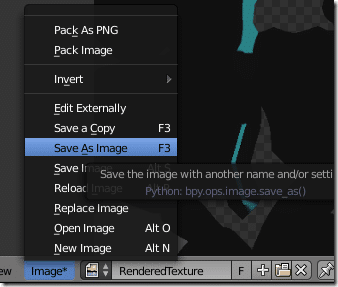
Let’s save the result to an external ( game engine friendly ) texture. Select Image->Save as Image. Save the image somewhere. Remember where.
Now lets modify the textures on our model to use only our newly generated texture map. First in 3D View, switch back to Object Mode from Edit mode.
Then, open the materials tab:
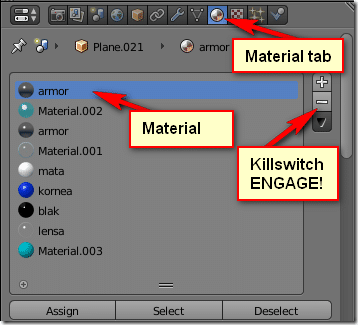
Select each material and hit the – ( or killswitch engage! ) button. So it should ultimately look like this:

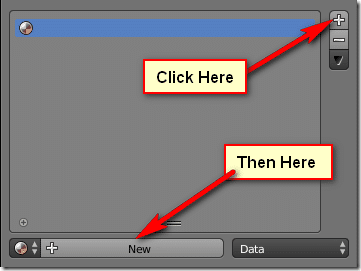
Now hit the + button and create a new Material. Then click the New button.
The default values for the material should be OK, but depending on your game engine, you may have to enable Face Textures:

Now click over to the Texture tab. Click New.
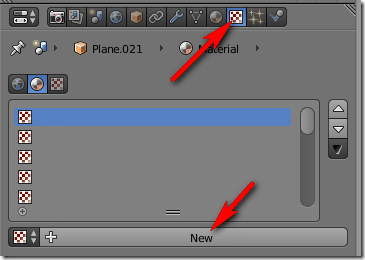
Drop down the Type box and select Image or Movie.
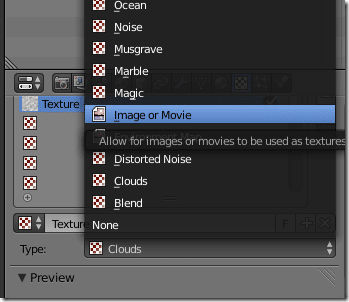
Scroll down to the Image section and select Open. Pick the image you saved earlier.

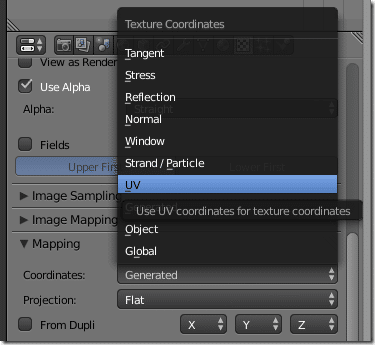
Now scroll down to Mapping, drop down Coordinates and select UV.
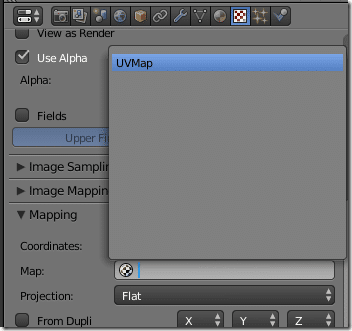
Under Map select UVMap.
Now if you go to the 3D View and set the view mode to Texture:
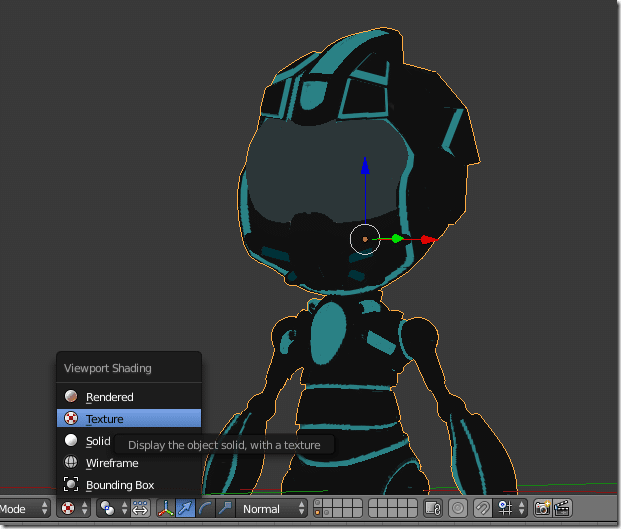
TADA! A game ready model.
One word of caution though, if you render this scene in Blender you will get the following result:
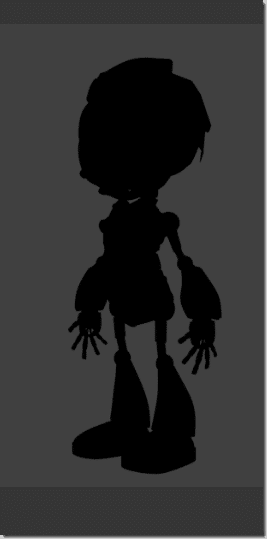
Don’t worry. That’s just a biproduct of going from Blender materials to texture mapping. If you want the texture to be seen, you need to add some lights to the scene. Or change the material so it has an Emit value > 0, so it will provide it’s own light source.
With Emit set to .92, here is the result if you render it:
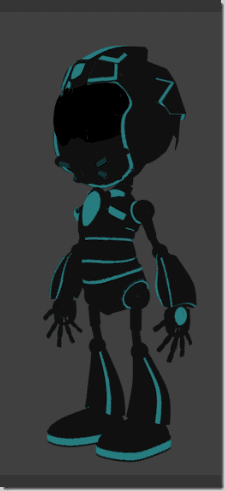
Now, what about it game?
import com.badlogic.gdx.ApplicationListener;
import com.badlogic.gdx.Files.FileType;
import com.badlogic.gdx.Gdx;
import com.badlogic.gdx.graphics.GL20;
import com.badlogic.gdx.graphics.PerspectiveCamera;
import com.badlogic.gdx.graphics.g3d.Environment;
import com.badlogic.gdx.graphics.g3d.Model;
import com.badlogic.gdx.graphics.g3d.ModelBatch;
import com.badlogic.gdx.graphics.g3d.ModelInstance;
import com.badlogic.gdx.graphics.g3d.attributes.ColorAttribute;
import com.badlogic.gdx.graphics.g3d.loader.G3dModelLoader;
import com.badlogic.gdx.utils.UBJsonReader;


public class ModelTest implements ApplicationListener {
    private PerspectiveCamera camera;
    private ModelBatch modelBatch;
    private Model model;
    private ModelInstance modelInstance;
    private Environment environment;

    @Override
    public void create() {
        camera = new PerspectiveCamera(
                75,
                Gdx.graphics.getWidth(),
                Gdx.graphics.getHeight());

        camera.position.set(3f,0f,6f);
        camera.lookAt(0f,1f,0f);

        // Near and Far (plane) represent the minimum and maximum ranges of the camera in, um, units
        camera.near = 0.1f;
        camera.far = 300.0f;

        modelBatch = new ModelBatch();

        UBJsonReader jsonReader = new UBJsonReader();
        G3dModelLoader modelLoader = new G3dModelLoader(jsonReader);
        model = modelLoader.loadModel(Gdx.files.getFileHandle("robot.g3db", FileType.Internal));
        modelInstance = new ModelInstance(model);

        environment = new Environment();
        environment.set(new ColorAttribute(ColorAttribute.AmbientLight, 0.8f, 0.8f, 0.8f, 1.0f));
    }

    @Override
    public void dispose() {
        modelBatch.dispose();
        model.dispose();
    }

    @Override
    public void render() {
        Gdx.gl.glViewport(0, 0, Gdx.graphics.getWidth(), Gdx.graphics.getHeight());
        Gdx.gl.glClearColor(1, 1, 1, 1);
        Gdx.gl.glClear(GL20.GL_COLOR_BUFFER_BIT | GL20.GL_DEPTH_BUFFER_BIT);

        camera.update();

        modelBatch.begin(camera);
        modelBatch.render(modelInstance, environment);
        modelBatch.end();
    }

    @Override
    public void resize(int width, int height) {
    }

    @Override
    public void pause() {
    }

    @Override
    public void resume() {
    }
}
And we run it and:
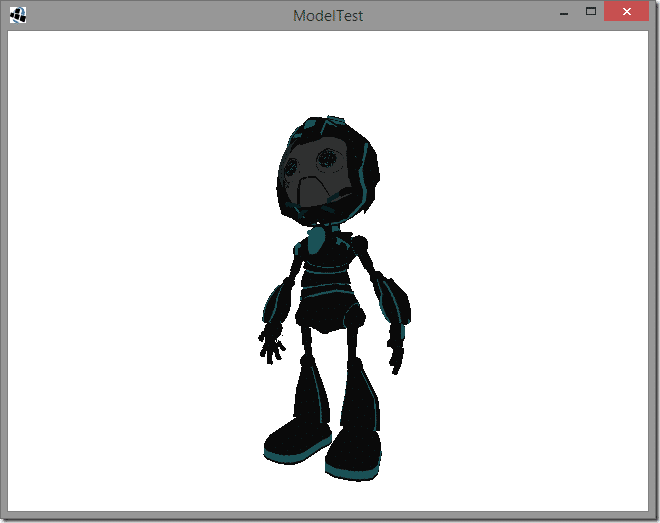
Wow, a model downloaded randomly from the Internet actually working in the game engine! How often does that actually happen? 😉
