
As promised in the last tutorial, in this tutorial we are going to jump in and do some coding. We are going to implement the obligatory Hello World example using Cocos2D HTML, with a twist ( literally ). I warn you up front, this is going to look a great deal more complex than it actually is. There is a certain amount of boilerplate code you need to get up and running, but it really isn’t all that difficult in the end. In a future game, you will just do a series of copy and pastes and be off to the races.
The following goes into a lot of detail, more so than future tutorials. There is however a TL;DR summary at the end, so if you prefer, simply read the code examples then jump ahead to the summary at the bottom of the post for an understanding of exactly what’s going on.
To make things a bit easier on yourself, create your game project in the same folder you extracted the Cocos2D-html archive to. If you followed my directions exactly in tutorial 1, this directory will be c:wampwww. Create a new folder for your project, I called mine MyFirstApp.
Now that your directory is created, we are going to be creating a couple files. First we need to create an HTML web page that is going to host our game. Following convention ( and so Apache will serve it as the default ), I called mine index.html. Enter the following code:
<html> <body style="padding:0; margin: 0; background: #fff;"> <div style="text-align: center; font-size: 0"> <canvas id="gameCanvas" width="600" height="600"> Your browser does not support the canvas tag </canvas> </div> </body> </html> <script src="cocos2d.js"></script>
This is pretty much stock HTML code. The styling in the body tag is so our canvas tag will be flush with the left side of the screen, and because I wanted a white background. Only two items here are really important. First is the canvas tag, we need at least one canvas tag, as this is where Cocos2D draws everything. Why 600 pixels? That’s (edit- was) the content width of my blog. So obviously, make your canvas whatever size you want it to be. Finally we include our cocos2d.js script.
This segues nicely into the next task, go ahead and create another text file, this one called cocos2d.js. Inside that file we type:
(function () { var d = document; var c = { COCOS2D_DEBUG:2, //0 to turn debug off, 1 for basic debug, and 2 for full debug box2d:false, showFPS:true, frameRate:60, tag:'gameCanvas', //the dom element to run cocos2d on engineDir:'../cocos2d/', appFiles:['MyFirstApp.js'] }; window.addEventListener('DOMContentLoaded', function () { //first load engine file if specified var s = d.createElement('script'); s.src = c.engineDir + 'platform/jsloader.js'; d.body.appendChild(s); s.c = c; s.id = 'cocos2d-html5'; }); })();
You may notice that this code block ends with (); This is a self executing anonymous function. Basically that means after it is finished being defined, it will immediately be called.
So what exactly are we doing here? First we care creating a configuration variable called c. This file consists of a number of configuration settings for initializing the Cocos2D engine. Lets take a quick look at each value:
COCOS2D_Debug: This controls the debug level Cocos2D engine. In release set to 0
box2d: Tells Cocos2D if it needs to initialize the box2d physics engine
showFPS: Enable/disable a frames per second counter being displayed each frame
tag: This is the HTML element that cocos2D will render to. In our case, our canvas tag
engineDir: This is the directory the cocos2D libraries are installed in. In our case, up one directory from cocos2d.js in the folder cocos2d
appFiles: This is an array containing all of the your script files. If you add a js file to your project, add it to this array. This causes it to be loaded by the loader.
Next we register an event handler that will be fired once the DOM has been loaded ( meaning the page is done loading and JavaScript is setup and ready ). We then create a <SCRIPT> tag in our HTML page with the id ‘cocos2d-html5’ and add a reference to jsloader.js script as well as our configuration variable c.
At this point, the jsloader.js script now loads all of the various libraries required by cocos2d into the HTML file. Once it is done loading all of the library files, it calls a user defined script named main.js. You need to create this file in the root of your project.
Now let’s go ahead and create main.js:
var cocos2dApp = cc.Application.extend({ config:document.querySelector('#cocos2d-html5')['c'], ctor:function (scene) { this._super(); this.startScene = scene; cc.COCOS2D_DEBUG = this.config['COCOS2D_DEBUG']; cc.setup(this.config['tag']); cc.Loader.shareLoader().onloading = function () { cc.LoaderScene.shareLoaderScene().draw(); }; cc.Loader.shareLoader().onload = function () { cc.AppController.shareAppController().didFinishLaunchingWithOptions(); }; cc.Loader.shareLoader().preload([ ]); }, applicationDidFinishLaunching:function () { var director = cc.Director.getInstance(); director.setDisplayStats(this.config['showFPS']); director.setAnimationInterval(1.0 / this.config['frameRate']); director.runWithScene(new this.startScene()); return true; } }); var myApp = new cocos2dApp(MyFirstAppScene);
We are creating a new object by extending cc.Application. If you are familiar with C++, Java or C# you may be looking at this code and thinking it is both vaguely familiar and different at the same time. There is a good reason for that. JavaScript isn’t really “object oriented” in the way you are familiar with, it is prototype based. This is beyond the scope of what I can explain here, but basically there are no classes. Instead there are “prototypes” that you clone and extend. So essentially you define something once, which is then used as a prototype for creating “objects” in the future. Clear as mud?
Essentially what we are doing here is defining our cocos2DApp object to extend the cc.Application prototype. This is a pretty common behavior in working with Cocos2D, so hopefully you can wrap your head around it. We then implement the ctor ( constructor ) and applicationDidFinishingLaunching. Again, if you are used to C++ like languages, you can think of cocos2DApp as being derived from cc.Application, then overriding the default constructor and a virtual method. If you aren’t a C++/C# or Java programmer, forget everything I just said. ![]()
First, up is the ctor, which simply results in the creation of the prototype cc.Application which cocos2DApp extends. super() can be a confusing concept to understand, for more details read this. ( warning, NSFW language ). One thing to keep in mind, in JavaScript, the constructor ( or ctor ) is just another function, unlike in other languages.
We pass the type of Scene we want to start our app with, we will be creating this in a moment. This is value the parameter scene holds. We then call _super() as described earlier. Next we setup cocos using the values we set in the value c earlier in cocos2d.js. Next we invoke the global Loader object via cc.Loader.shareLoader(). onloading is a call back that will be called when the loader is executing, which effectively renders the loading screen. preLoad is an important function for loading user data files, which we will user in a later tutorial.
In applicationDidFinishLaunching ( which is predictably called when the application finishes launching! ), we initialize the Director object. Director is a global object that basically controls the execution of everything, we will be seeing a lot of it later on. For now just realize that Director is very important. Why will become clear in time. The .getInstance() call is where the singleton part of the equation comes in. It’s well beyond the scope of what I can go into, but for now just think about it as a globally unique shared variable.
The heart of our cocos2dApp though is the applicationDidFinishLaunching function. This is a function that will be called once your cocos2dApp class is loaded, cocos2d is setup and it is what gets the party started. First we tell the ( all important! ) Director if we want to display the frames per second counter on screen and that we want to update using the framerate specified in c configuration in cocos2d.js. Next we tell Director to start running using the scene type we passed in to the constructor. The director only ever has one scene at a time active, and as I said earlier, Cocos2D organizes your game Scene by scene. This is the point where your (only) Scene is created and execution is started.
Finally we create an instance of cocos2dApp named myApp and pass it the scene MyFirstAppScene.
Now lets create that scene object, create a file named MyFirstApp.js as such:
var MyFirstApp = cc.Layer.extend({ init:function() { this._super(); var s = cc.Director.getInstance().getWinSize(); var layer1 = cc.LayerColor.create(new cc.Color4B(255, 255, 0, 255), 600, 600); layer1.setAnchorPoint(new cc.Point(0.5,0.5)); var helloLabel = cc.LabelTTF.create("Hello world", "Arial", 30); helloLabel.setPosition(new cc.Point(s.width/2,s.height/2)); helloLabel.setColor(new cc.Color3B(255,0,0)); var rotationAmount = 0; var scale = 1; helloLabel.schedule(function() { this.setRotation(rotationAmount++); if(rotationAmount > 360) rotationAmount = 0; this.setScale(scale); scale+= 0.05; if(scale > 10) scale =1; }); layer1.addChild(helloLabel); this.addChild(layer1); return true; } }); var MyFirstAppScene = cc.Scene.extend({ onEnter:function(){ this._super(); var layer = new MyFirstApp(); layer.init(); this.addChild(layer); } })
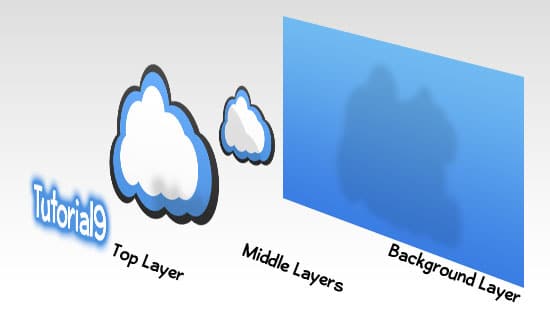
Just like we did when creating our cocos2dApp, we are creating MyFirstApp by extending a Cocos2D prototype, in this case ccLayer. If you have ever worked in a graphic application like Photoshop or GIMP, the concept of a layer should already be familiar to you. If the term is new to you, think of a layer as an image or graphic, that might be transparent in parts. You can layer ( thus the name ) layers over top of each other to create a compound image. This image illustrates the concept as well as any I could find:
You can think of MyFirstApp as representing the entire collection of layers, which in the end will ultimately be drawn to our HTML canvas tag.
As I said, our canvas can be made out of a collection of layers, and the first thing we want to do is create a solid yellow layer. That is what this call does:
var layer1 = cc.LayerColor.create(new cc.Color4B(255, 255, 0, 255), 600, 600);
We are creating a layer 600×600 in size ( the same as our canvas tag ), filled with the RGBA color 255,255,0,255. These numbers represent the red, green, blue and alpha values respectively, as represented by a value from 0-255. The alpha value can be thought of as the amount of transparency in the layer, in this case 100% opaque. As you can see, we created our color with a call to cc.Color4B, you will see this naming convention quite often.
Now that we have a solid yellow layer, we need to position it. Positioning in Cocos2D might be a bit different from what you are used to. Instead of positioning elements from the their top left, they are positioned by their center point by default. Additionally Cocos2D coordinates start at the bottom left of the screen instead of the top left. Therefore when we set the position of our layer, we want it to be the center of the screen.
Now we want to create our HelloWorld text, which we do by creating a cc.LabelTTF ( TTF = True Text Font ), with our string “Hello world” using the font family Arial and font size of 30. We too want the Hello World label centered to the screen and we want it to be red in color. We then declare two local variables rotationAmount and scale, which we will use in a second.
The next line is key, we are declaring a lambda ( or anonymous ) function that we pass as a parameter to the schedule function. End end result is, the following code will be executed every update ( which we set to 60 times per second earlier ) as long as our scene is active. Essentially what happens is Director calls our Scene ( MyFirstApp ) to update 60 times per second, and our Scene in turn calls the update function of each node that registered to be updated. This line is registering the function that is going to be called during updating. ( This is greatly simplifying the actual process, but will do for now ). Essentially, all this function does is rotate the text and scale it until it is 10 times in size, at which point it starts over.
Finally, we add our Hello World label to our layer, and add our layer to our MyFirstApp variable.
Now we create our scene, MyFirstAppScene. This is the value we passed in to the constructor cocos2dApp earlier. MyFirstAppScene extends cc.Scene and overrides the OnEnter method, which is called when the scene is activated ( in the RunWithScene call ). In this case, we simply call up to cc.Scene with a call to this._super(), then create an instance of our layer MyFirstApp and add it to our scene. This causes our layer to be created and displayed.
Here are the end results of all our activity:
TL;DR overview of what just happened:
- index.html is loaded in the web browser
- Our canvas tag is defined
- cocos2d.js then loaded ( within index.html )
- cocos2.js creates a SCRIPT tag in our index.html, injects configuration settings as well as a reference to jsloader.js
- jsloader loads all of the required cocos2D libraries, then invokes main.js
- main.js loads cocos2D, preloads assets, initializes the director then runs our scene
- our scene MyFirstAppScene creates a new layer MyFirstApp
Your game is now running. We will take a closer look at program execution and handling input shortly.
You can download the whole project here. Simply extract it to your www folder and open index.html in your browser.
Read Tutorial 3