Click here for the previous tutorial section.
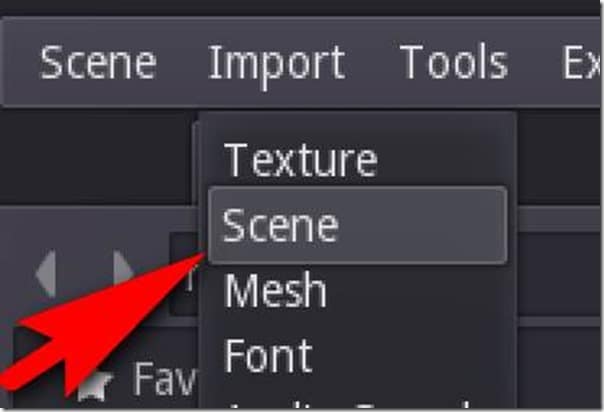
Now it’s time to create our bowling lane. If you are a Patreon, the resources we are using are located in the GFS Dropbox in the GameKitsBowling folder. Godot works a bit different from other game engines in that complex models are imported as scenes. Simply select Import->Scene
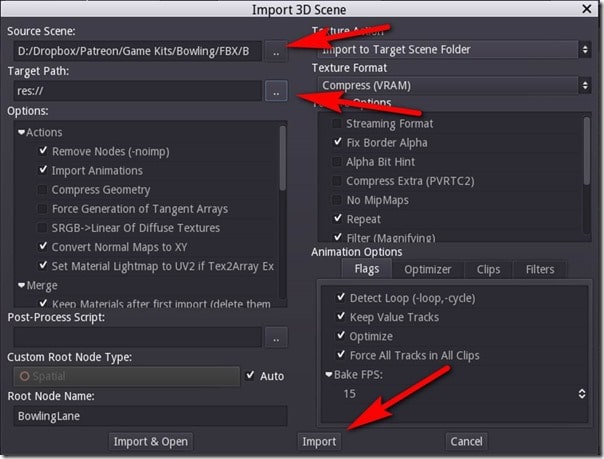
At a minimum select the DAE (COLLADA) file location, then the location within your project to import into, then finally click import.
One thing that is very important to realize here is this process will import the entire scene from the model file. This includes lights, cameras, etc… so be sure when you export to DAE, you only export the items you want imported. Of course, you’ve got the option of deleting unneeded items in Godot if needed.
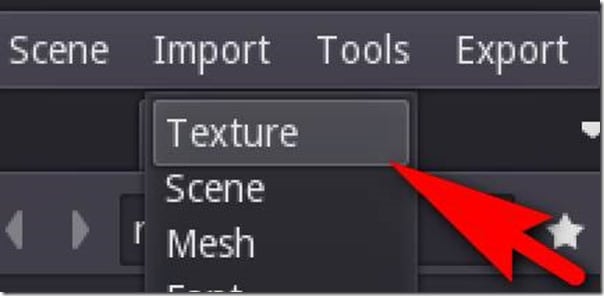
It is possible that the import process doesn’t always bring in the textures, so we will cover doing this part manually. If your model imported fully textured, you can skip ahead and ignore this section. First import that texture object into your scene. The bowling lane has two textures, a diffuse (color) and normal (depth) map. Select Import->Texture.
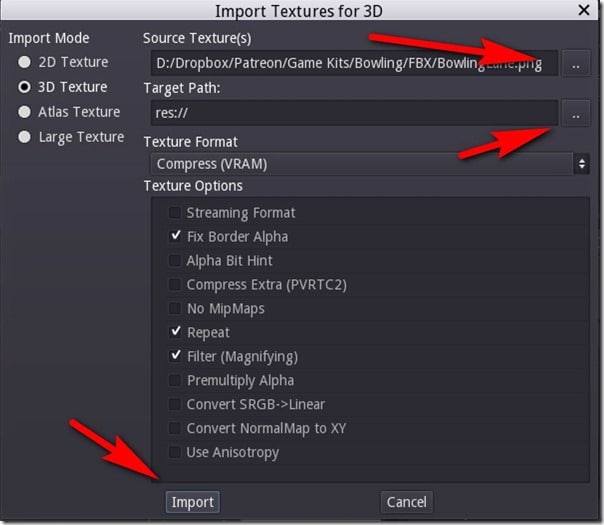
Then select the texture, where to import it and finally hit the import button.
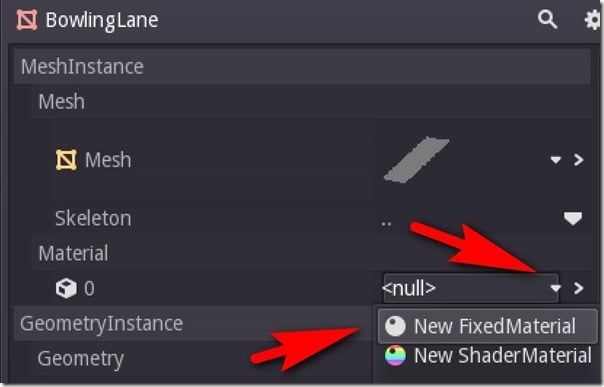
Repeat this process for each texture file you need to import. Now we need to define a material on our BowlingLane node. Select the BowlingLane, locate MeshInstance->Material->0, click the drop down and select New FixedMaterial.
This will create a new material. Drop it down again and this time select Edit.
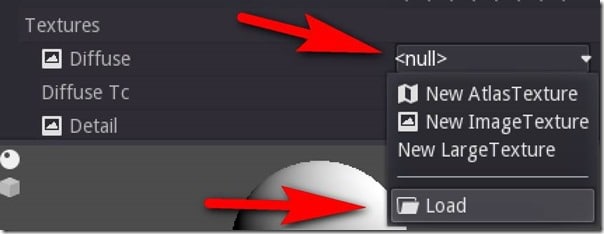
Now locate Diffuse, drop down the pull down and select Load.
Select your newly imported Diffuse texture. Now repeat the process for Normal
You can control the strength of the normal map using the Normal Depth setting:
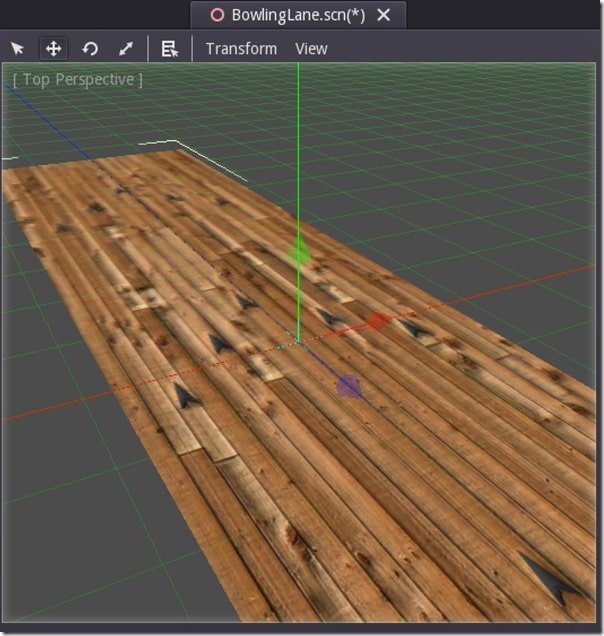
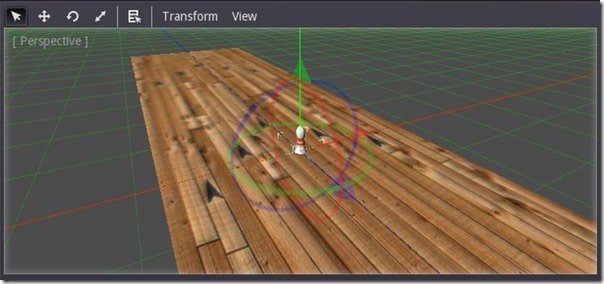
Your Bowling Lane should now look a lot more like a bowling lane than before!
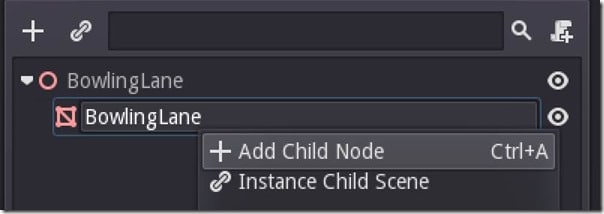
Now we need to add some Physics nodes to our lane. In the Scene graph, select the BowlingLane mesh instance, right click and select Add Child Node.
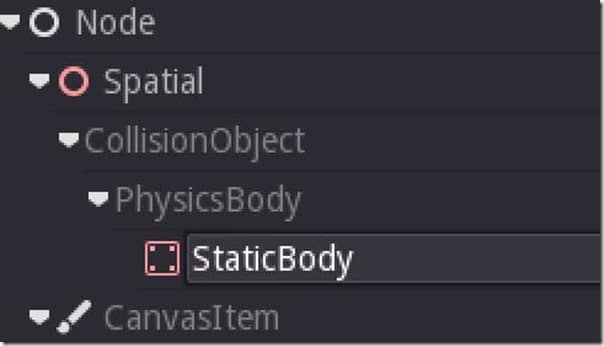
Select StaticBody.
This will make our lane part of the physics simulation, but as the name suggests, it wont be affected by it. So basically, a static body can be hit, but nothing will happen to it. Finally, we need to define the geometry of physics object. Right click your newly created StaticBody, select Add Child Node Again and this time select CollisionShape.
With the newly created CollisionShape selected, locate Shape, drop down and select New BoxShape.
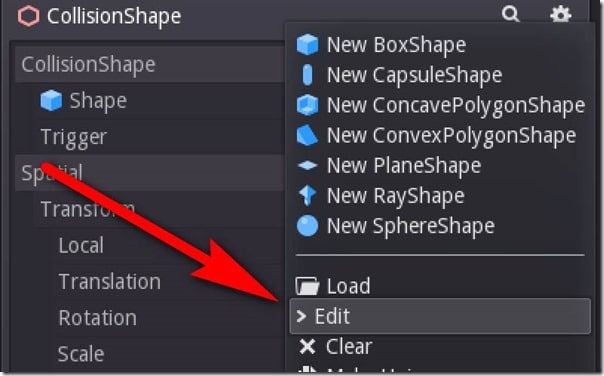
Now select the Shape drop down again and select Edit
Now modify the Extents until it tightly wraps the underlying shape.
We are now done with the lane. Save the scene file and close it.
Creating the Bowling Pin
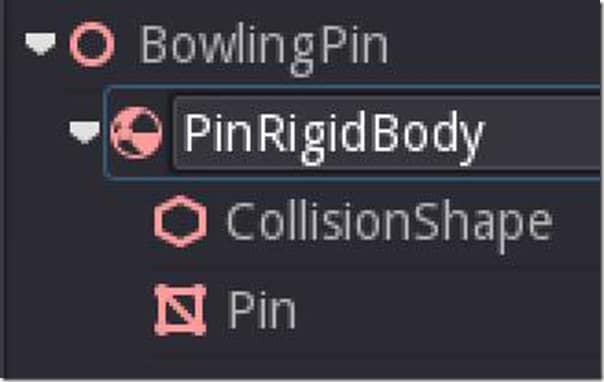
Now we repeat the exact same process, except this time with our bowling pin. The process is actually identical, except instead of creating a StaticBody, we create a PhysicsBody. However, in this case the RigidBody needs to be the parent of the Pin. Don’t worry, its pretty simple. Be sure to make the RigidBody node a child of the Root “BowlingPin” node, then drag the Pin node onto the newly created RigidBody. So we can identify the node in code later, also rename it from RigidBody to PinRigidBody. The end result should look like:
In the properties of our RigidBody, we also want to set Can Sleep off and Contact Monitor on, like so:
Creating our Bowling Alley
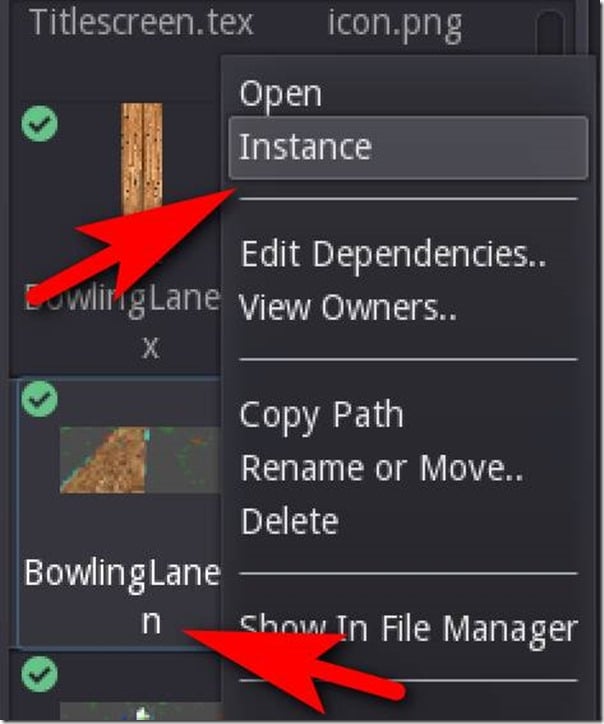
Now it’s time to put it all together. Go back to GameScene in the editor and we need to create some instances of our lane and pins. Simply locate the lane in the assets view, right click and select Instance.
Now repeat the process for the bowling pin. Your scene should now look something like:
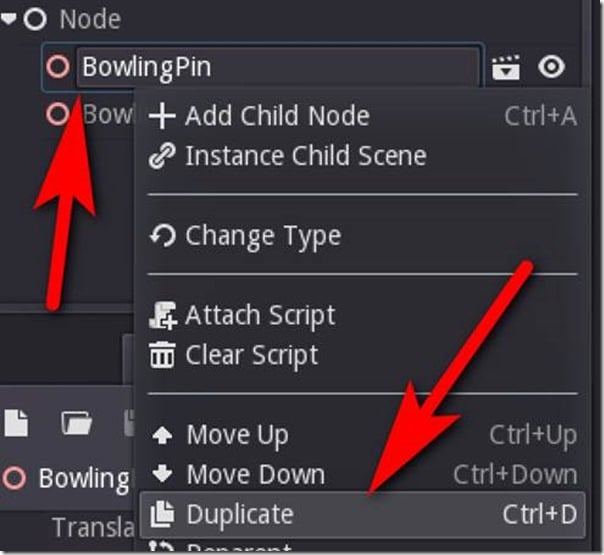
Next reposition the bowling pin and so it’s above the lane and down a bit. Now it’s the moment of truth… are you a 5 pin or 10 pin fan? Either way, duplicate the first pin. Locate it in the Scene panel, right click and select duplicate ( or select and hit Ctrl + D ).
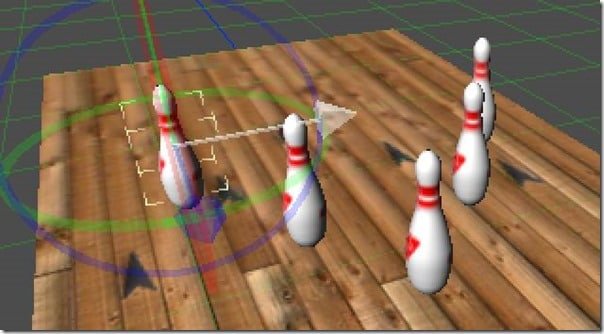
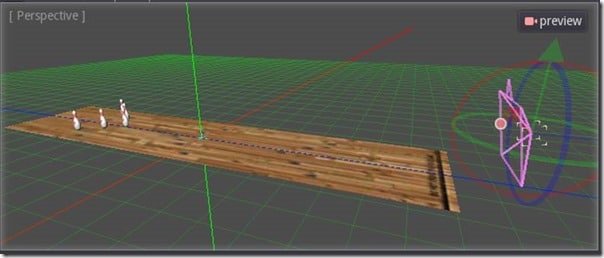
Then move the pin into position and repeat the process. If you want, now is your chance to create 7 pin bowling! Personally, I went with 5, and it looks like this:
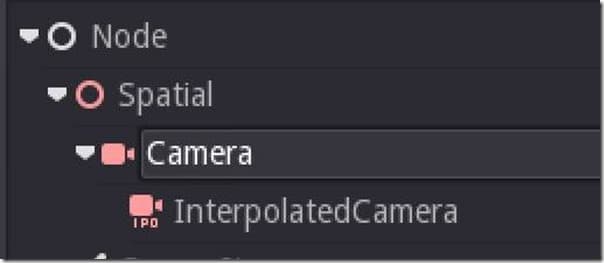
5 pin for life! We are certainly getting there! It’s at least starting to feel like a bowling game. It would be a good time to check out our work, but press play and you’ll notice a problem… nothing shows up! That’s because we need to create a camera! With the root node selected, create a new node and select Camera:
Now position the camera in your scene using the transform manipulator. With a camera node selected, you can hit the Preview button at any time to, well, preview the camera.
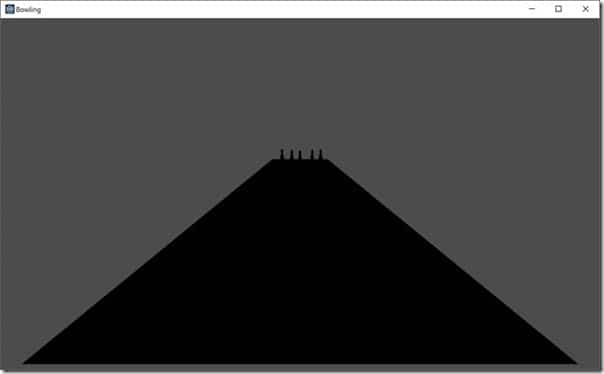
Now when we press play…
Hmm, a bit dark in here isn’t it? Well that makes sense, we have no lights in our scene. We have two options here… we can add some lights or we can add ambient lighting. Getting the later right is probably a bit easier, so lets take that approach. With the camera selected, located the Environment setting, drop it down and select New Environment
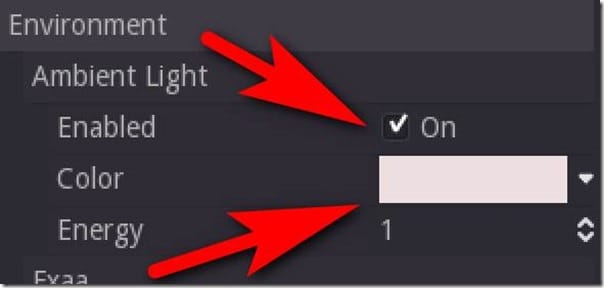
Now drop it down again, this time selecting Edit. Now turn Ambient lighting on and select a color close to white.
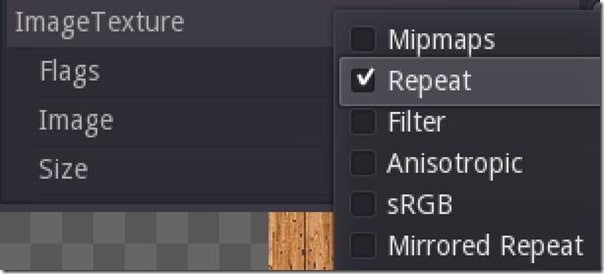
One thing you might find is that the results are really blurry and undesirable. There are two ways to address this… first, select the texture, locate the flags propert and turn off MipMap and Filtering:
Finally, in the mesh of an imported scene, you can turn off baked lighting:
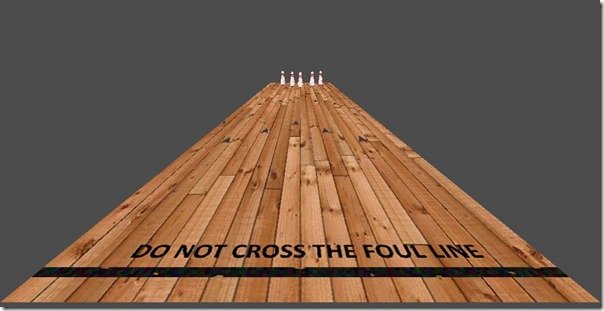
Both of these steps are completely optional. At this point our game should look like:
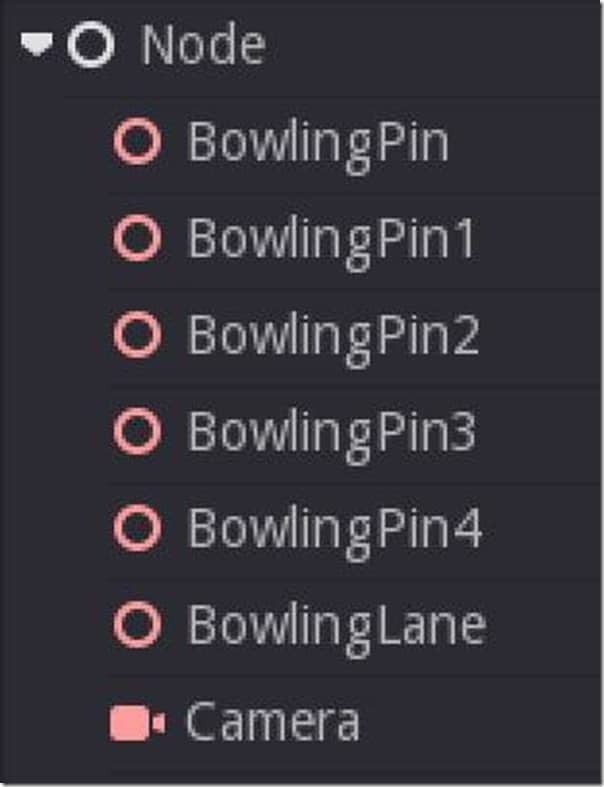
And our scene should look like:
Now all we need is a ball! Click here for the next tutorial section.

