In our previous tutorial we materials in our ongoing Babylon Tutorial Series but today we are going to take things a step higher up and let someone else worry about doing the work for us. Today we will look at exporting 3D models from Blender for use in our game. A number of exporters exist (3ds Max, FBX, Cheetah, Unity), but today we are specifically going to talk about using Blender.
First we need to download and install the plugin. Fortunately they make a zip version available for download. Head on over to https://github.com/BabylonJS/Babylon.js/blob/master/Exporters/Blender/Blender2Babylon-5.2.zip and click Download:
Save the zip file somewhere you will remember. Now fire up Blender. Select File->User Preferences… then select the Add-Ons tab
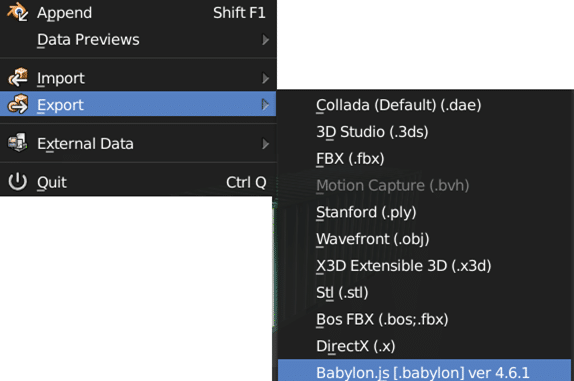
Now choose Install From File… and select the newly downloaded zip. Then in the filter area type “Bab” and Import-Export: Babylon.js should be available. Simply check the checkbox to the right hand side to enable it. We can now export our scene as a .babylon file for use in our game. Simply select File->Export->Babylon.js:
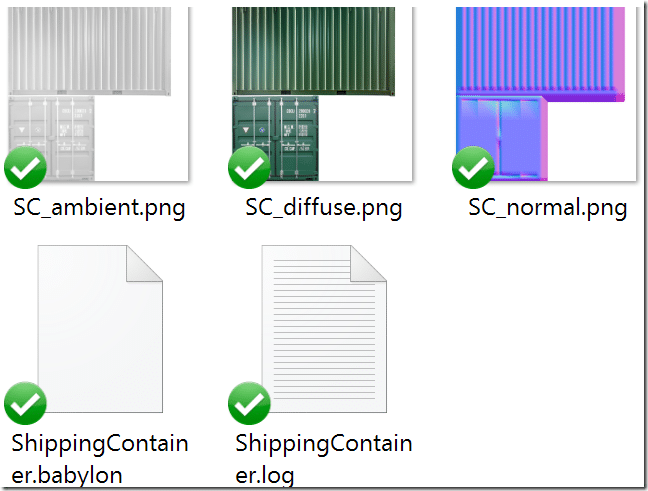
There are no settings for the exporter, so simply pick your game asset directory and click Export Babylon.js Scene. A .Babylon file and all of your textures will be created in your selected save location:
Now let’s look at the code required to load and display this model in our game:
window.addEventListener('DOMContentLoaded', function(){ var canvas = document.getElementById('canvas'); var engine = new BABYLON.Engine(canvas, true); engine.enableOfflineSupport = false; // Dont require a manifest file var createScene = function(){ var scene = new BABYLON.Scene(engine); scene.clearColor = new BABYLON.Color3.White(); var camera = new BABYLON.ArcRotateCamera("arcCam", BABYLON.Tools.ToRadians(0), BABYLON.Tools.ToRadians(0), 10.0,BABYLON.Vector3.Zero(),scene); camera.attachControl(canvas,true); var light = new BABYLON.PointLight("PointLight",new BABYLON.Vector3( 0,0,0),scene); light.parent = camera; light.intensity = 1.5; BABYLON.SceneLoader.ImportMesh("","","ShippingContainer.babylon", scene,function(newMeshes) { newMeshes.forEach(function(mesh){ mesh.rotation = new BABYLON.Vector3(BABYLON.Tools.ToRadians( 45),0,0); } ); }); return scene; } var scene = createScene(); engine.runRenderLoop(function(){ scene.render(); }); });
The magic is done using the Y() function call. You can load a specific asset from within the .babylon file by specifying it’s name, but in this case we just want the whole thing. Import mesh has a callback when the mesh is loaded ( it’s loaded async, so you need to use this callback ) and it’s passed an array of Mesh objects. We simply loop through this array ( in this example it’s only one item long, so we could have just as easily done newMeshes[0] and accomplished the same thing ). Sometimes you will need to reposition your objects when loaded due to different coordinate systems, this example shows rotating each mesh by 45 degrees along the X axis.
This example uses the ShippingContainer blend file available as part of the Patreon dropbox assets, but you can use any applicable Blend file to create the example. If you are a Patreon support (thanks by the way!) you can find this model in ArtBlenderShippingContainer and the code is all available (including the exported Babylon file) in Tutorial SeriesBabylon5 – PartFive – Models.
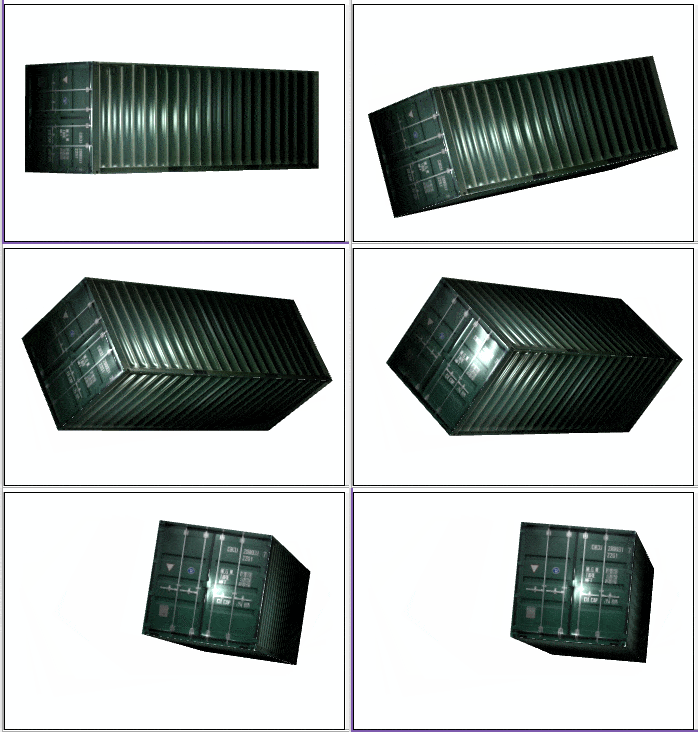
When we run this example, we should see:
The Video


