Up until this point we’ve covered a ton of the items that go into making a game, but nothing resembling a game… the pieces simply didn’t fit together. In this tutorial we are going to change that and start bringing everything we learned together. We are going to be covering a lot today, so if I lose you let me know. This might be one of those tutorials where the video version comes in very handy.
Once again, I am simply going to assume you’ve gone through all the prior tutorials, so instead of telling you how to make a flipbook, I simply say “Make a flipbook”. So if you haven’t already, you may want to go back and read or watch the earlier tutorials. Ok, let’s jump right in.
There is an HD video version of this tutorial available here, or available embedded below.
Actors, Pawns, Characters and Controllers
In the world of Unreal Engine, things that exist in the game world are Actors. Quite simply an Actor is an object that can be placed into a level. It contains details like position, rotation and scale. Most importantly, Actors are containers for Components, or even a hierarchy of components. Components can be thought of as attributes or properties of an actor… these are the things the actor is and does, and the Actor->Component relationship is a big part of Unreal’s modular design.
There are a few very important classes derived from Actor that are very important. The first of which is the Pawn. Basically a Pawn is an Actor that can be controlled by either the player or the games AI. Each Pawn has a Controller and each Controller has a pawn.
The Controller can control a pawn. This takes two forms, AI controllers and character controllers. The AI controller is responsible for the artificial intelligence that controls a pawns movements. The Player Controller on the other hand is responsible for handling input from the player(s) and applying the results to the character’s pawn.
Finally you have Characters. A Character brings a number of objects together to represent that character. In the 3D world, the Character class extends Pawn to include a skeletal mesh, a mesh for collision detection and of course whatever components you add. In the Paper2D world there instead is PaperCharacter, which instead of a mesh instead has a Flipbook.
These key classes all work together to provide the building blocks of your game. Don’t worry, we are about to see it all in action in a few minutes.
Getting Ready
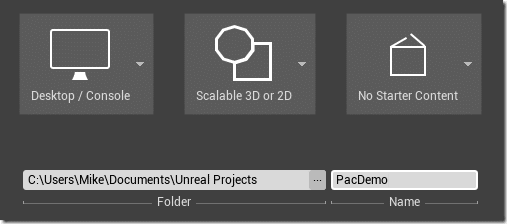
We are now going to create the skeleton of a game, but this is going to require you to do a few things. First of course create a new project, I am using these settings:
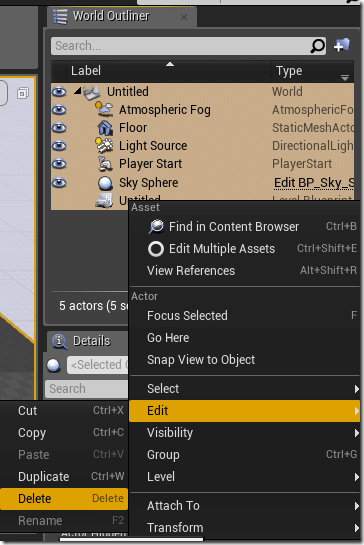
After loading I want a completely clean slate so I select an delete everything the project included:
Next, we need to import some sprites, both as a background and to create a flipbook for our main character.
I am using a simple three frame animation using this frame, this frame and this frame. For my world background I am using this image. Any likeness or similarity to an existing game is purely coincidental… Obviously you don’t have to use these images, but if you want to follow along exactly you can.
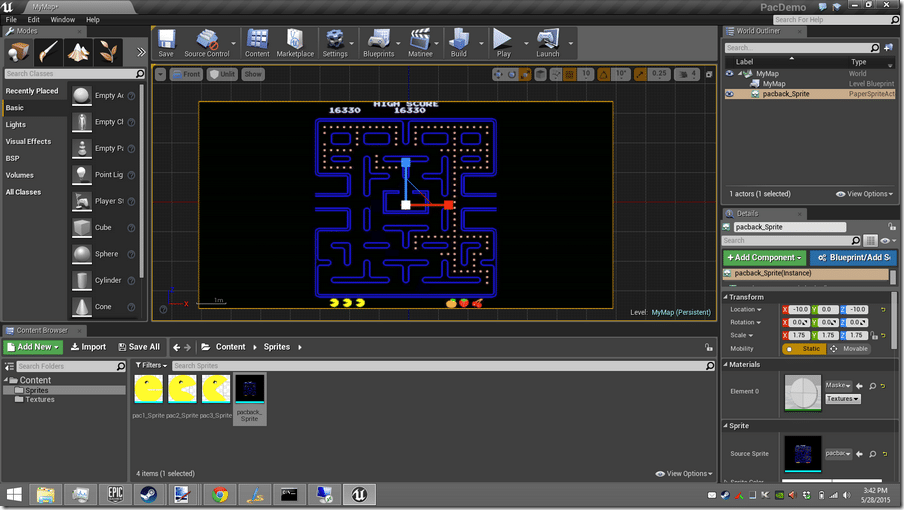
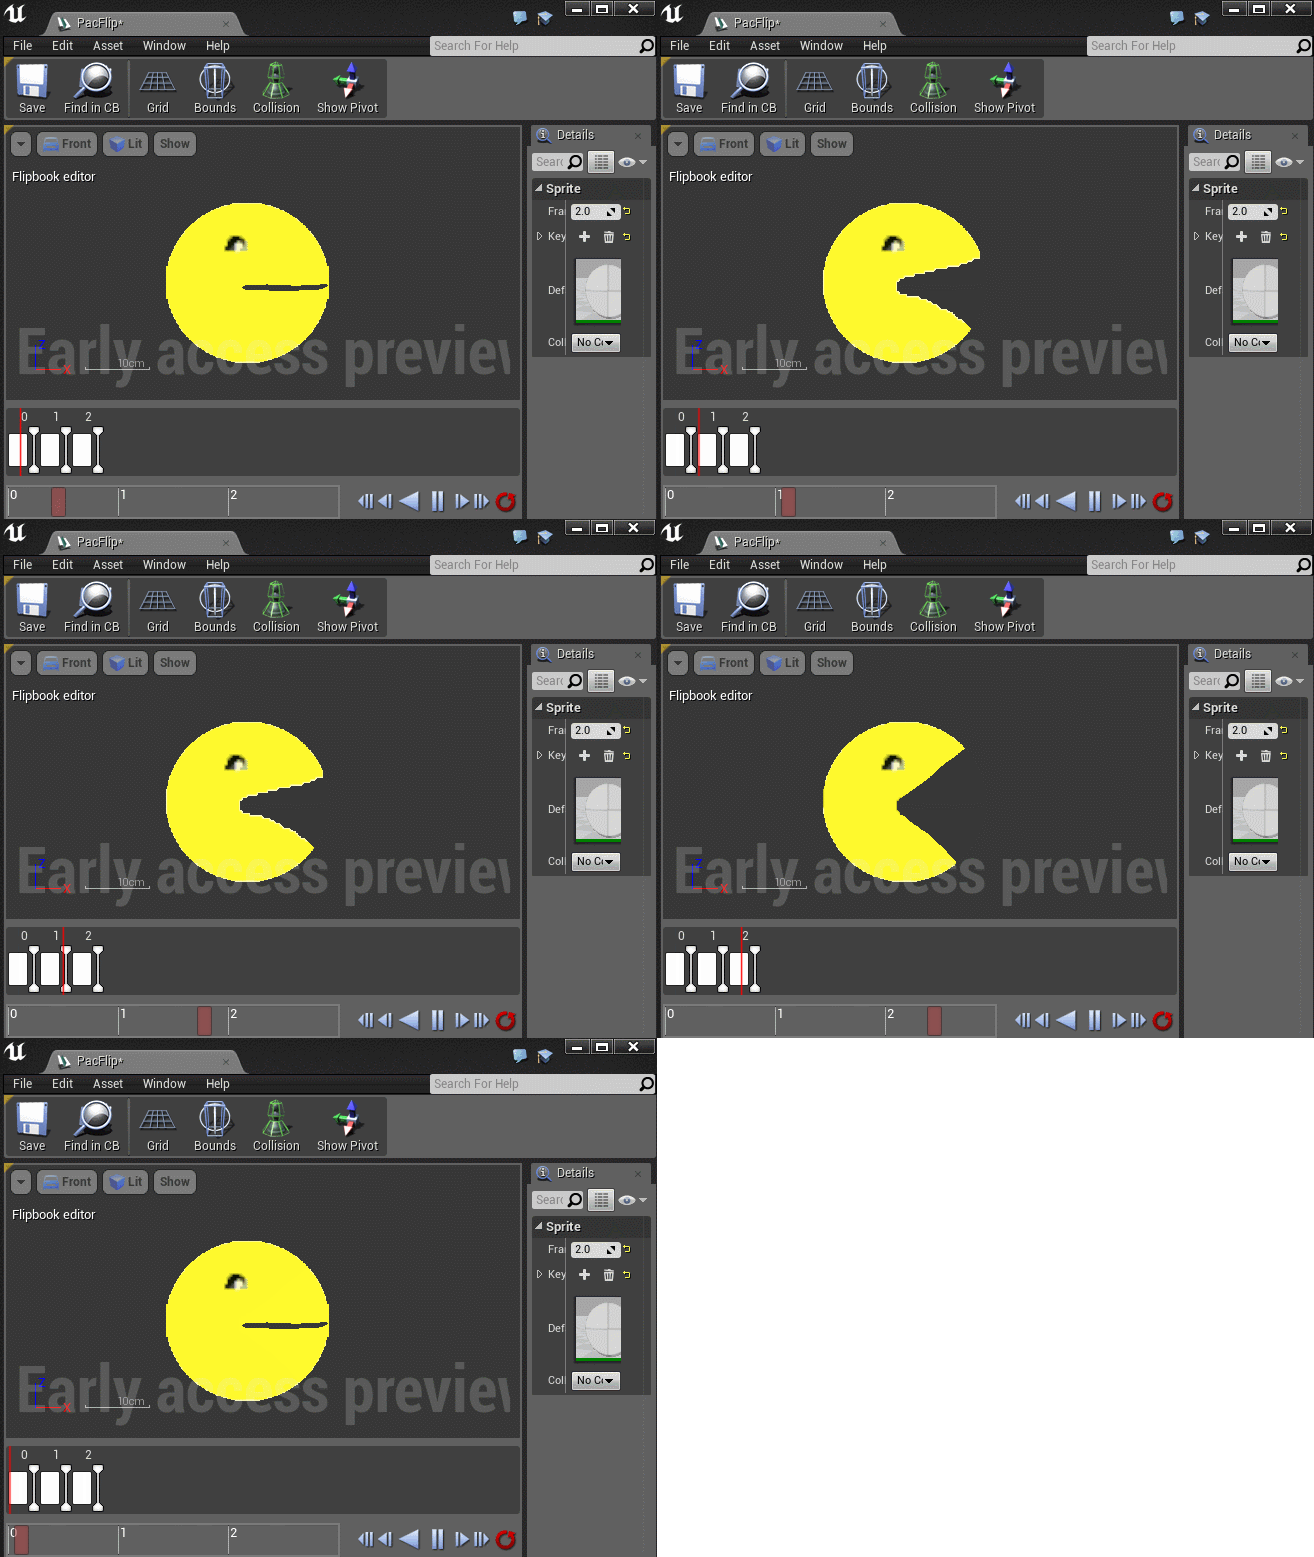
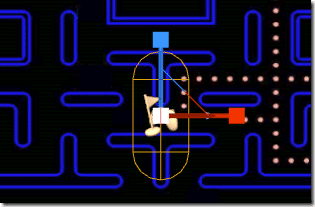
Load all four images in as textures, then make a sprite from each. Create a new Sprite Flipbook out of our 3 frames of animation and set the frame rate at 2fps. Then drag the fourth sprite in as our scenes background. Be sure to set the backgrounds Y value to a negative so our game sprite will draw in front of it!
Ultimately you should have something like this:
With a Flipbook like this:
Creating a Main Character
Now that we have a world and an animation, it’s time to add a character to the game.
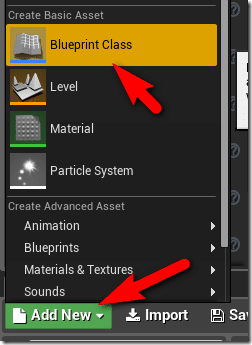
To do so, select Add New, then Blueprint Class:
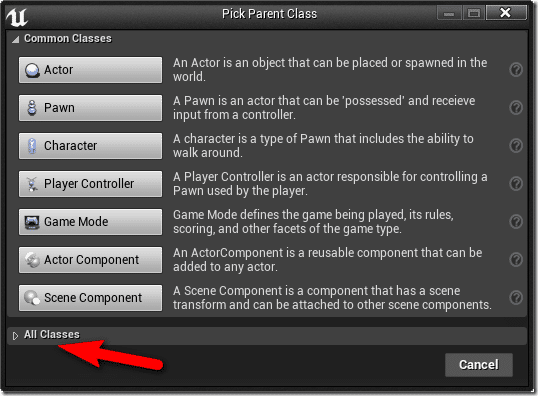
It is going to present a dialog with a number of the options we talked about earlier. The one we are going to use in this example isn’t actually on the list so select All Classes:
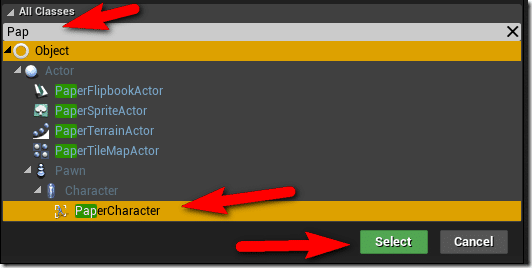
In the filter type “Pap”, then locate PaperCharacter, click it and press Select.
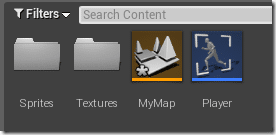
This will create a new Blueprint for you, I immediately renamed mine MyPlayer.
I suppose I should point out, you don’t have to use PaperCharacter, any Pawn derived class is fine, although the process will be slightly different.
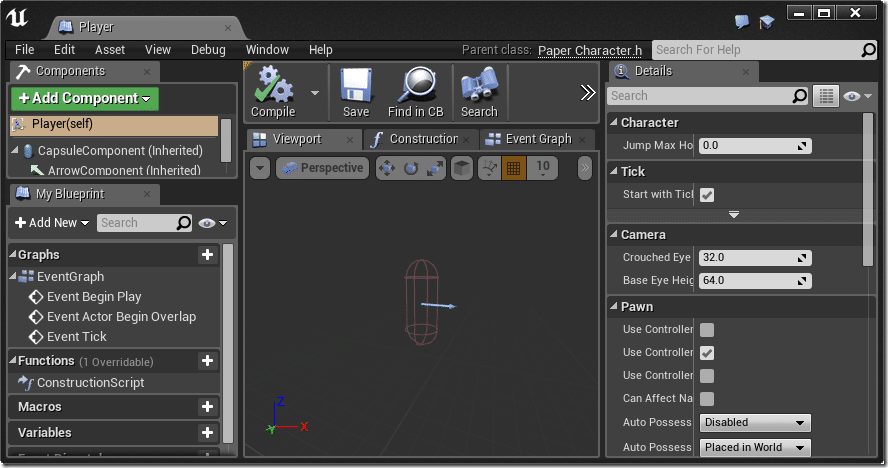
In the Content Browser, double click MyPlayer to bring up the Blueprint editor, it should look something like this:
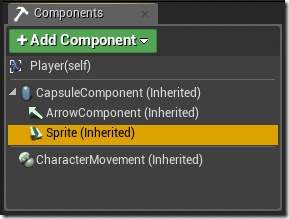
Now we need to set the Flipbook for our Player. You will notice on the left hand side, several components are already defined:
Select Sprite.
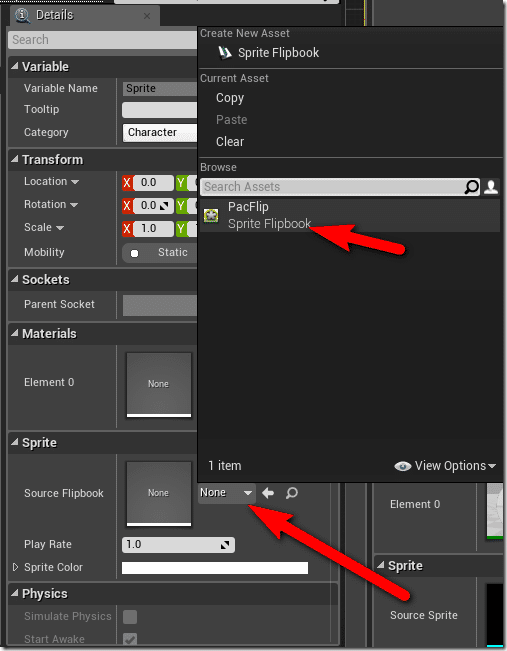
Now with sprite selected, it’s details should appear on the right hand side. No locate Sprite and select the Flipbook you created earlier:
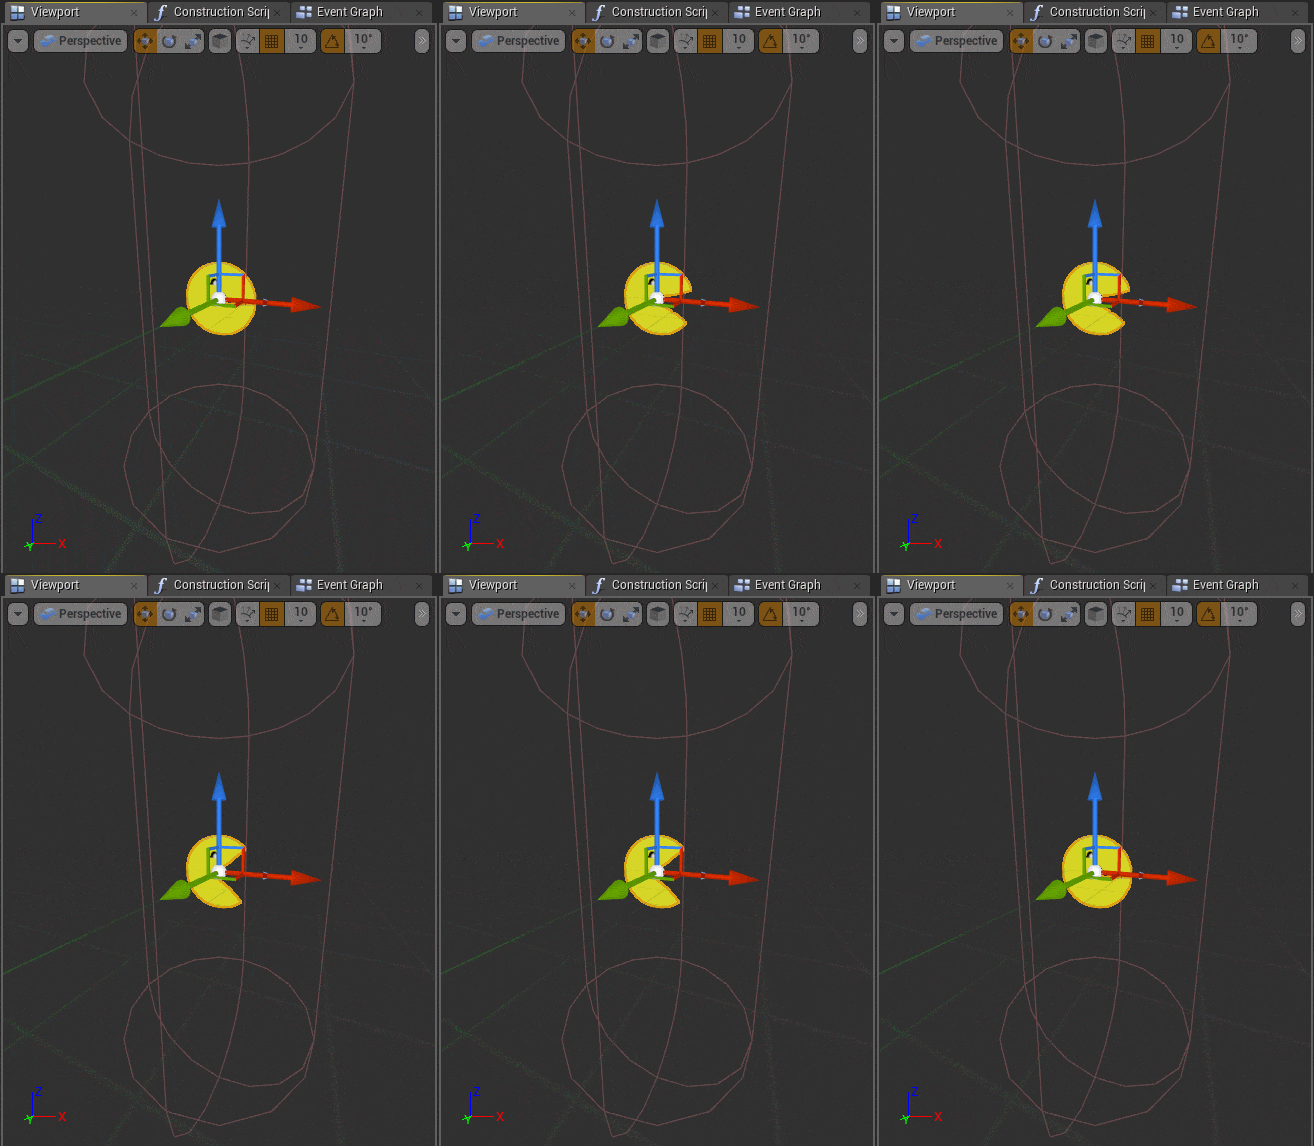
In the Viewport tab, your Player should now look like:
Now we want to shrink the capsule down to match our sprite. The capsule container is used for doing collision tests and should be as near an approximation as possible. Simply select the capsule in the viewport, then in details locate Shape and set the two values until it just fits around your sprite. I used:
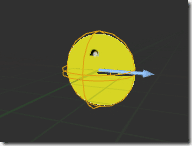
And the end results looks like:
Adding a Camera
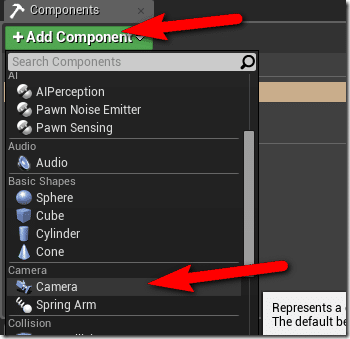
Let’s look at the process of adding a component to an actor, in this case a Camera. This will create a camera centered on the Actor. To do so, in the Components panel select Add Component, then Camera:
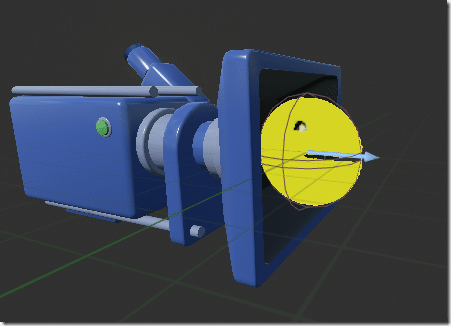
In the viewport you will now see your new Camera component:
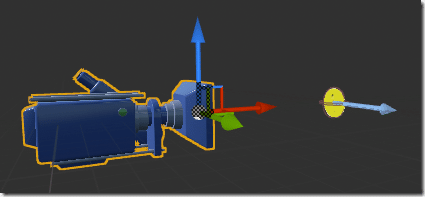
Right click select it, hit E to rotate and rotate it 90 degrees. Then hit W to move it, and move it back along the X axis. Something like this:
The angle and distance between the camera and the sprite are important, but once you’ve got things configured correctly ( in a few minutes ), you will be able to hit the Play icon and preview the effect of the camera on your player. If we needed more fine tune control of the relationship between the camera and the sprite, we could add a Swing Arm component and attach the camera to it. We don’t need this in this particular example though.
Configuring your game
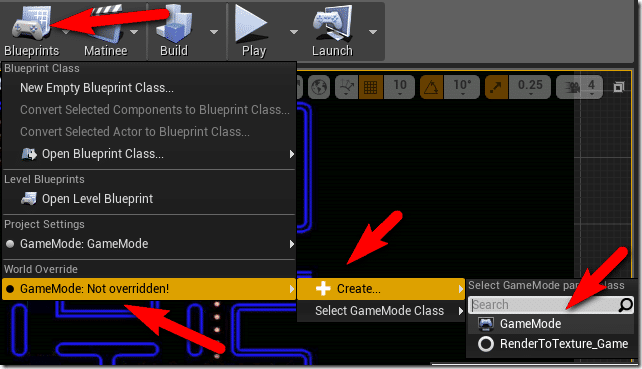
Now that we have our player class, we need to let the game know that it is our player. This is done by creating a GameMode blueprint. To do so drop down the Blueprints icon, select GameMode->Create->GameMode, like so:
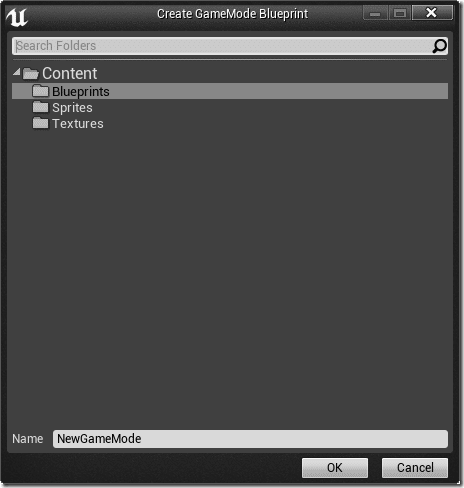
In the resulting dialog, name it then select OK. I’m going with the default NewGameMode.
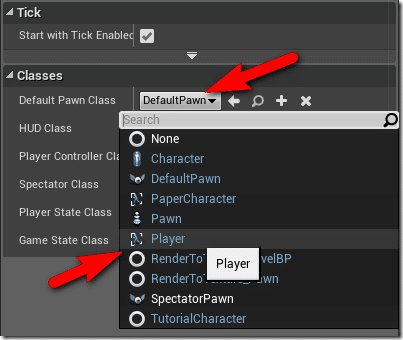
This will create a new Blueprint but the part you are most interested in are the properties. It is here that you configure a number of important top level classes for your game. Locate “Default Pawn Class” in the Classes section and select your Player class.
Now when the game starts, and instance of your Player class will automatically be created.
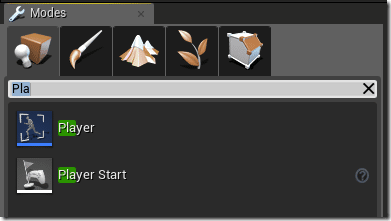
Now we just need to tell the game WHERE the player should be created, and this is done using a Player Start object. In the Modes dialog, locate or search for Player Start and drag one onto the scene where you want the player pawn to be created.
And position it like so:
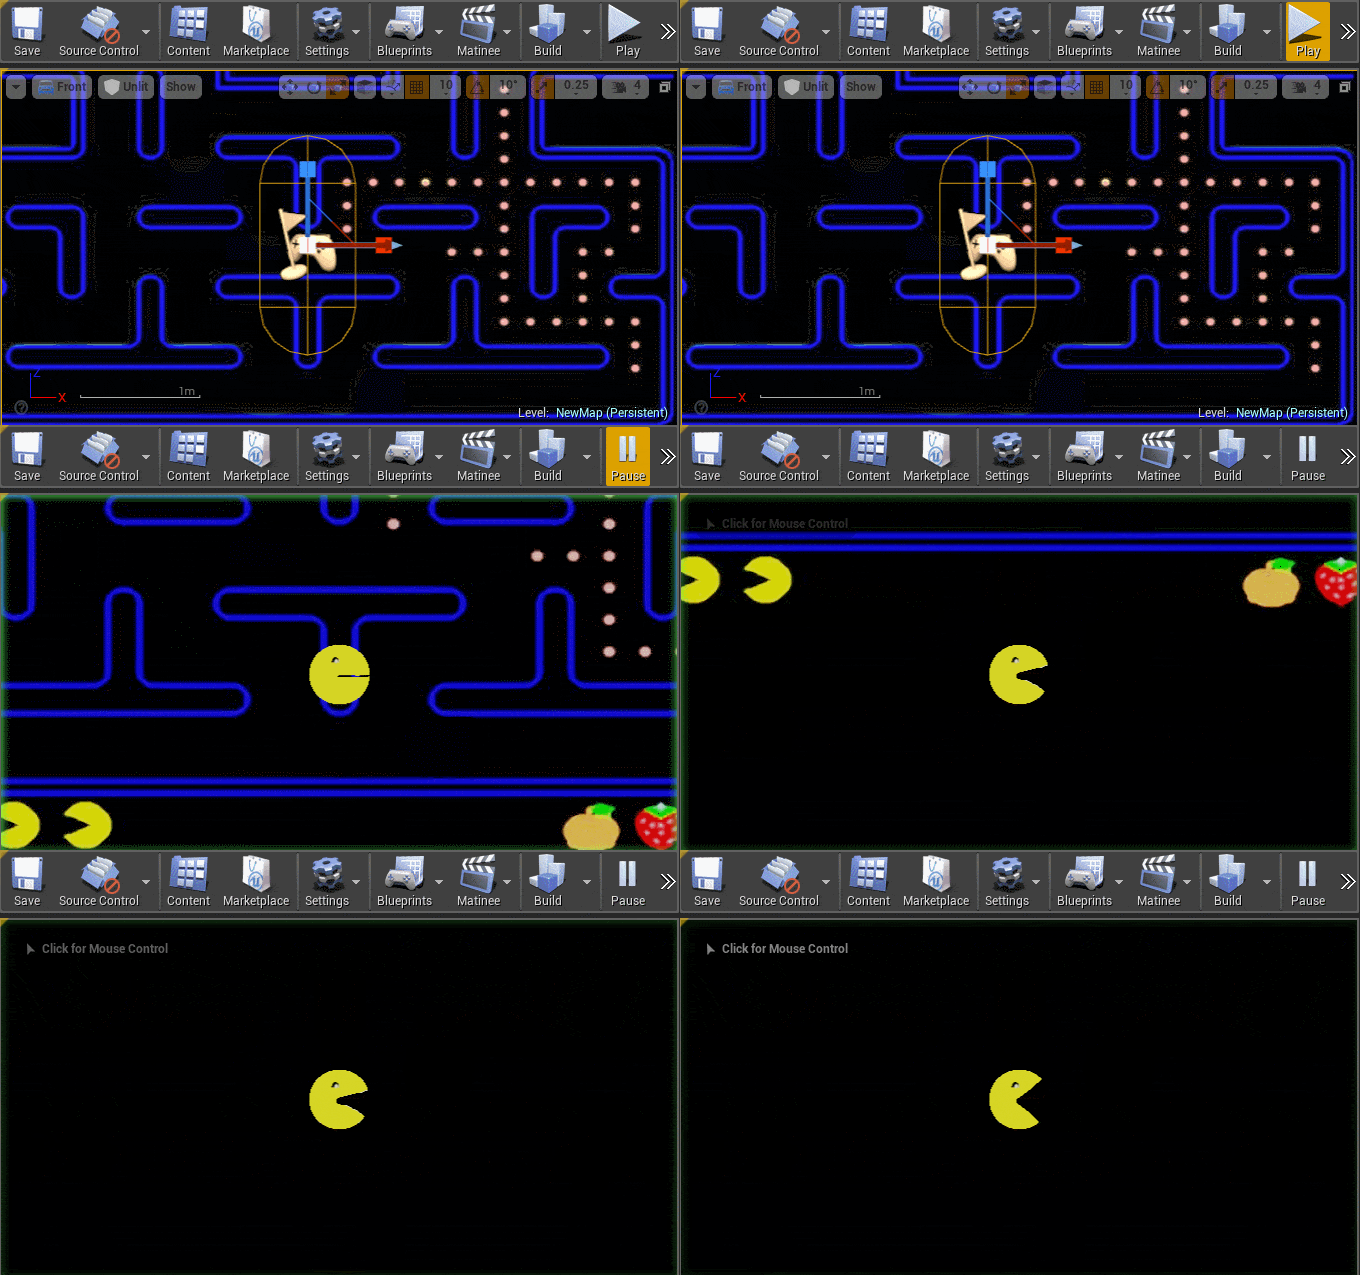
Now press play and we see…
Hmmm… that’s not good.
The problem is, our game world has gravity enabled by default and we don’t want this. The easiest fix is to turn gravity off.
To turn off gravity, in the World Outliner, double click your map to bring World Settings dialog up. Now locate the Physics section, check Override World Gravity and make sure gravity is set to 0.
Now when we press play we should see:
Much better, we are now one step closer. We have a world (sorta… I’ll admit, we are faking that part pretty heavily here), we have a main character… now we just need to add some controls.
Simple Keyboard Controls
Now we are going to jump into some Blueprint programming to add some keyboard controls to our player. Double click your MyPlayer blueprint to bring it up in the editor, then select the Event Graph task. Personally I am deleting all of the premades that they provide to keep things a bit cleaner.
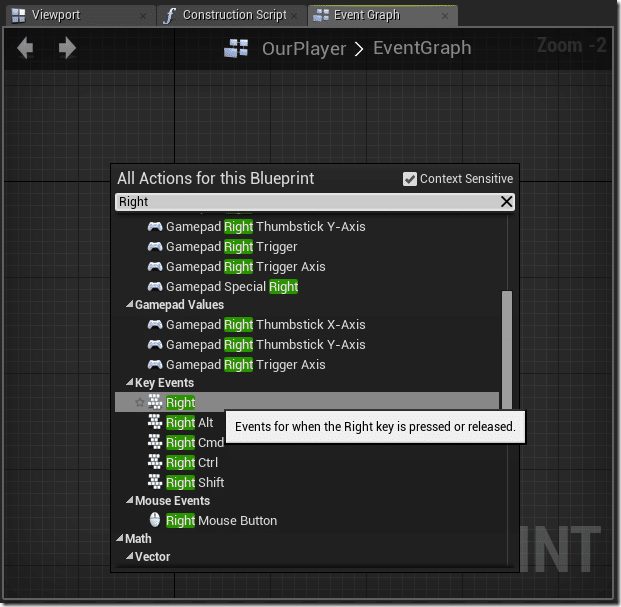
Now we are going to add an input handler for when the user presses the Right arrow key. Simply right click the canvas, type Right and select Key Events –> Right like so:
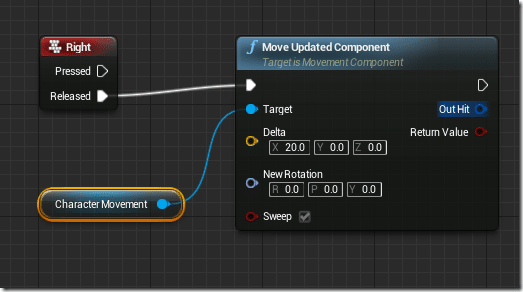
We create this simple blueprint.
Now when the user releases the right arrow, we move the Character Movement component of our player by 20 along the X axis.
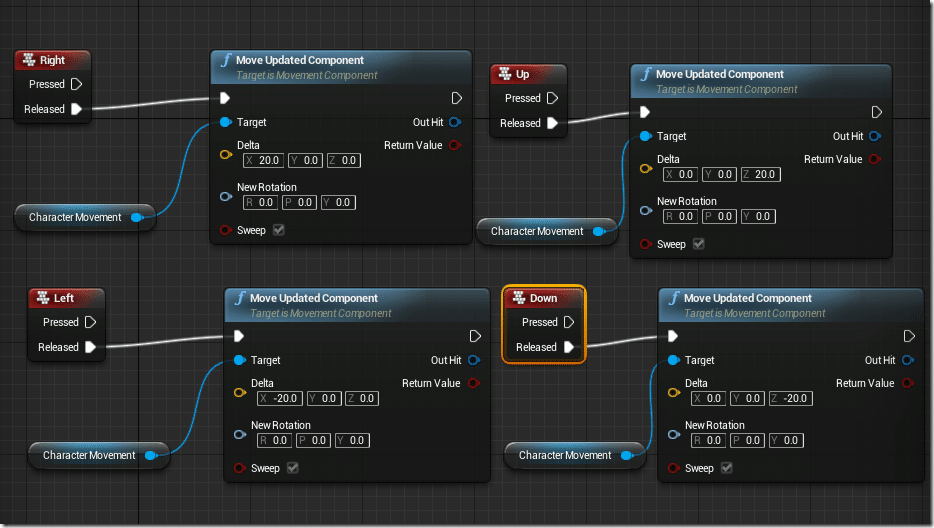
Now through the power of Cut and Paste, we quickly create the following simple control scheme:
All that changes is for each key pressed we move in a different direction, either +/- x for left and right, or +/- z for up and down.
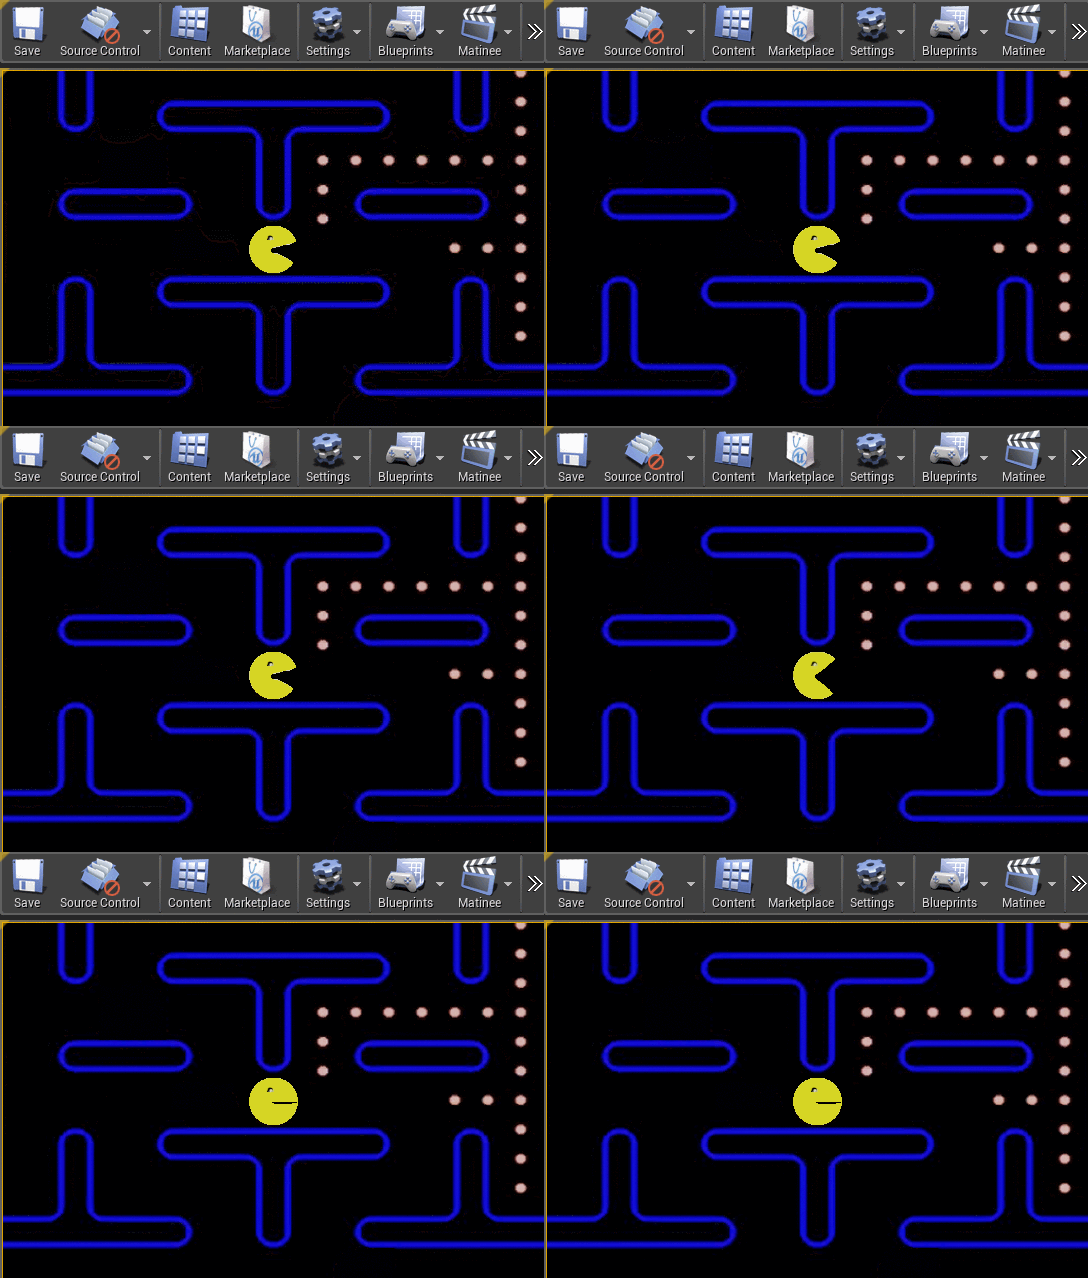
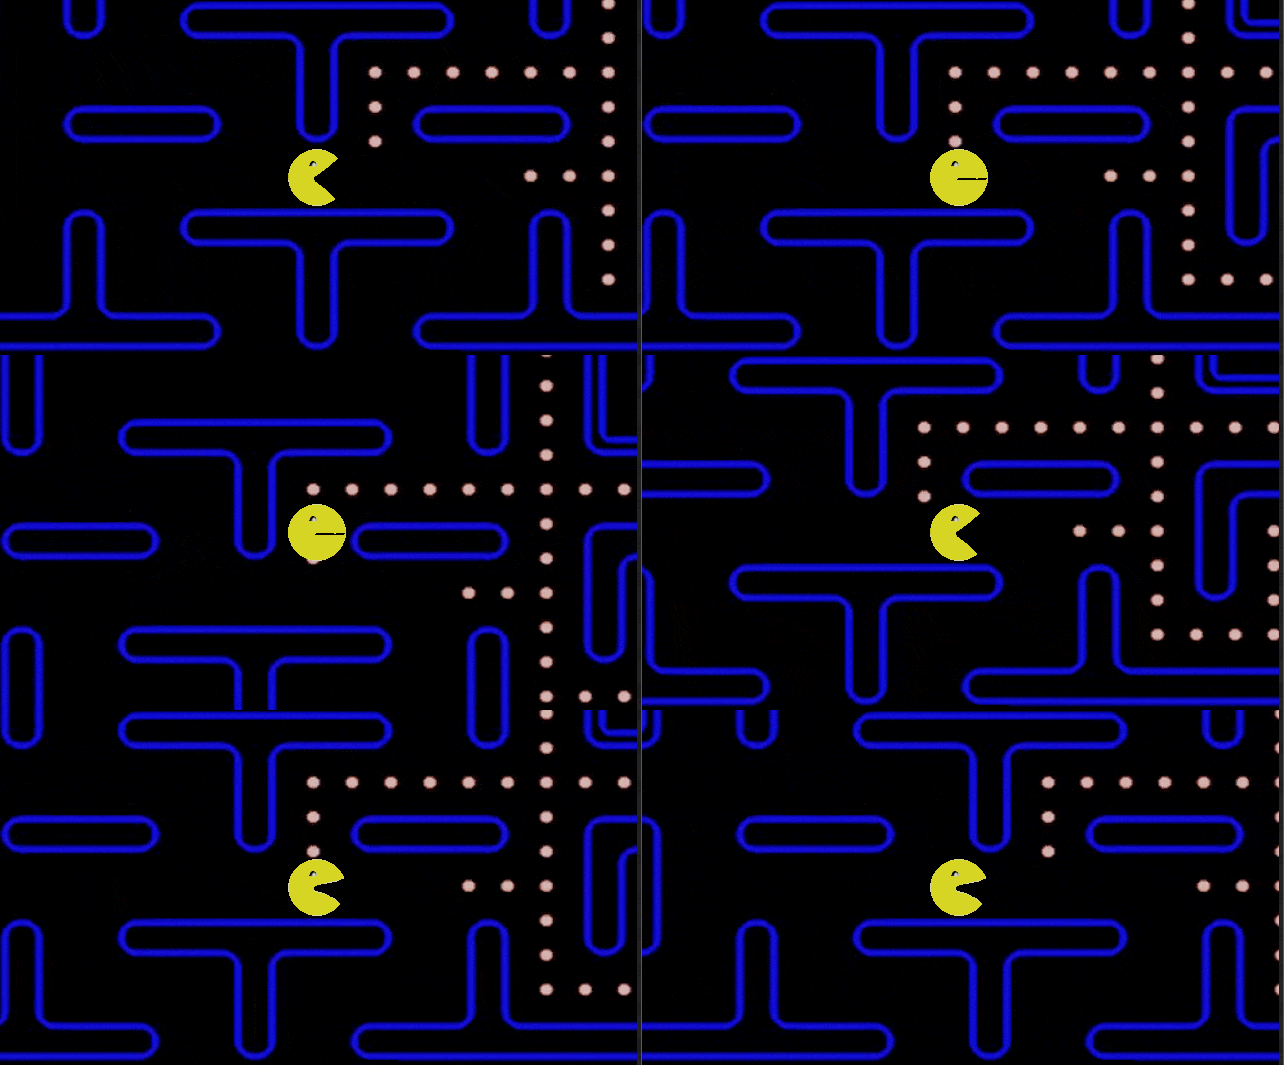
In case you didn’t know, you can rectangle select a region of blueprint and replicate it use the traditional cut/copy/paste hot keys. Now we we run our game, we have primitive control over our player:
This is a very very very trivial example, and as you can see, it’s missing some logic for left and right as “definitely not PacMan” doesn’t turn to face the direction we are facing. If you watch the video version of this tutorial I will show a simple way to handle that situation, we are already running pretty long here.
More on Input
The above example was super simple, we simply respond directly to a certain key being pressed. In your game you probably wont end up using this logic. Let’s take a quick look at some more advanced control options before moving on.
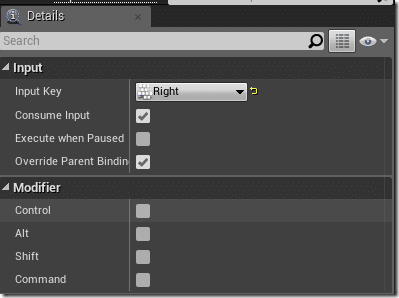
First, there was additional options for the key handling events that I never showed. With a Key event selected in the Details panel you will see additional options:
In addition to changing the key handled you can enabled/disable modifier keys like Ctrl and Shift. You can also control if the keyboard event is handled or will be propagated to the rest of the application by setting Consume Input.
More commonly however, you are going to want to handle Input more generically. Responding to a single key event is all well and good, but what happens when you want the same code to work on a device without a keyboard? Or you want a joystick to do the same thing? Or you want the user to be able to remap their own keys? Well, good news, there is an answer for that.
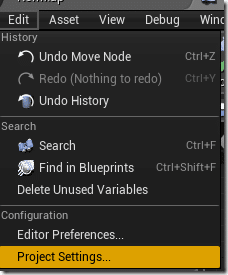
First, select Edit->Project Settings:
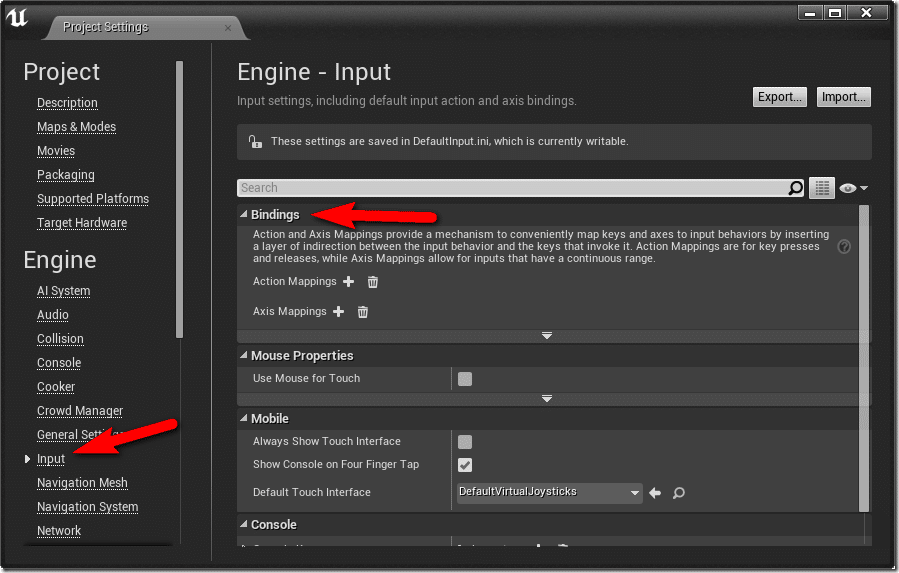
On the left, under Engine select Input then locate the Bindings section:
This area allows us to create input bindings between controls and either an action, or the axis of a controller ( virtual or otherwise ). Let’s look at an example of mapping a “Left” axis.
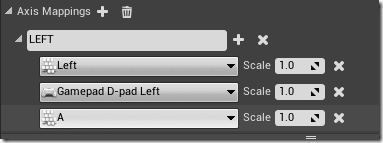
Start by clicking the + next to Axis Mapping, expand the new value and rename it left, then add a key like so:
Now I am going to repeat the task, but also mapping for the left D-pad on a controller and the A key. The end result looks like:
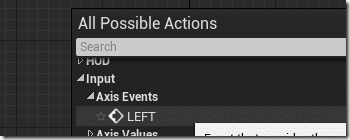
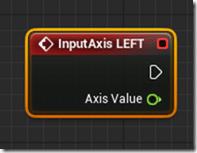
Now instead of handling each controller/key separately they will all emit the same “LEFT” event. When you are creating your input handling blueprint, you can now respond to an Input->Axis Events->LEFT event:
You will notice the Event for an axis has one additional parameter:
Axis value is the “amount” along the axis it is. All of our examples are on/off inputs, but if you had an analog stick, the Axis Value would indicate how far to the left the stick was pressed. Coincidentally, that is the use of the “Scale” property in the Axis mapping process. If for example you wanted the Left arrow key to be equivalent of pushing the Left analog stick 50%, you would set the scale value to 0.5.
Video

