In this tutorial we are going to look at how to use Cameras ( and in the next, Viewports ) in LibGDX. I will admit, I am a bit late in covering this topic, as I should have covered it much earlier in the series. In fact, in some prior tutorials I actually made use of Cameras with little prior discussion. Better late than never, no?
The first immediate question that comes to mind are probably “What’s a camera, what’s a viewport and how are they different?”.
Well, basically a camera is responsible for being the players “eye” into the game world. It’s an analogy to the way video camera’s work in the real world. A viewport represents how what the camera sees is displayed to the viewer. Any easy way to think about this is to think about your HD cable or satellite box and your HD TV. The video signal comes in to your box ( this is the camera ), this is the picture that is going to be displayed. Then your TV devices how to display the signal that comes in. For example, the box may send you a 480i image, or a 1080p image, and it’s your TV’s responsibility to decide how it’s displayed. This is what a viewport does… takes an incoming image and adapts it to run best on the device it’s sent to it. Sometime this means stretching the image, or displaying black bars or possibly doing nothing at all.
So, simple summary description…
- Camera – eye in the scene, determines what the player can see, used by LibGDX to render the scene.
- Viewport – controls how the render results from the camera are displayed to the user, be it with black bars, stretched or doing nothing at all.
In LibGDX there are two kinds of cameras, the PerspectiveCamera and the OrthographicCamera. Both are very big words and somewhat scary, but neither needs to be. First and foremost, if you are working on a 2D game, there is a 99.9% change you want an Orthographic camera, while if you are working in 3D, you most likely ( but not always ) want to use a Perspective camera.
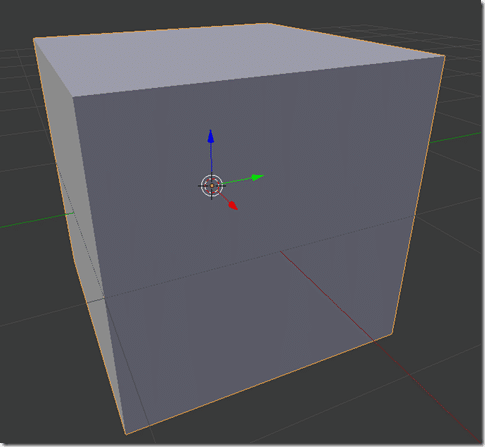
Now, the difference between them. A perspective camera tries to mimic the way the human eye sees the world ( instead of how the world actually works ). To the human eye, as something gets further away the smaller it appears. One of the easiest ways to illustrate the effect is to fire up Blender and view a Cube in both perspectives:
Perspective Rendered:
Orthographic Rendered:
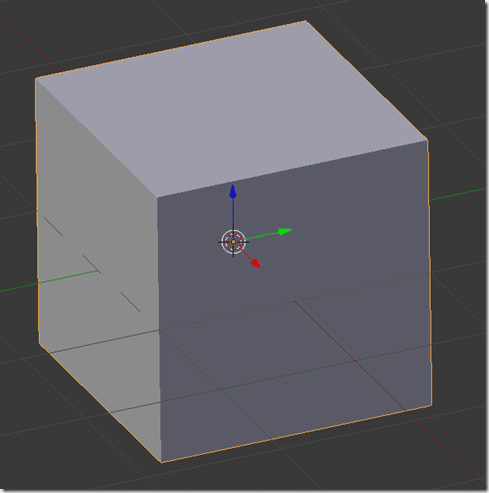
When dealing with 3D, a Perspective camera looks much more like we expect in the real world. However, when you are working in 2D, you are actually still in 3D but for the most part you are ignoring depth ( except for sprite ordering ). In a 2D game, you don’t want objects to change size the further “into the screen” they are.
So, TL;DR version, if you are making a 2D game, you probably want Orthographic. If you aren’t, you probably don’t.
Ok, enough talk, CODE time.
We are going to implement a simple Orthographic camera that pans around a single image that represents our game world. For this demo I am going to use this 2048×1024 image (click it for the full resolution, non-squished version, or make your own):
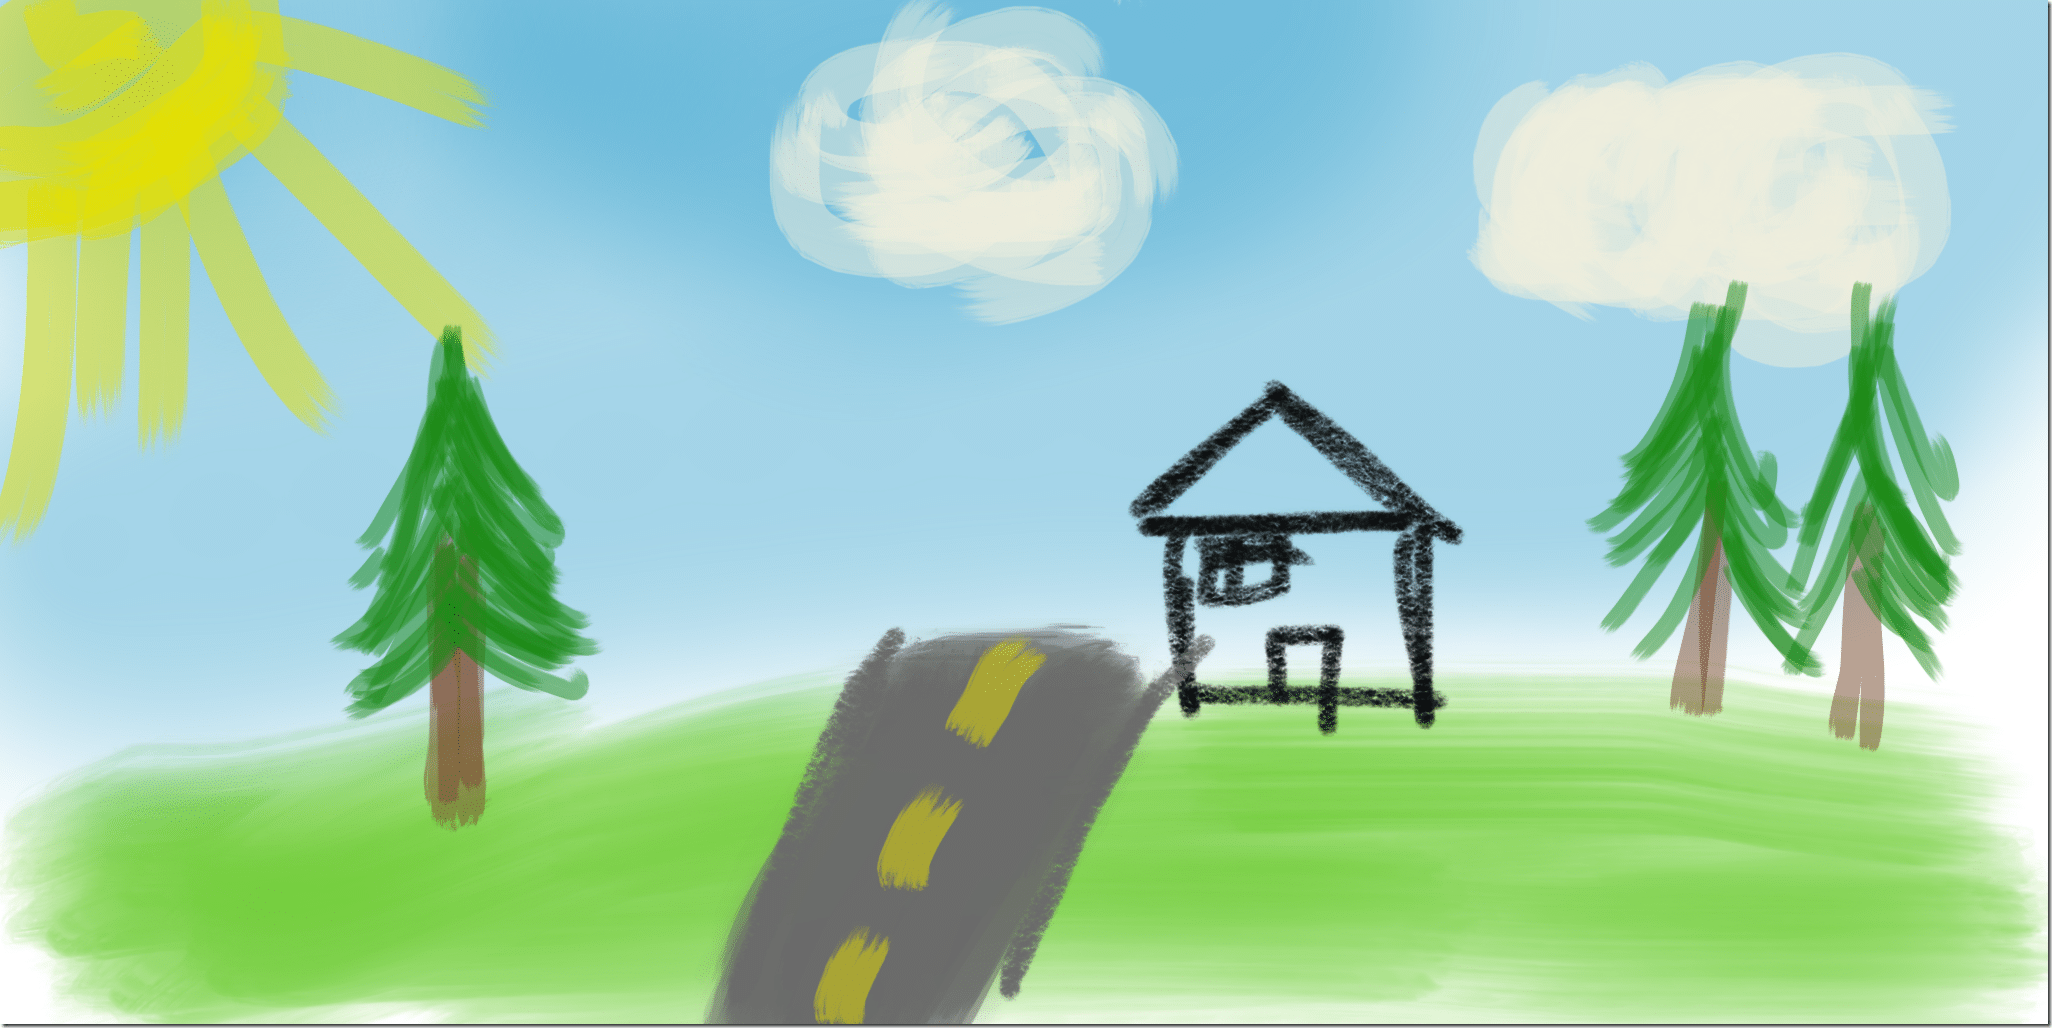
Paint skills at their finest! Now lets look at rendering this using a camera:
package com.gamefromscratch;

import com.badlogic.gdx.ApplicationAdapter;
import com.badlogic.gdx.Gdx;
import com.badlogic.gdx.graphics.GL20;
import com.badlogic.gdx.graphics.OrthographicCamera;
import com.badlogic.gdx.graphics.Texture;
import com.badlogic.gdx.graphics.g2d.SpriteBatch;

public class CameraDemo extends ApplicationAdapter {
   SpriteBatch batch;
   Texture img;
   OrthographicCamera camera;

   @Override
   public void create () {
      batch = new SpriteBatch();
      img = new Texture("TheWorld.png");
      camera = new OrthographicCamera(Gdx.graphics.getWidth(),Gdx.graphics.getHeight());
   }

   @Override
   public void render () {
      Gdx.gl.glClearColor(1, 0, 0, 1);
      Gdx.gl.glClear(GL20.GL_COLOR_BUFFER_BIT);

      camera.update();
      batch.setProjectionMatrix(camera.combined);
      batch.begin();
      batch.draw(img, 0, 0);
      batch.end();
   }
}
The process is quite simple. We simply create a camera, then in our render loop we call it’s update() method then set it as the projectionMatrix of our SpriteBatch. If you are new to 3D ( fake 2D ), the ProjectionMatrix along with the View Matrix are matrix based multiplications responsible for transforming 3D data to 2D screen space. Camera.combined returns the camera’s view and perspective matrixes multiplied together. Essentially this process is what positions everything from the scene to your screen.
Now if we go ahead and run this code we see:
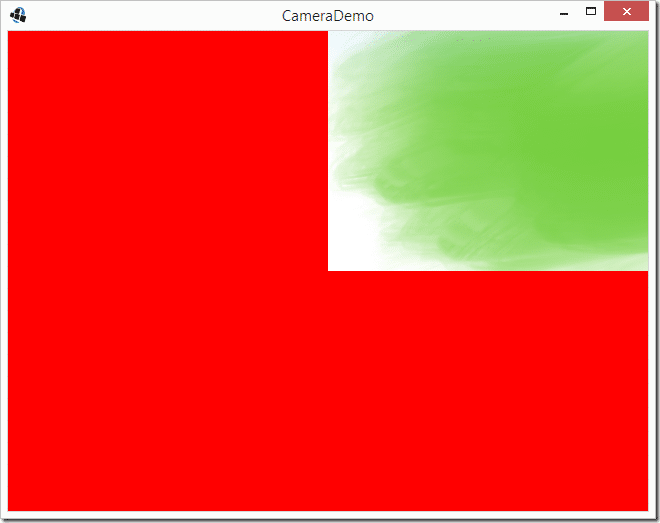
Hmmmm… that may not be what you were expecting. So what exactly happened here?
Well, the camera is located at the position 0,0. However, the camera’s lens is actually at it’s center. The red you see in the above image are the portions of the scene that have nothing in it. So in the above example if you want to start at the bottom left of your world you actually need to take the camera’s dimensions into account. Like so:
camera = new OrthographicCamera(Gdx.graphics.getWidth(),Gdx.graphics.getHeight());
camera.translate(camera.viewportWidth/2,camera.viewportHeight/2);
Now when you run it, the results are probably more along the lines you expected:
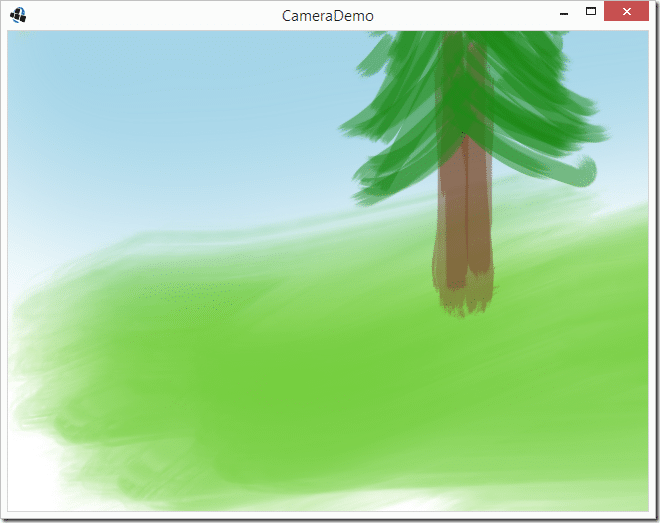
In the previous examples I actually did something you really don’t want to do in real life:
camera = new OrthographicCamera(Gdx.graphics.getWidth(),Gdx.graphics.getHeight());
I am setting the camera viewport to use the devices resolution, then later I am translating using pixels. If you are working across multiple devices, this almost certainly isn’t the approach you want to take as so many different devices have different resolutions. Instead what you normally want to do is work in world units of some form. This is especially true if you are working with a physics engine like Box2D.
So, what’s a world unit? The short answer is, whatever you want it to be! The nice part is, regardless to what units you choose, it will behave the same across all devices with the same aspect ratio! Aspect ration is the more important factor here. The aspect ratio is the ratio of horizontal to vertical pixels.
Let’s take the above code and modify it slightly to no longer use pixel coordinates. Instead we will define our world as 50 units wide by 25 tall. We then are going to set our camera to be the worlds height and centered. Finally we will hook it up so you can control the camera using arrow keys. Let’s see the code:
package com.gamefromscratch;

import com.badlogic.gdx.ApplicationAdapter;
import com.badlogic.gdx.Gdx;
import com.badlogic.gdx.Input;
import com.badlogic.gdx.InputProcessor;
import com.badlogic.gdx.graphics.GL20;
import com.badlogic.gdx.graphics.OrthographicCamera;
import com.badlogic.gdx.graphics.Texture;
import com.badlogic.gdx.graphics.g2d.Sprite;
import com.badlogic.gdx.graphics.g2d.SpriteBatch;

public class CameraDemo2 extends ApplicationAdapter implements InputProcessor {
   SpriteBatch batch;
   Sprite theWorld;
   OrthographicCamera camera;

   final float WORLD_WIDTH = 50;
   final float WORLD_HEIGHT = 25;

   @Override
   public void create () {
      batch = new SpriteBatch();
      theWorld = new Sprite(new Texture(Gdx.files.internal("TheWorld.png")));
      theWorld.setPosition(0,0);
      theWorld.setSize(50,25);

      float aspectRatio = (float)Gdx.graphics.getHeight()/(float)Gdx.graphics.getWidth();

      camera = new OrthographicCamera(25 * aspectRatio ,25);
      camera.position.set(WORLD_WIDTH/2,WORLD_HEIGHT/2,0);

      Gdx.input.setInputProcessor(this);
   }

   @Override
   public void render () {
      Gdx.gl.glClearColor(1, 0, 0, 1);
      Gdx.gl.glClear(GL20.GL_COLOR_BUFFER_BIT);

      camera.update();
      batch.setProjectionMatrix(camera.combined);
      batch.begin();
      theWorld.draw(batch);
      batch.end();
   }

   @Override
   public boolean keyUp(int keycode) {
      return false;
   }

   @Override
   public boolean keyDown(int keycode) {
      if(keycode == Input.Keys.RIGHT)
         camera.translate(1f,0f);
      if(keycode == Input.Keys.LEFT)
         camera.translate(-1f,0f);
      if(keycode == Input.Keys.UP)
         camera.translate(0f,1f);
      if(keycode == Input.Keys.DOWN)
         camera.translate(0f,-1f);

      return false;
   }

   @Override
   public boolean keyTyped(char character) {
      return false;
   }

   @Override
   public boolean touchDown(int screenX, int screenY, int pointer, int button) {
      return false;
   }

   @Override
   public boolean touchUp(int screenX, int screenY, int pointer, int button) {
      return false;
   }

   @Override
   public boolean touchDragged(int screenX, int screenY, int pointer) {
      return false;
   }

   @Override
   public boolean mouseMoved(int screenX, int screenY) {
      return false;
   }

   @Override
   public boolean scrolled(int amount) {
      return false;
   }
}
Now when you run this code:
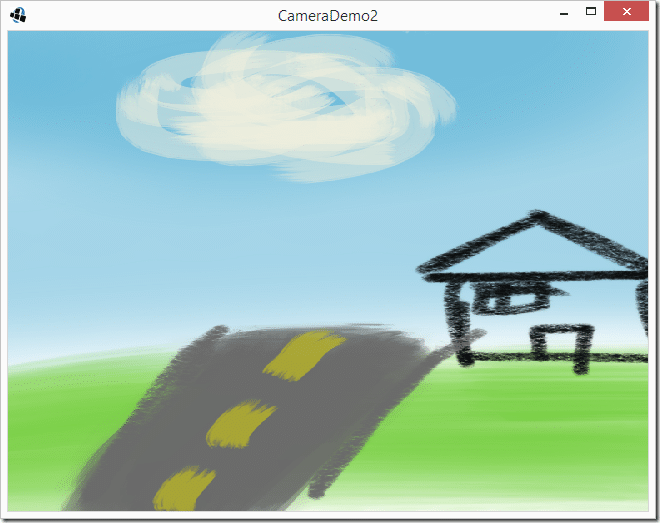
Now let’s look at what happens when we change our application’s resolution. Since we aren’t using pixels anymore, the results should be fairly smooth.
In case you forgot, you set the resolution in the platform specific Application class. For iOS and Android, you cannot set the resolution. For HTML and Desktop you can. Setting the resolution on Desktop is a matter of editing DesktopLauncher, like so:
public class DesktopLauncher {
   public static void main (String[] arg) {
      LwjglApplicationConfiguration config = new LwjglApplicationConfiguration();
      config.width = 920;
      config.height = 480;
      new LwjglApplication(new CameraDemo2(), config);
   }
}
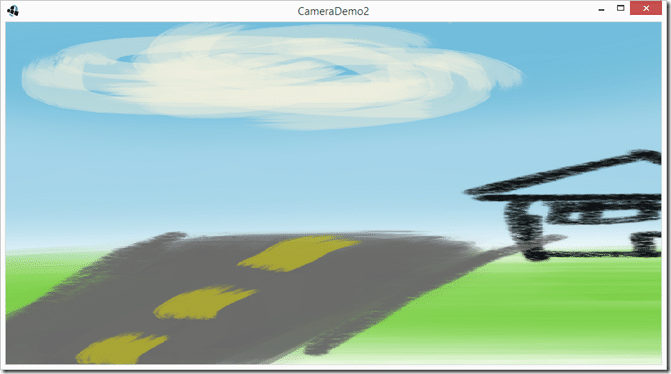
Here is the code running at 920×480
And here is 1280×400:
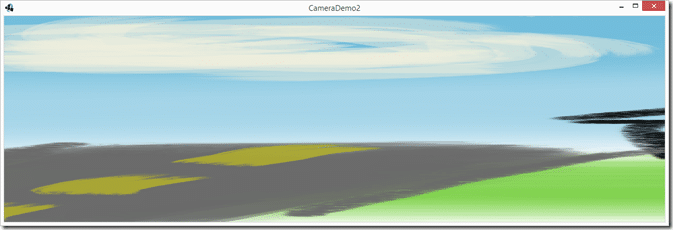
As you can see, the code updates so the results render in a pixel independent way.
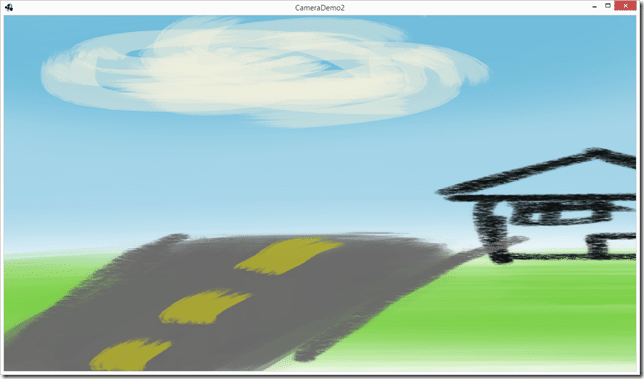
However, and as you can see above, if your aspect ratios don’t stay the same, the results look massively different. In the previous example you can see in the 1280×400 render, the results look squished and the world contains a great deal less content. Obviously, the values I used to illustrate this point are pretty extreme. Let’s instead use the two most common different aspect ratios, 16:9 ( most Android devices, many consoles running at 1080p ) and 4:3 ( the iPad and SD NTSC signals ):
16:9 results:
4:3 results:
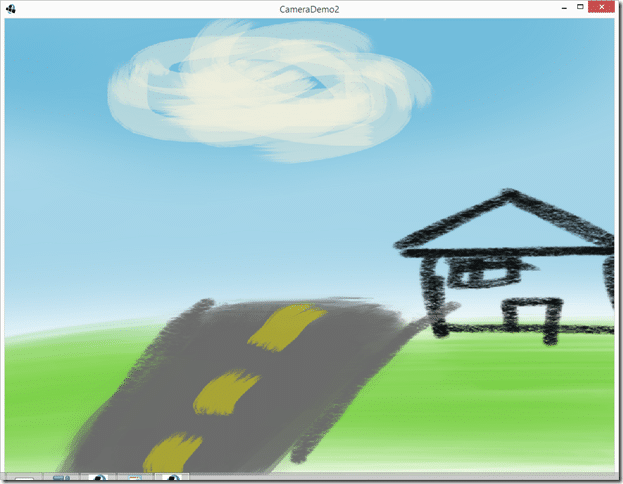
While much closure, the results are still going to look rather awful. There are two ways to deal with this, both have their merits.
First, is create a version for each major aspect ratio. This actually makes a great deal of sense although it can be a pain in the butt. The final results are the best, but you double your burden for art assets. We will talk about managing multiple resolution art assets in a different tutorial at a later date.
Second, you pick a native aspect ratio for your game to run at, then use a viewport to manage the different aspect ratios, just like you use the aspect button on your TV. Since this tutorial is getting pretty long, we will cover Viewports in the next section, so stay tuned!
