There is an old law, possibly predating the age of man, that all tutorials must start with Hello World. I am nothing if not law abiding, so therefore let’s create a Hello World app. Hello World is generally one of the simplest programs you can create, you simply display the words Hello World on screen. Of course, there are always complications in life… that’s what makes it interesting!
To get started I created a simple project using the Project Setup tool we discussed in the prior tutorial.
We are going to jump in with the code in a second, but first let’s take a quick look at the code created by the project tool, gdx-setup-ui. Your project should look like this:
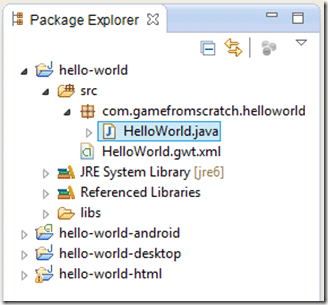
Obviously your file names will vary depending on what you used during the project setup tool. The key thing to note is the basics of how code is laid out. The non-suffixed folder ( hello-world ) is where the shared code goes. The –android, –desktop and –html folders are where platform specific code goes and hopefully you will have minimal need to use these. I will look at them a bit closer in a few minutes, but for now it’s the file HelloWorld.java that we are interested in. This is where a very important class called an ApplicationListener is implemented. Here is the code I used:
package com.gamefromscratch.helloworld;

import com.badlogic.gdx.ApplicationListener;
import com.badlogic.gdx.Gdx;
import com.badlogic.gdx.graphics.Color;
import com.badlogic.gdx.graphics.GL10;
import com.badlogic.gdx.graphics.g2d.BitmapFont;
import com.badlogic.gdx.graphics.g2d.SpriteBatch;

public class HelloWorld implements ApplicationListener {
    private SpriteBatch batch;
    private BitmapFont font;

    @Override
    public void create() {
        batch = new SpriteBatch();
        font = new BitmapFont();
        font.setColor(Color.RED);
    }

    @Override
    public void dispose() {
        batch.dispose();
        font.dispose();
    }

    @Override
    public void render() {
        Gdx.gl.glClearColor(1, 1, 1, 1);
        Gdx.gl.glClear(GL10.GL_COLOR_BUFFER_BIT);

        batch.begin();
        font.draw(batch, "Hello World", 200, 200);
        batch.end();
    }

    @Override
    public void resize(int width, int height) {
    }

    @Override
    public void pause() {
    }

    @Override
    public void resume() {
    }
}
The first thing you may notice is… there’s no Main! Well there is one and we will take a look at it in a second. At the end of the day though, LibGDX is an event driven engine. You implement an ApplicationListener and GDX calls a number of functions that you can respond to. The render() method will be called each frame, so if you want to, you can think of that as your event loop. Otherwise there are functions that are called in response to various events, these include create, resize, pause and resume. I imagine you can guess what event each one is in response to!
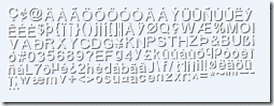
The bulk of our code is in create() and render(). In create() we allocate a new SpriteBatch, BitmapFont and set the font to the colour red. SpriteBatch’ing is a common activity in 2D game engines built over 3D libraries, if you’ve used XNA you are used to it. Basically behind the scenes, LibGDX is using OpenGL ( or WebGL depending on platform ) to do the rendering. In OpenGL there is a fair bit of overhead in drawing … well, anything. A spritebatch combines them all into a single operation to reduce the amount of overhead. In a nutshell, it makes 2D rendering a great deal faster. A BitmapFont is exactly what it sounds like, a 2D bitmap containing all the characters. If you don’t specify a Font in the constructor, you will get the default font Arial-15 included with LibGDX. The font file looks like this:
In the render() method we clear the screen to white by making the OpenGL function call glClear() and glClearColor(). The parameters to glClearColor are the red, green, blue and alpha ( transparency ) values to clear the screen with. The function glClear actually clears the screen. As you can see, the underlying OpenGL functionality is exposed in Gdx.gl, although generally you wont work at that level very often.
Next we start our sprite batch by calling begin(), then render our text to the batch using the font.draw method. The parameters to draw() are the batch to draw to, the text to draw and the x and y coordinates to draw the text at. If you run this code ( right click hello-world-desktop and select Run As->Java Application ) you will see:
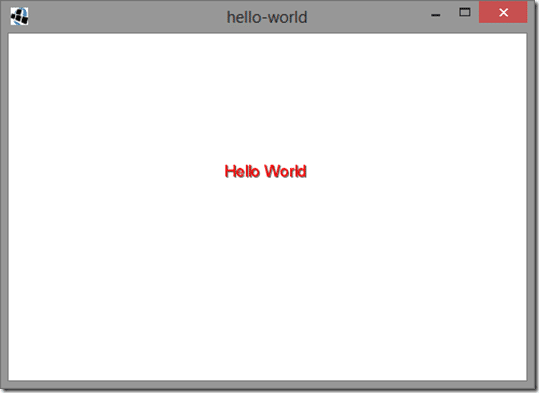
Voila! It’s Hello World.
One important thing to be aware of is the project hello-world is not an application that you can run, its a library used by the other projects. I’ll show you what I mean, take a look at code in hello-world-desktop for example:
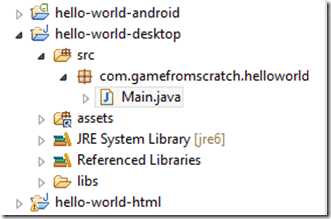
Hey look, it’s Main! Let’s check out the code:
package com.gamefromscratch.helloworld;

import com.badlogic.gdx.backends.lwjgl.LwjglApplication;
import com.badlogic.gdx.backends.lwjgl.LwjglApplicationConfiguration;

public class Main {
    public static void main(String[] args) {
        LwjglApplicationConfiguration cfg = new LwjglApplicationConfiguration();
        cfg.title = "hello-world";
        cfg.useGL20 = false;
        cfg.width = 480;
        cfg.height = 320;

        new LwjglApplication(new HelloWorld(), cfg);
    }
}
This is the actual entry point for your application, or at least it is for the desktop target. This is where the Desktop specific configuration happens. You then start your game off by creating a LwjglApplication object, passing in an instance of your ApplicationListener as well as the Lwjgl specific configuration settings. If Lwjgl is new to you, it’s a Java based game wrapper over top of OpenGL and is what LibGDX uses for desktop rendering. Beyond configuring it here, you will have no other interactions with it, LibGDX takes care of all of that for you.
To really understand how cross platform magic works in LibGDX, let’s also take a look at the Main for the –html project. In this case it’s not actually called Main, but instead GwtLauncher.java.
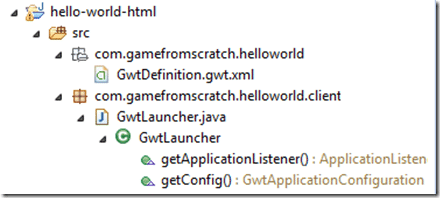
Gwt stands for Google Web Toolkit, and it’s a technology Google provides for compiling Java into JavaScript for use in a browser. It’s the secret sauce that LibGDX uses to make your game run in HTML. It’s also horrifically annoying at times, you have been warned! That said, if you dont care about HTML, you can remove this project completely and save yourself a number of headaches.
Let’s take a look at GwtLauncher.java:
package com.gamefromscratch.helloworld.client;

import com.gamefromscratch.helloworld.HelloWorld;
import com.badlogic.gdx.ApplicationListener;
import com.badlogic.gdx.backends.gwt.GwtApplication;
import com.badlogic.gdx.backends.gwt.GwtApplicationConfiguration;

public class GwtLauncher extends GwtApplication {
    @Override
    public GwtApplicationConfiguration getConfig () {
        GwtApplicationConfiguration cfg = new GwtApplicationConfiguration(480, 320);
        return cfg;
    }

    @Override
    public ApplicationListener getApplicationListener () {
        return new HelloWorld();
    }
}
Look’s a lot like the –desktop project main doesn’t it? The basic concept is exactly the same, you create the platform specific configuration bits, and create an instance of your ApplicationListener. The GwtApplication class is callback based however, so it looks a bit different. Once again, you should rarely be working at this level. One important thing to note though is the values being passed to GwtApplicationConfiguration… this represents the size of the HTML canvas being created. So if you want your HTML app to be more than a small square in the middle of the screen, this is where you change it.
So basically LibGDX works by having you create a single common library that implements your game in a cross platform way in the form of an ApplicationListener. To support multiple platforms, you have a project for each platform where you create a platform specific application ( an instance of GwtApplication in the case of HTML targets, LwjglApplication for desktop targets, AndroidApplication for Android targets, Application for iOS targets… not shown because I am working on Windows currently ) , configure it and pass in the ApplicationListener. It is this application class that will be calling back to your ApplicationListener each frame. The nice news is, most of the time, you wont care about any of this… but it’s handy to understand what’s happening behind the curtains.
Oh yeah… about GWT
Remember I said it was a bit of a pain? Well let’s take a look at what happens when you run the hello-world-html application ( right click hello-world-html->Run As->Web Application):
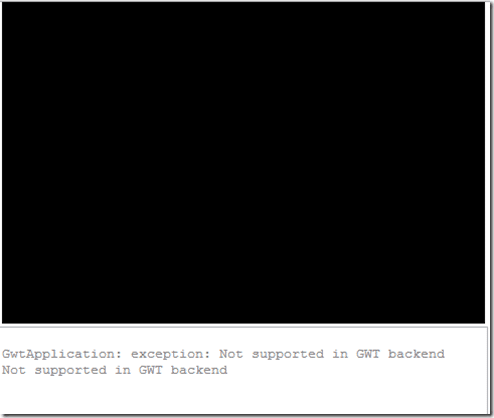
Ugh… so basically our code is trying to do something GWT does not permit. If we flip back to Eclipse in the Console panel we can get a bit more insight into the nature of the exception.

It’s line 17 in HelloWorld.Java that is causing the exception:
font = new BitmapFont();
So, what exactly is going on here? Well, remember earlier when I told you that BitmapFont’s default constructor would use the built-in arial-15 font. Well, when I said built in, that file actually resides in gdx.jar which is included in your project. A jar file is actually just a zip, so if you extract the file you can see all the code and assets that make up the gdx library itself. Of particular interest to us is the folder gdxcombadlogicgdxutils, this is where the font file resides among other files:
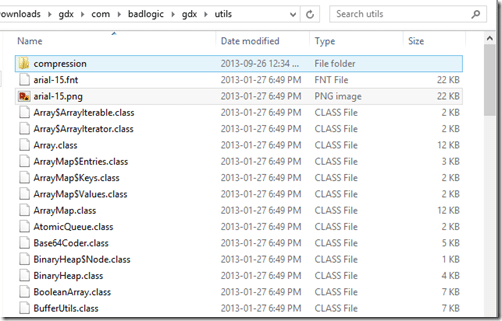
Basically the GwtApplication is trying to access this file and doesn’t have permission to do so. What’s the moral to the story? Cross platform is awesome… but not always free! Unless you need to support HTML, I would suggest not creating an HTML project, as it is by far the most fragile part of LibGDX and working with GWT causes all kinds of heartache and complication. Your mileage may vary!
That said, there is a very simple fix to this, and it nicely illustrates how you deal with files between your projects… a process that may not be particularly intuitive. The simple solution is to add the files arial-15.fnt and arial-15 to the project and change the line:
font = new BitmapFont();
to
font = new BitmapFont(Gdx.files.internal("data/arial-15.fnt"),false);
This version of BitmapFont’s constructor takes a file handle of the font file you want the BitmapFont to use. Gdx.files is used for file manipulation, internal returns a file handle to a file that is included within the project. The false parameter is specifying that the font’s graphic isn’t flipped upside down.
So, how do you actually add the file to the project? You add them to the assetsdata folder of the hello-world-android project:
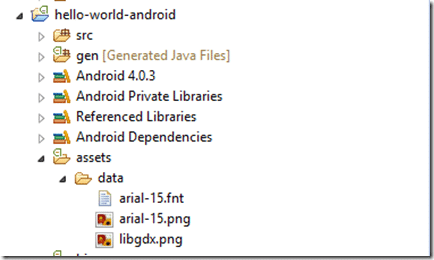
You can add the files by simply dragging/dropping from Finder or Explorer to the data folder in the Package Explorer.
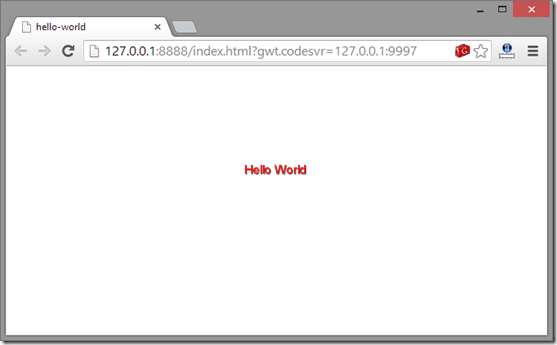
Now that the font file has been added, we can now run the HTML target:
So that’s Hello World in LibGDX. Next up we look at something more advanced than Hello World.
