Now that Project Anarchy is out, I’ve decided to take a look at what you actually get. If you’ve never heard of it before, Project Anarchy is a collection of Havok game 
**Update: Project Anarchy was shut down in 2016. Broken links have been removed.
When I started this post, I expected it to be rather short… boy was I wrong. Let’s just say, you get a LOT in this package. This post will give you a pretty good idea of what you get in Project Anarchy and should give you an idea of its capabilities.
Getting started and help contents
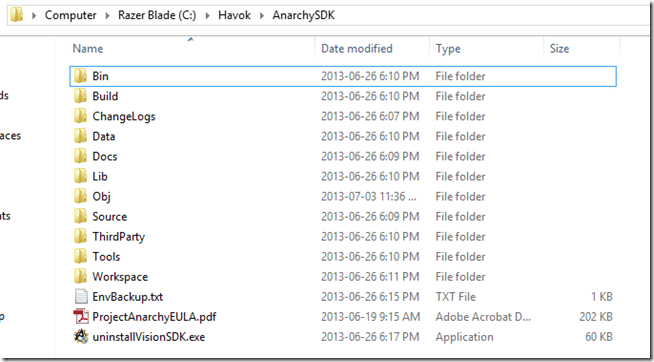
After installing, you should have a folder structure like this:
One important thing to keep in mind, to develop for iOS you need a Mac and need to perform a different download. Also, it is important to note that the vast majority of Project Anarchy’s tools do not run on MacOS. So basically, you will need a Windows and Mac machine if you want to do iOS development. That’s pretty much normal at this point in time though.
A bit of a warning, Project Anarchy isn’t the only thing you will need to install. To do Android development on Windows, you will also need the Android SDK and NDK installed, Visual Studio 2010 or higher ( Express works, but lacks Android debugging), as well as the Java 1.6 JDK. Notice again, 1.6, not the newest version! Seems a common trend for developer tools to require Java 6 instead of 7. If developing for iOS, you need to have XCode and the iOS SDK installed. There is a document specifically about getting started with Android and iOS that walks you through the process in more detail.
Documentation and learning resources
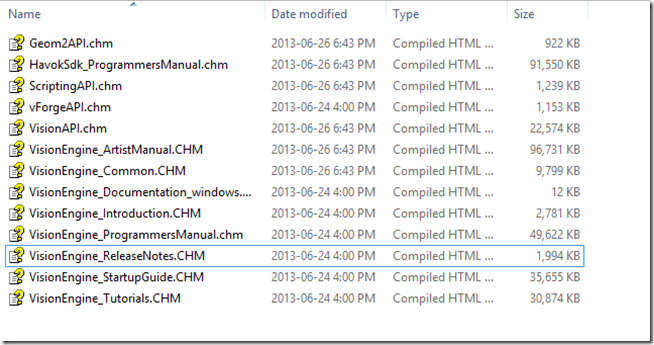
The documentation shipped with Project Anarchy is in a word impressive. A great deal of the documentation is installed locally. The directories that will be of immediate interest to most developers are DocsVisionwindows, DocsVisionandroid, DocsVisionios, although confusingly enough, they seem to contain only slightly modified versions of the exact same documents! So, if you want to shave 600MB or so from your install, you can probably start here. The VisionEngine_Documentation_platformname.chm file is the master index, pulling all the other documents together. Project Anarchy includes the following documents:
As you can see, a pretty comprehensive set of documentation. The Startup Guide is the most logical place to start. It gives you an overview of the various tools, a short Lua scripting primer, etc. Perhaps coolest of all, there is a full sample project with assets that you can play around with. These assets are referenced multiple times in the documentation. There are actually a ton of assets for anyone to get started with, especially if you don’t have immediate access to Maya or 3DS Max.
In addition to the documentation installed locally, there are a series of video tutorials available, covering vForge, Animation and the basics of scripting. The quality of the videos varies massively from very good to… not. There are also a series of courseware, which you can think of like tutorials that are targeted towards school curriculums. The courseware series all revolve around the sample project you can download here (direct link, 100mb in size). Additionally, they have a StackOverflow style question and answer page as well as a remarkably active forum, considering the age of the project.
All told, the information available is quite good. That said, I’ve done a fair bit of jumping into the documentation and it’s a mixed bag. It’s well enough written and generally useful. That said, it has some serious legacy issues, as much of this obviously was inherited from Havok tools, and they’ve been around for a long time. For example, I found configuration details for Metrowerks Codewarrior… a compiler that might be older than some of the people reading this right now! So there is a huge amount of documentation, but figuring out which parts you need might be a bit of a challenge. In the end, though, it’s much better than I was expecting and a very well documented and supported SDK. You can tell they put some focus on documentation/new user experience, and it shows.
vForge
In many ways, vForge *IS* Project Anarchy, in the same way, Unity Studio is Unity. This is where you create your levels, write your scripts, create landscapes, etc. Basically it’s the glue that holds all the other pieces together.
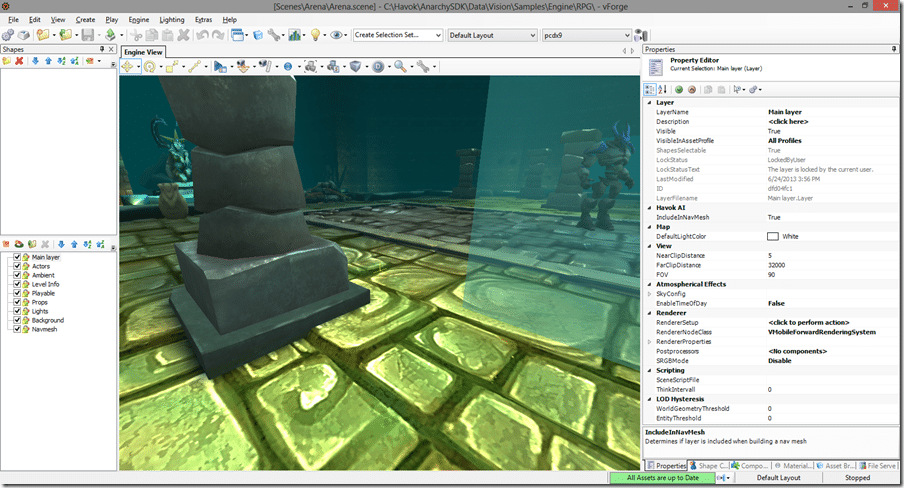
Here is vForge with the RPG project loaded and the Arena scene open. FYI, the RPG project is available at DataVisionSamplesEngineRPG
You can navigate around the scene using the mouse. Aiming with mouse, left mouse button to move in the direction your are looking, right mouse button to change your look direction. You can also configure it to use WASD keys for navigation if that is your preference. See where it says “Default Layout”, this is where you can change the layout between the various things you might want to do in vForge, such as script editing, particles, etc. You can also define your own custom layouts, or use almost every panel as undocked, which is nice on a multi monitor setup.
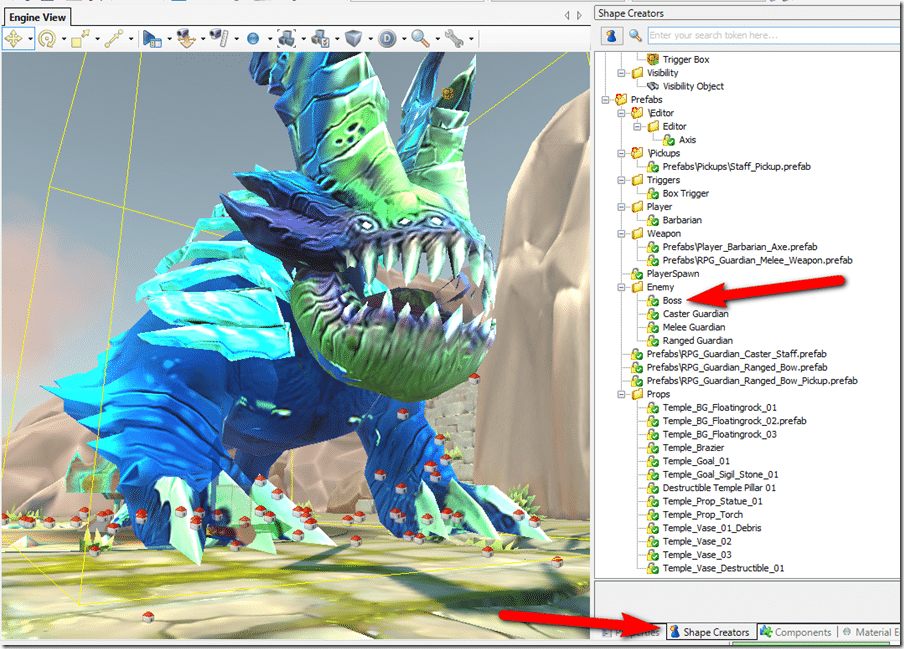
In Engine View, this is where you can place items in the scene. Here, for example, I instanced a BOSS shape from the Shape Creators tab by dragging and dropping onto the Engine View.
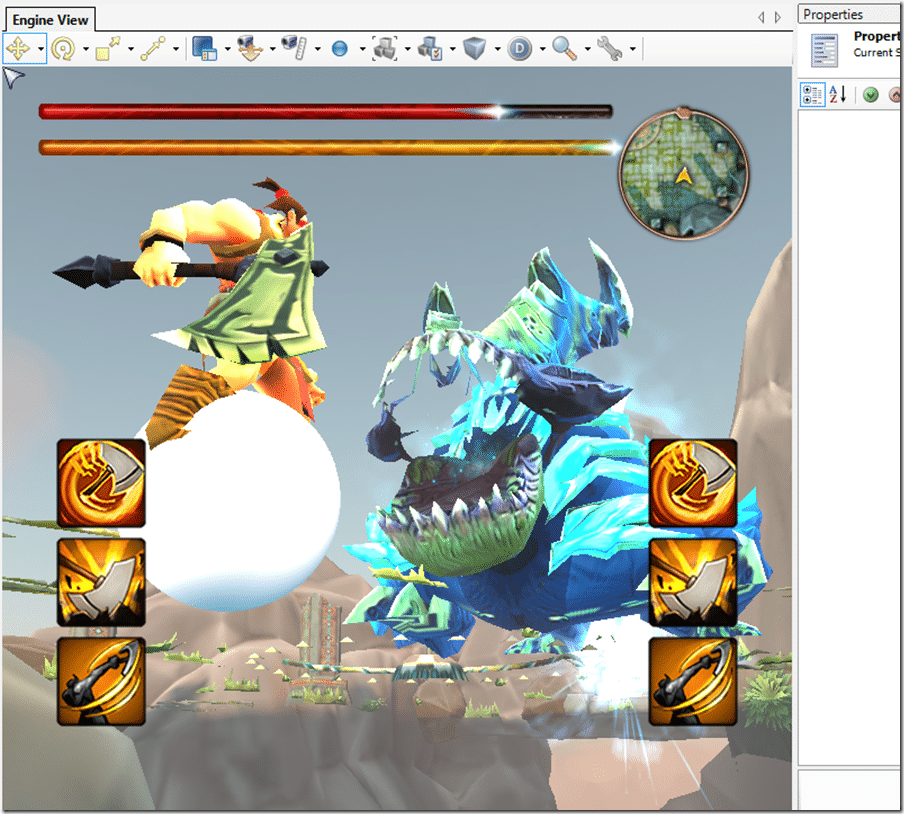
Press the Play icon in the Engine View toolbar, and your game will start playing, UI and all ( animated obviously… ):
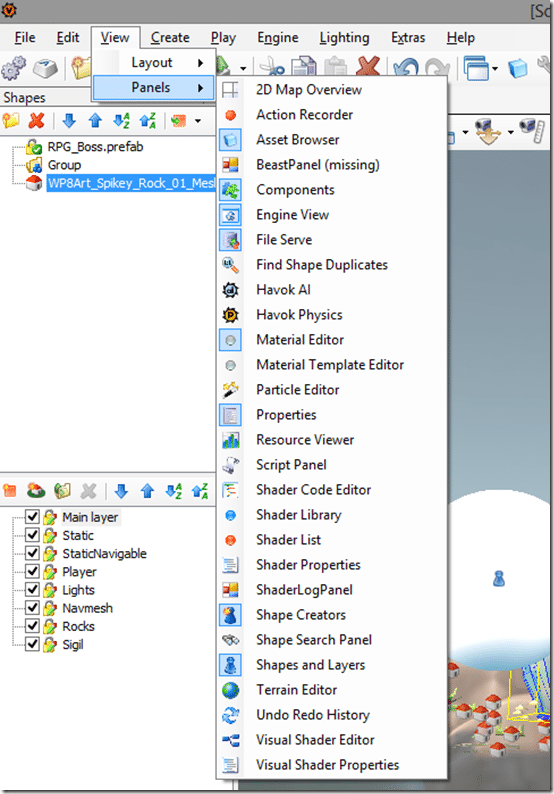
So, vForge is where you place game objects, but that’s just scratching the surface. There are a staggering number of tools embedded in here… see:
We will look at many of them shortly.
Script Editing and debugging
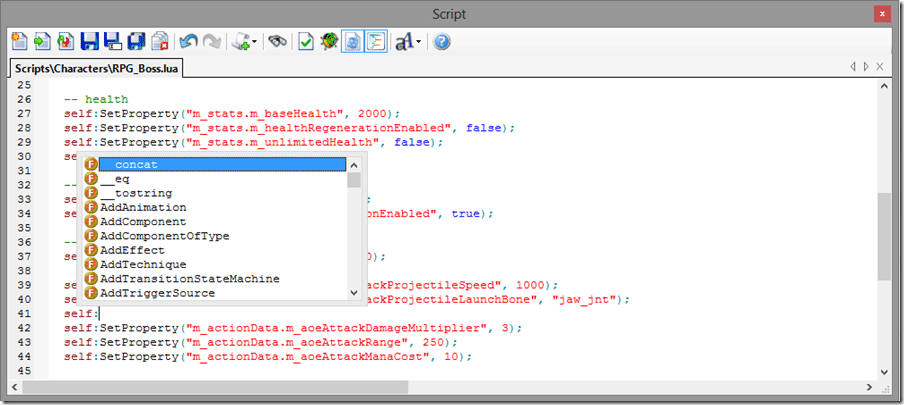
For example, opening the Script Panel, brings up a script window. Here is the Boss script:
As you can see, the script editor has full IntelliSense support, well if that wasn’t a trademarked Microsoft term that is. What’s the non-trademarked term… code hints? Anyway… it has them, and I love ‘em. It’s not as detailed as you might be used to in Visual Studio, but it is a great help. That ? icon to the right brings up context sensitive help too, so highlight a function name and click that button and it will open the reference help to that entry if found. Handy.
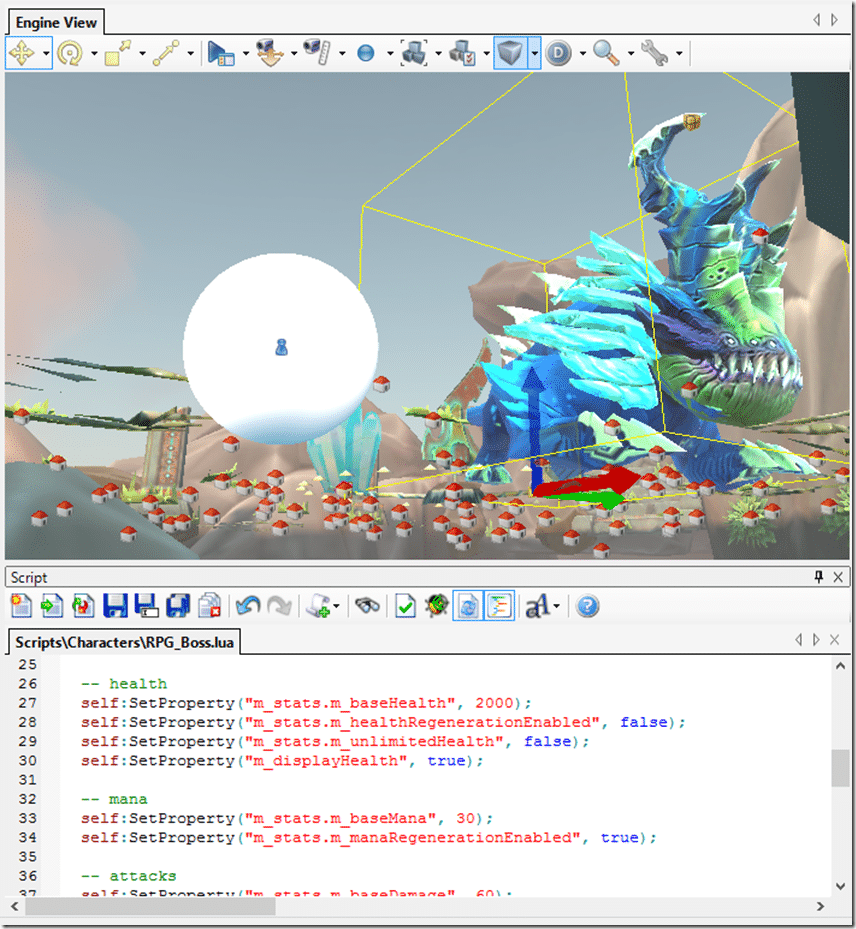
Each of these floating panels can also be docked within the main editor, here is the script panel docked below the Engine View for example:
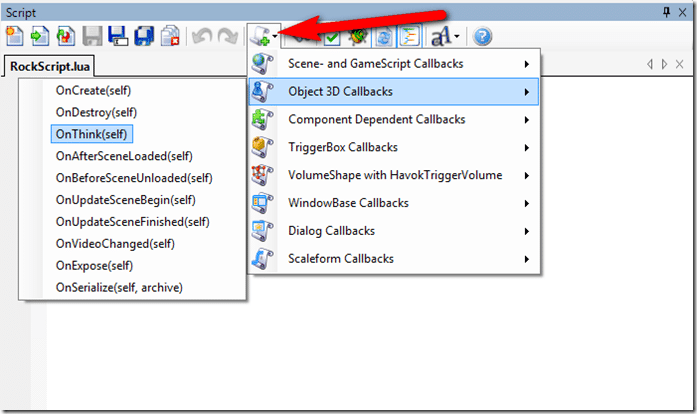
The script editor looks remarkably simple, but there is a great deal of functionality hidden in there. For example, there is a full snippets library:
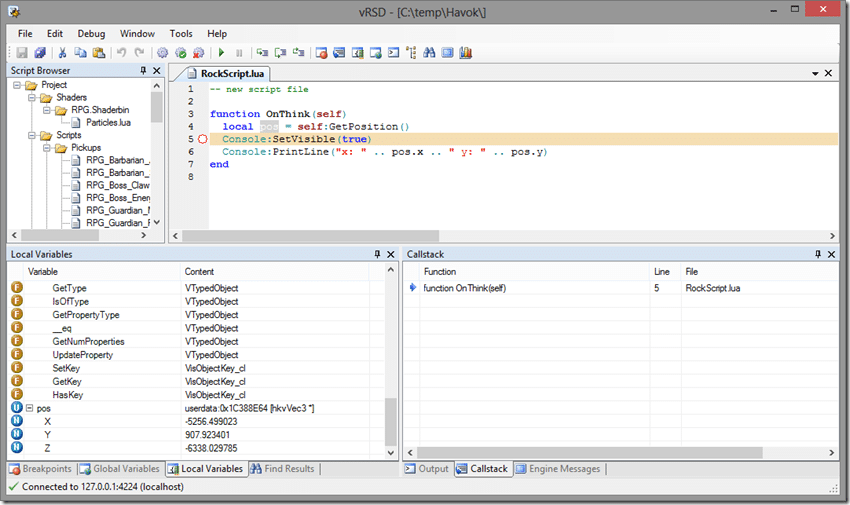
In addition to the Script Editor, there is also a full script debugger:
With all of the traditional components you would expect, breakpoints, watches, type inspection, it even allows you to connect to a remote device for debugging.
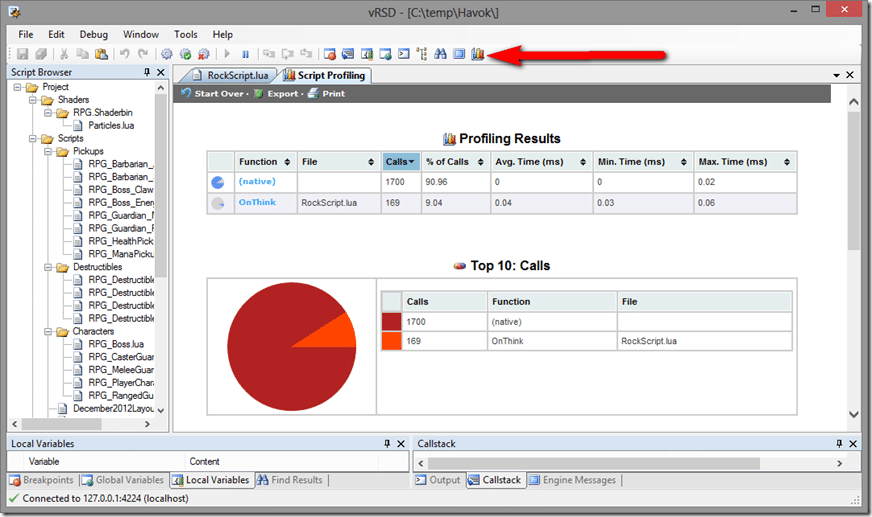
Perhaps coolest of all, by clicking the highlighted debugger, you can invoke the code profiler.
Allowing you to identify performance bottlenecks in your scripts.
Terrain
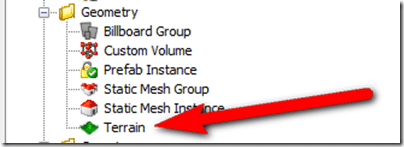
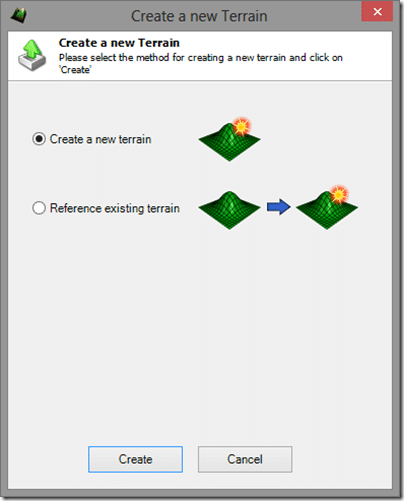
Creating Terrain in vForge is a straight forward process. In the Shape Creators tab, simply drag a Terrain over to your scene:
You will then be prompted with this dialog:
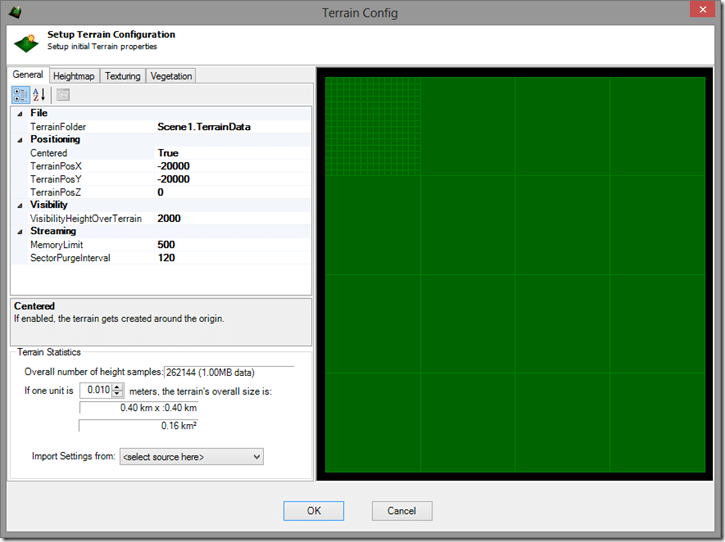
Then its a matter of configuring your terrain:
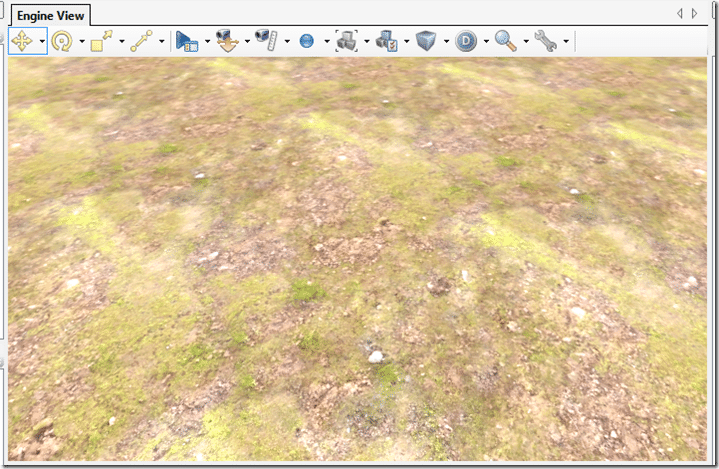
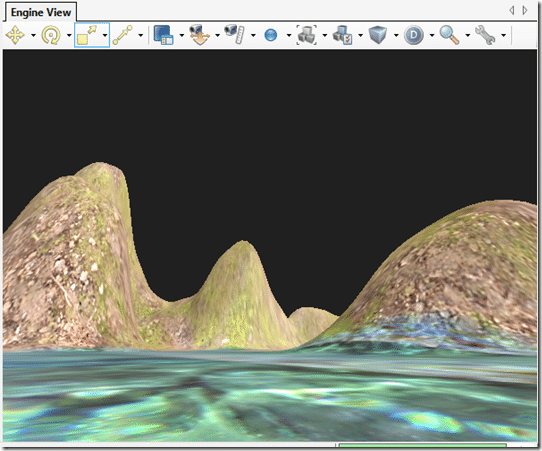
And presto, our landscape, using the default settings and sand texture:
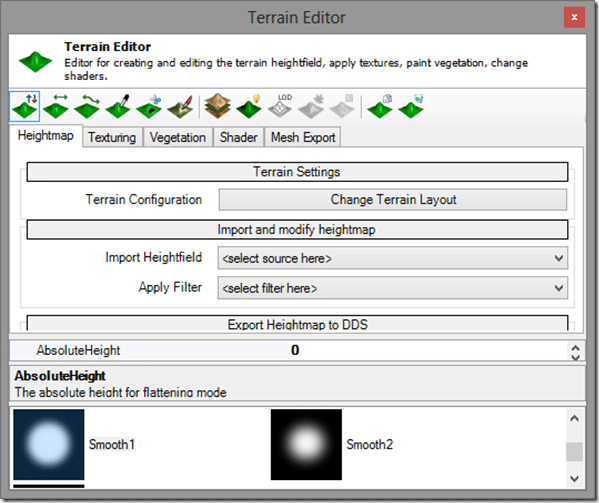
Now fire up the Terrain Editor and you can raise, drop, smooth, paint, etc… your terrain. Select the tool, and hold down SHIFT or CTRL and Left Click to paint.
And after playing around for a few minutes:
Obviously I am just playing around and using a fraction of the tools. You can paint mesh (instances) directly on to the terrain, paint billboards ( textures that always face the user, useful for grass and similar effects ) as well as set up skyboxes including full day/night cycles.
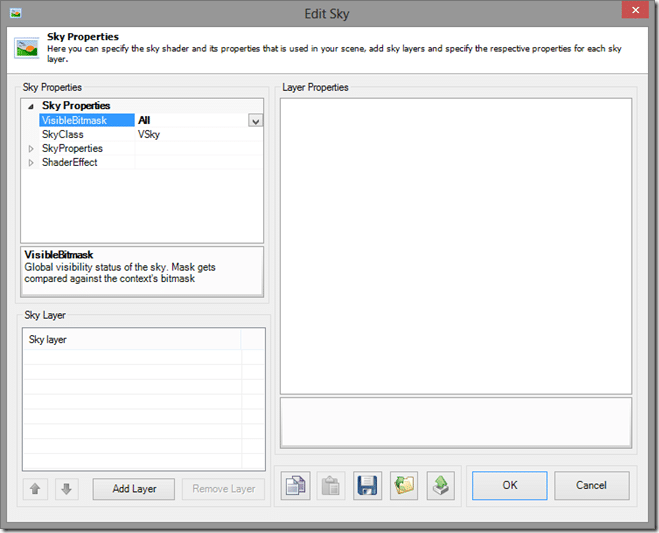
In fact, there are dialogs for editing the sky:
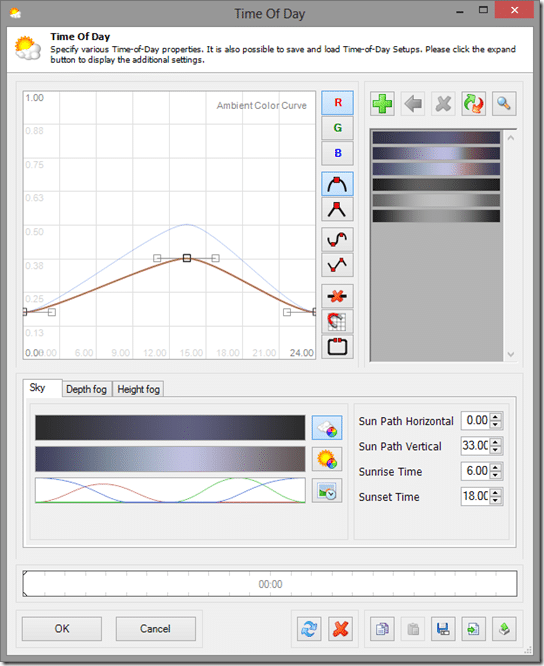
Editing time of day, including the effect, sunset and sunrise times:
As well as fog editing and post processing effects ( glow and tone mapping, two settings you chose when initially creating your project ). So the terrain editing tools are fairly comprehensive.
Particles
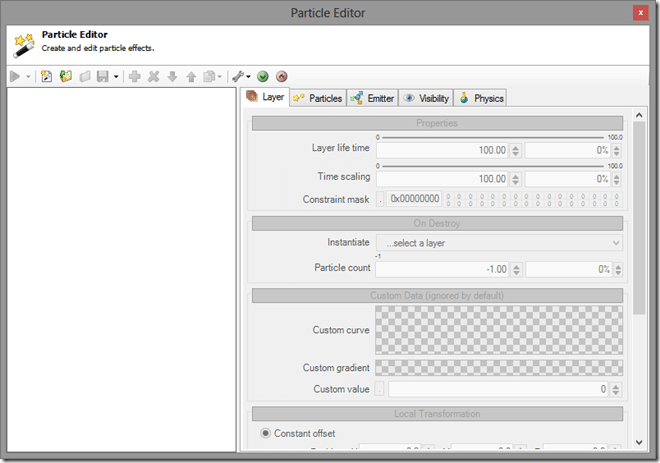
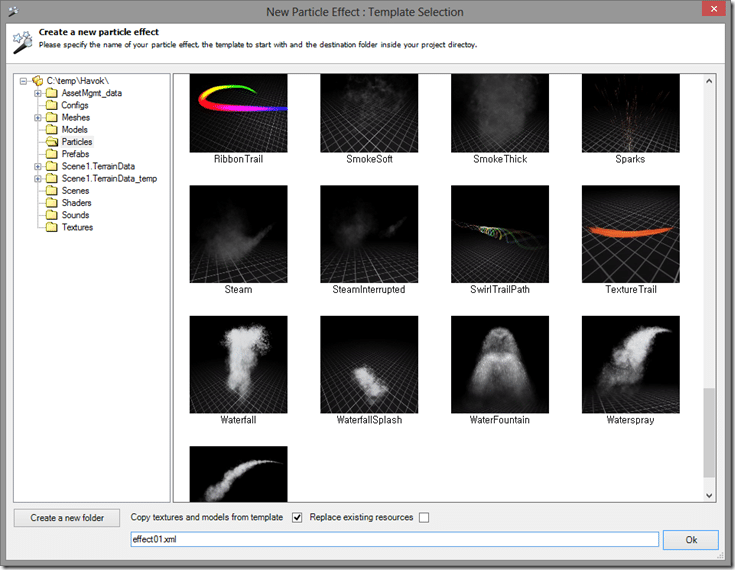
Of course, particles are a heavy part of almost every modern tool and of course, vForge includes a suite of tools for working with/ creating particle systems. In the form of the particle editor:
This is one of those things I have always sucked at, so it was comforting to see the templates when I clicked the Create a new particle effect button:
The actual editor has a few hundred different settings for your particle system, if you create a particle system, then set it to your newly created system, you can press the play button and watch your change in real time.
Physics Integration
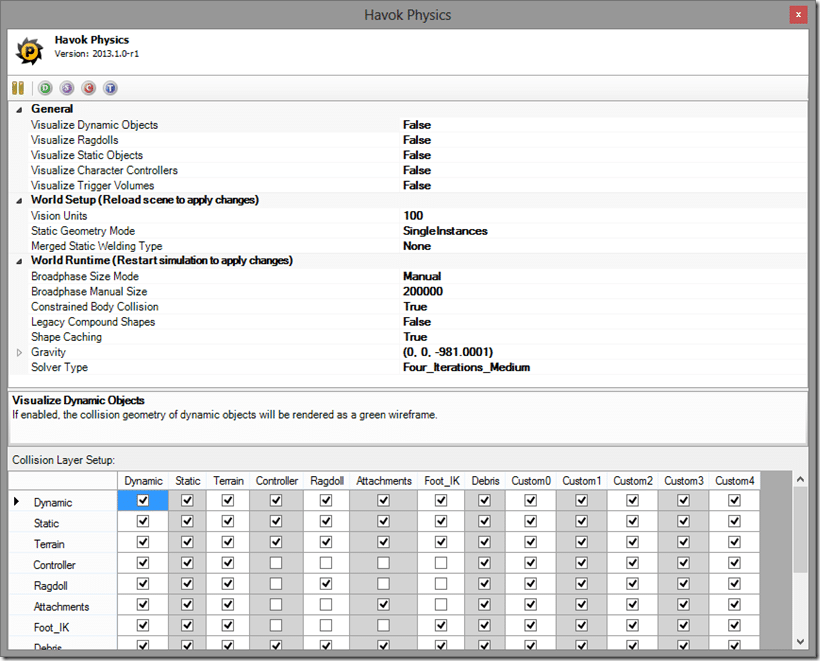
As you can see, Havok Physics is also directly integrated into vForge
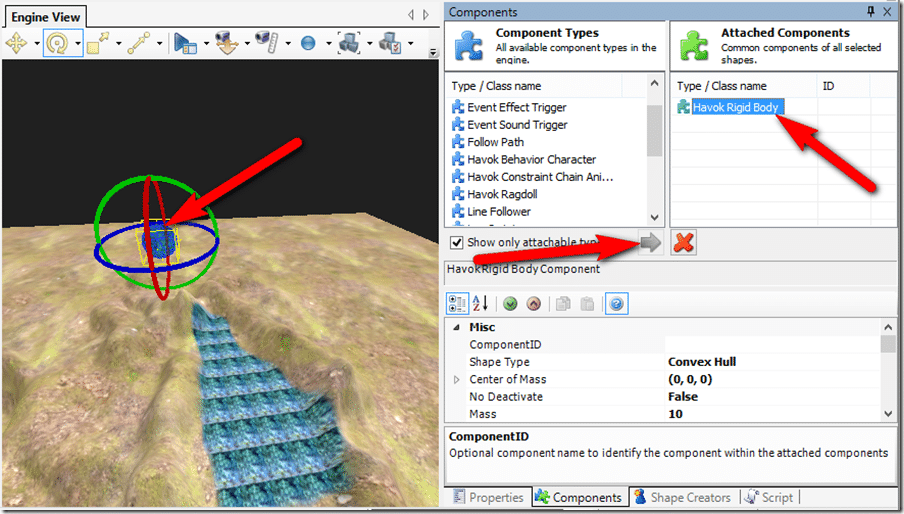
Of course, that is only part of the physics equation… the global part. You are of course going to need to add physics to your scene. This is accomplished by means of components. Add an entity to the scene, define its model type, then you can add a component easy enough. In this case, I’ve added an entity with a ball model.
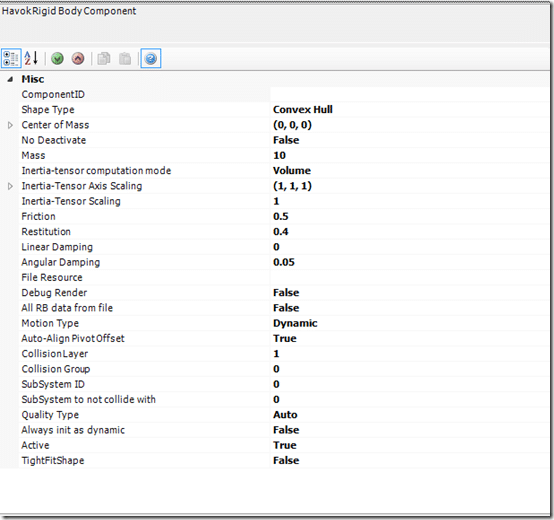
Here we selected then entity then added the Havok Rigid Body controller. As you can see, there are a number of parameters you can play with for Rigid Bodies:
Of course, rigid bodies aren’t your only option when it comes to physics. There are a number of constraints you can add as well ( under the Shape Creators ), such as adding a Terrain constraint to the Terrain object, which will then cause our Rigid Body Ball in interact with the terrain.
Mobile Helpers
Mobile development has its own special difficulties, two of which Project Anarchy has a nice solution to.
The first common issue is the deploy cycle. Generally what you do (on Android) is create an APK, which is your application and all of its data bundled together into a single package. So what happens when you change a few small things then want to test it on device? Well, you create a new APK file and deploy it. As your application grows in size, this process gets more annoying.
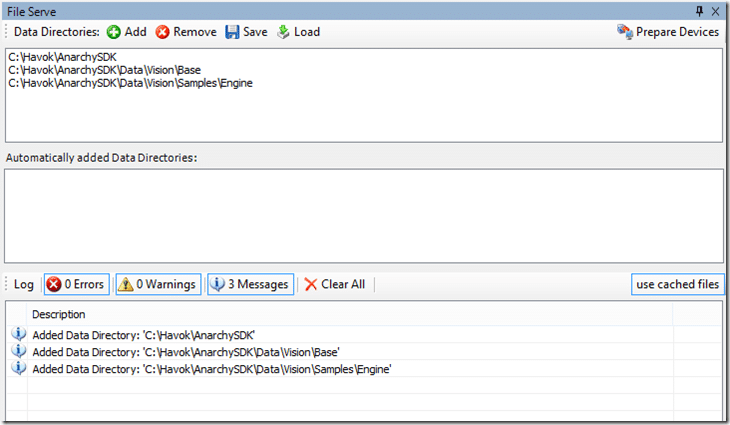
Enter vFileServe, which can either be run in vForge or as a stand alone application.
Essentially it acts as a virtual file system. You deploy an application to your device ( using the Prepare Devices Button), which then syncs files between your device and vFileServe using wireless. This allows you to make changes and do rapid on device testing.
Another common problem with developing for mobile devices is emulating the controls. Multi-touch and motion controls specifically are often difficult to replicate on a PC. For this Havok provide the vRemoteInput plugin, which enables you to use a mobile device to control vForge. It is enabled in code however, so there is very little I can show in terms of screenshot. Basically once enabled, when you go into “play” mode, your game can be controlled using your device’s touch screen and motion sensors.
Shaders
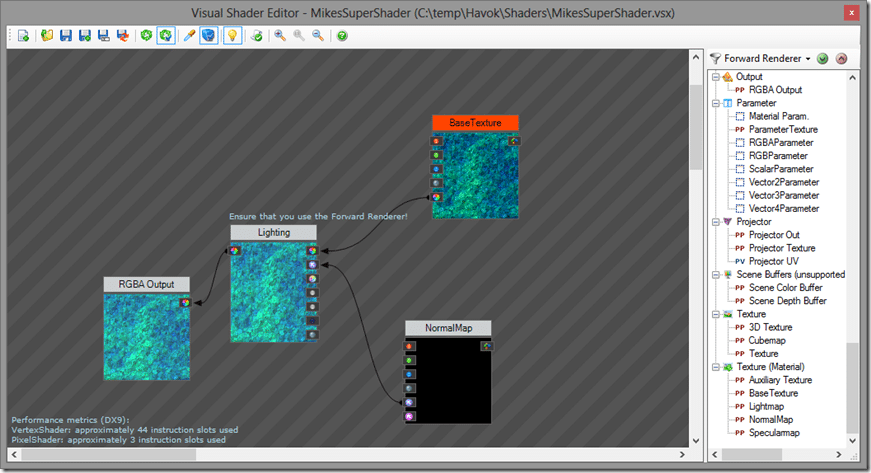
There are also comprehensive tools for dealing with shaders. The first and easiest to use is the Visual Shader Editor:
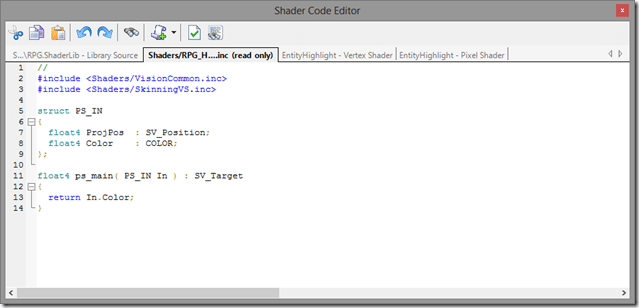
This tool enables you to create shaders by linking items and operations together. For those that prefer direct access to their shaders, there is also an editor:
On top of this, there are panels for creating and managing shader libraries, property inspectors, and more.
Havok AI
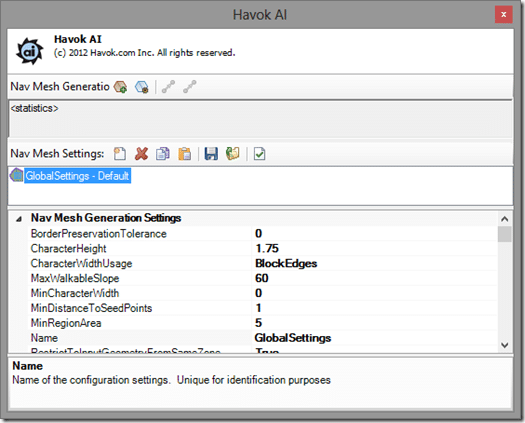
AI is obviously a big part of game programming and the user is often left to roll their own. Not so in Havok, Project Anarchy includes the Havok AI suite. This is a combination of a set of tools integrated into vForge, as well as many AI-related functions available to the programmer.
Here are global AI settings:
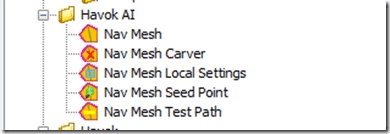
In vForge, you have the ability to set up Nav meshes, which consists of geometry that define the navigable portions of your game:
You also have the ability to makes paths ( bezier splines ) for AI to follow, triggers, and more. The majority of Havok AI seems to be on the developer side, with a large number of api calls for things like determining the best path, etc. I need to look into Havok AI in greater detail later.
Havok Animation Tool
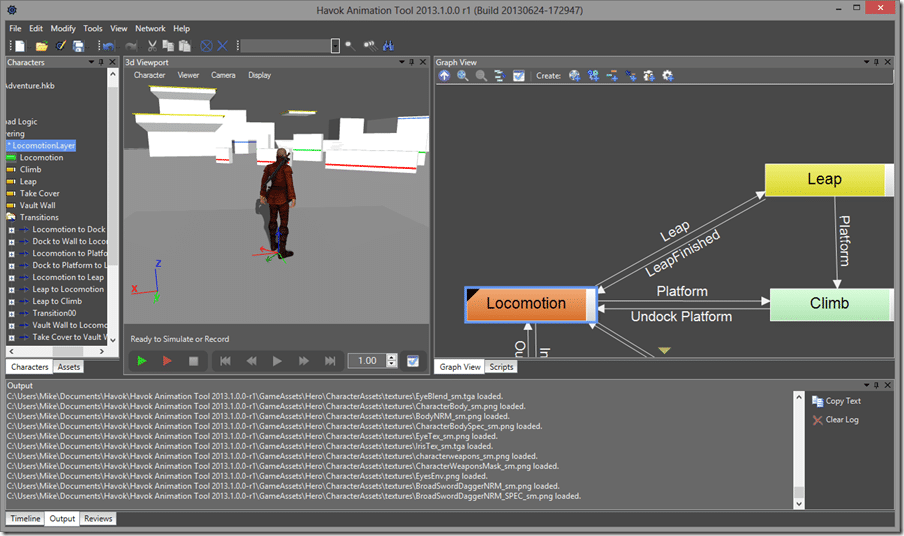
This is another entire application, seemingly for making animation state machines, so basically for “gamifying” your rigged animations. Yeah, I think I made that word up. Truth is, I am not an animator, so this is way outside my pay grade… anyways, here is Havok Animation Tool running an included example project ( located at C:UsersMikeDocumentsHavokHavok Animation Tool 2013.1.0.0-r1GameAssetsHero on my PC ). You can control the characters animations using a game pad.
Again… not my realm of knowledge, so I know very little about this tool. I believe this was a good part of the product known as Havok Behaviour.
Other Tools
There is a collection of other tools that are part of Project Anarchy as well.
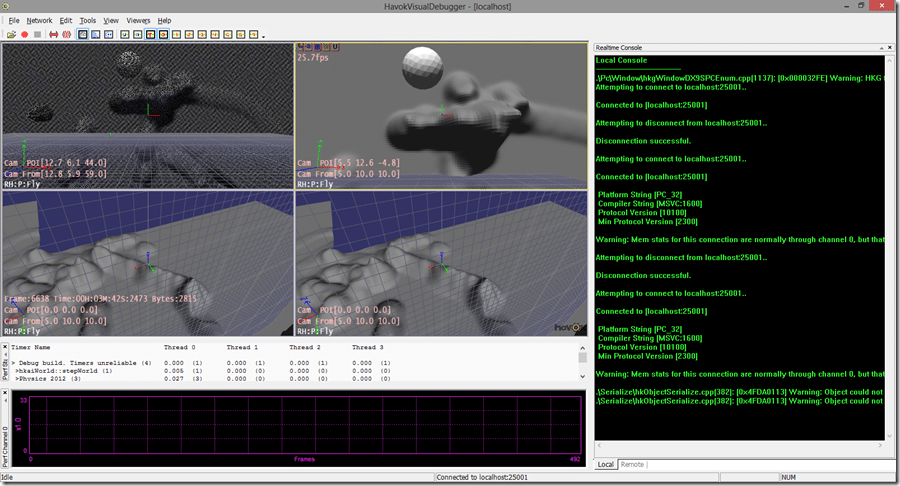
One is the Visual Debugger
In Havoks words:
The Havok™ Visual debugger (VDB) is a very convenient tool to monitor the physics representation of a scene in real-time. By watching the physics objects in the visual debugger, you can quickly locate any potential errors, which may not have been located by viewing the scene in vForge alone.
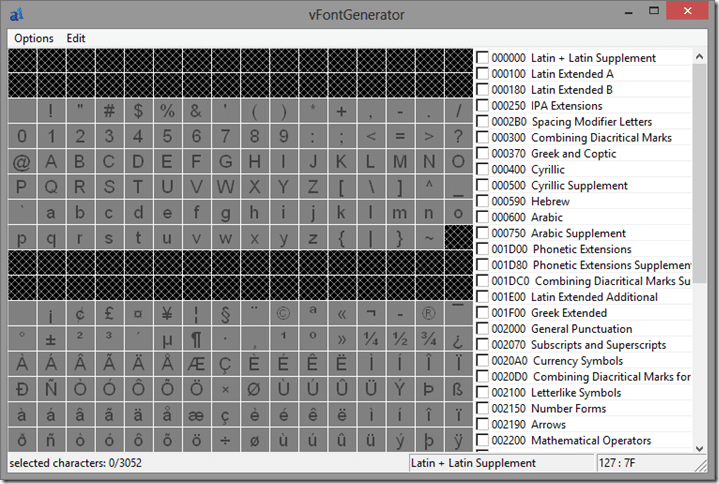
vFontGenerator
For creating fnt bitmap font files.
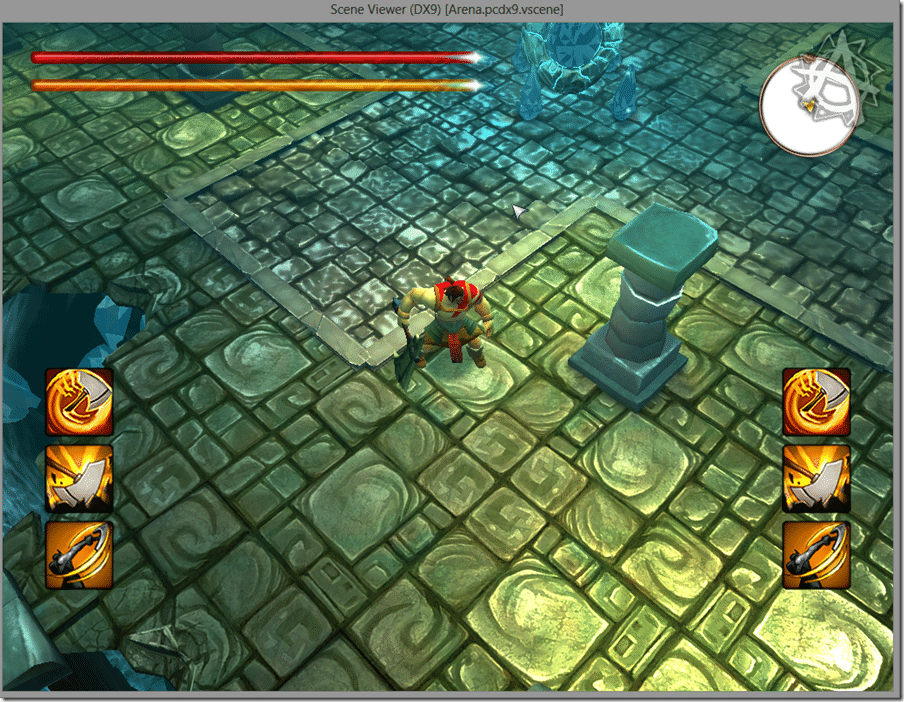
vSceneViewer for viewing scenes (outside of vForge)
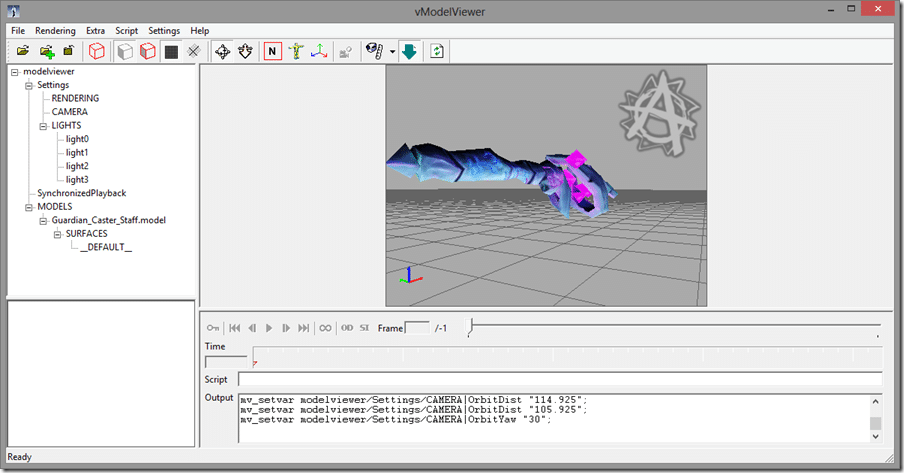
vModelViewer the name pretty much says it all, for viewing Project Anarchy model files:
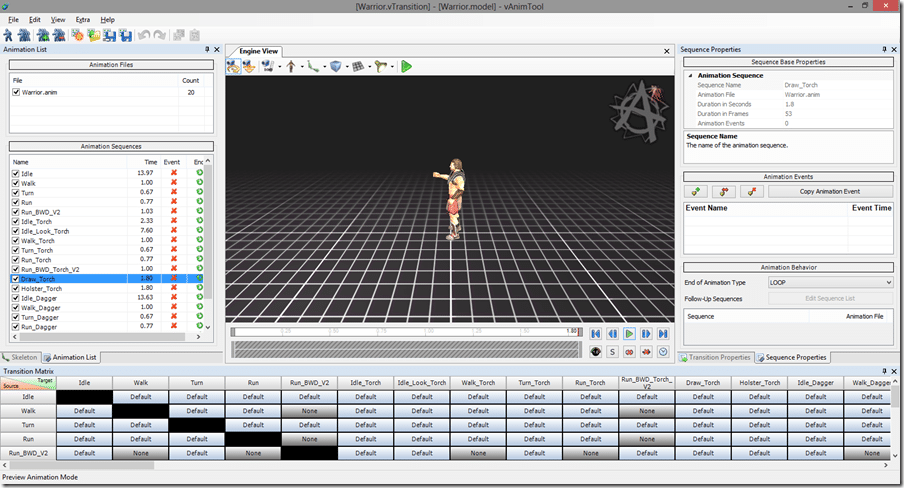
vAnimTool You can load a model and anim animation file preview and edit animation sequences:
Art Pipeline Tools
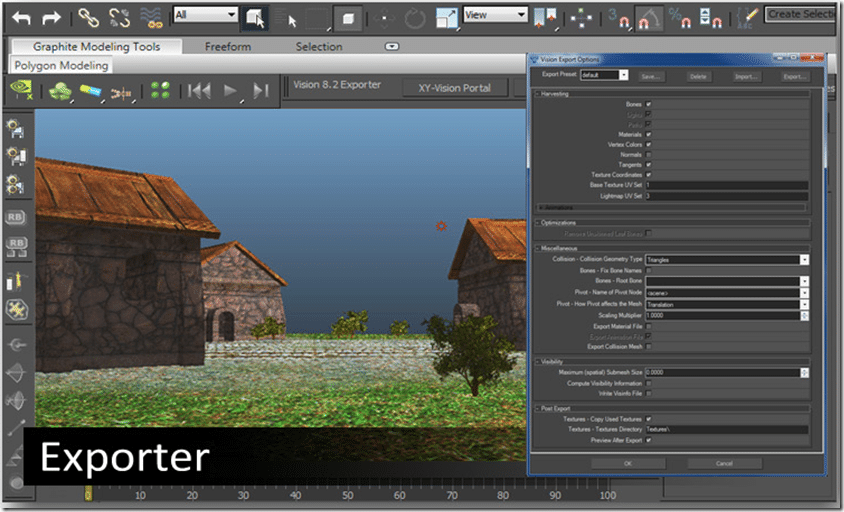
There are plugins for Max and Maya for exporting 3D content. I don’t have either currently installed, so I can only show this screenshot taken from the documentation:
So then… what happens if you don’t have Max or Maya? Well, you are out of luck. There is a 30 day fully functioning trial available, but unless you are a student there is a 5000$ pricetag at the end of that trial.
Fortunately, that is just a temporary problem, from the ProjectAnarchy answers website:
Based off the community feedback we are currently working and testing an FBX importer. We realize that many users in the community use other modeling packages and the FBX importer will help those users with being able to get their assets in.
Once that importer is available you will suddenly be able to use tools like Blender, Cheetah, Poser/Daz, Silo, etc. Basically any tool that exports FBX, which is just about every modern app.
Summary
There’s tons of functionality packed in this engine, and this is just looking at the tool side of the equation. Of course, there are dozens upon dozens of APIs behind the scenes as well. In the future, I will look closer at how you actually put it all to use. Let me know if there is anything you specifically want to be covered.
I will say, I am a lot more impressed than I thought I was going to be. I thought it would be a bunch of poorly documented tools mashed together with minimal documentation. In reality, it’s a remarkably cohesive and powerful package that covers almost all of the bases. They certainly have my interested piqued. Good job Havok!

