This is part 3, the following are links for part one and part two in this series.
Alright, we’ve installed the tools, got an editor up and going and now how to run the generated code, both on our computers and on device ( well… Android anyways… I don’t currently have an iOS developer license from Apple ), so now the obvious next step is to take a look at code.
Let’s get one thing clear right away… I know nothing about ActionScript, never used it, and I didn’t bother taking the time to learn how. As unfair as that sounds, frankly when it comes to scripting languages, I rarely bother learning them in advance… I jump in with both feet and if they are good scripting languages, you can generally puzzle them out with minimal effort. This is frankly the entire point of using a scripting language. So today is no different. This may mean I do some stupid stuff, or get impressed by stuff that makes you go… well duh. Just making that clear before we continue… now, lets continue…
LoomScript
Apparently LoomScript is ActionScript with a mashup of C# and a smattering of CSS. ActionScript is itself derived or based on JavaScript. I know and like JavaScript and know and like C#, so we should get along fabulously.
Let’s look at the specific changes from ActionScript.
First are delegates, a wonderful feature of C#. What exactly is a delegate? In simple terms it’s a function object, or in C++ terms, a function pointer. It’s basically a variable that is also a function. This allows you to easily create dynamic event handlers or even call multiple functions at once.
Next was type inference, think the var keyword in C# or auto keyword in C++ 11.
They added support for the struct data type. This is a pre-initialized and copy by value (as opposed to reference) class. I am assuming this is to work around an annoyance in ActionScript programming that I’ve never encountered.
They also added C# style Reflection libraries. I assume this is confined to the System.Reflection namespaces. If you are unfamiliar with Reflection in C# land, it’s a darned handy feature. In a nutshell, it lets you know a heck of a lot about objects at runtime, allowing you to query information about what “object” you are currently working with and what it can do. It also enables you load assemblies and execute code at runtime. Some incredibly powerful coding techniques are enabled using reflection. If you come from a C++ background, it’s kinda like RTTI, just far better with less of an overall performance hit.
Finally they added operator overloading. Some people absolutely love this feature… I am not one of those people. I understand the appeal, I just think it’s abused more often than used well. This is an old argument and I generally am in the minority on this one.
Hello World
Now let’s take a look at creating the iconic Hello World example.
First is the loom.config file, it was created for us:
{
“sdk_version”: “1.0.782”,
“executable”: “Main.loom”,
“display”: {
“width”: 480,
“height”: 320,
“title”: “Hello Loom”,
“stats”: true,
“orientation”: “landscape”
},
“app_id”: “com.gamefromscratch.HelloLoom”,
“app_name”: “HelloWorld”
}
This is basically the run characteristics of your application. This is where you set application dimensions, the title, the application name, etc. Initially you don’t really even have to touch this file, but it’s good to know where it is and to understand where the app details are set.
Pretty much every application has a main function of some sort, the entry point of your application and Loom is no exception. Here is ours in main.ls
package
{
import cocos2d.Cocos2DApplication;
static class Main extends Cocos2DApplication
{
protected static var game:HelloWorld = new HelloWorld();
public static function main()
{
initialize();
onStart += game.run;
}
}
}
Here we are creating a Cocos2DApplication class Main, with one member, our (soon to be created) Cocos2DGame derived class HelloWorld.
We have one function, main(), which is our app entry point, and is called when the application is started. Here you can see the first use of a delegate in LoomScript, where you assign the function game.run to the delegate onStart, which is a property of Cocos2DApplication. In a nutshell, this is the function that is going to be called when our app is run. We will look at HelloWorld’s run() function now.
Speaking of HelloWorld, lets take a look at HelloWorld.ls
package
{
import cocos2d.Cocos2DGame;
import cocos2d.Cocos2D;
import UI.Label;
public class HelloWorld extends Cocos2DGame
{
override public function run():void
{
super.run();
var label = new Label(“assets/Curse-hd.fnt”);
label.text = “Hello World”;
label.x = Cocos2D.getDisplayWidth()/2;
label.y = Cocos2D.getDisplayHeight()/2;
System.Console.print(“Hello World! printed to console”);
//Gratuitous delegate example!
layer.onTouchEnded += function(){
label.text = “Touched”;
}
layer.addChild(label);
}
}
}
We start off with a series of imports… these tell Loom what libaries/namespaces we need to access. We added cocos2d.Cocos2D to have access to Cocos2D.getDisplayWidth() and Cocos2D.getDisplayHeight(). Without this import, these methods would fail. We similarly import UI.Label to have access to the label control.
Remember about 20 seconds ago ( if no btw… you may wish to get that looked into… ) when we assigned game.run to the Cocos2DApplications onStart delegate? Will, this is where we define the run method.
The very first thing it does is calls the parent’s run() method to perform the default behaviour. Next we create a Label widget using the font file Curse-hd.fnt (that was automatically added to our project when it was created ). We set the text to “Hello World” and (mostly) centre the label to the screen by setting its x and y properties. You may notice something odd here, depending on your background… the coordinate system. When working with Cocos2D, there are a couple things to keep in mind. First, things are positioned relative to the bottom left corner of the screen/window/layer by default, not the top left. Second, nodes within the world are by default positioned relative to their centre. It takes a bit of getting used to, and can be overridden if needed.
Next we print “Hello World was printed to the console” to demonstrate how to print to the console. Then we follow with another bit of demonstrative code. This is wiring a delegate to the layer.onTouchEnded property. This function is going to be called when the screen is released, as you can see, this is an anonymous function, unlike run we used earlier. When a touch happens, we simply change the label’s text to Touched. Finally we add the label to our layer, inherited from Cocos2DGame.
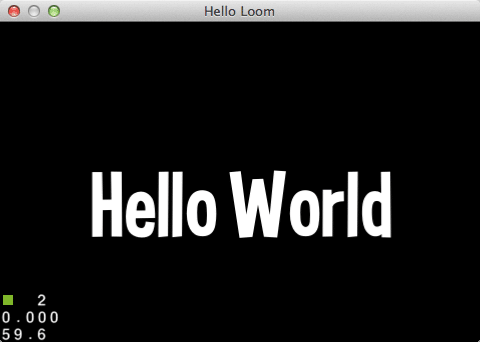
Run the code and you will see:
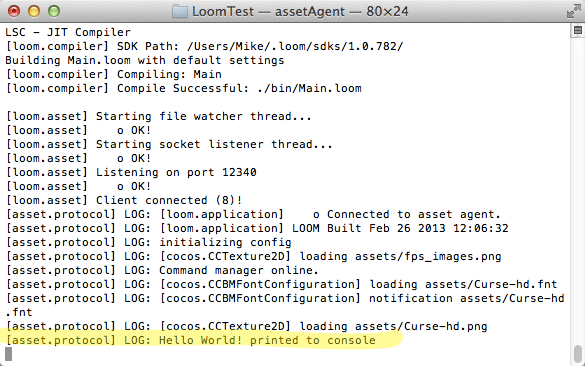
While if you check out your terminal window, you will see:
As you can see, Hello world is also displayed to the terminal.
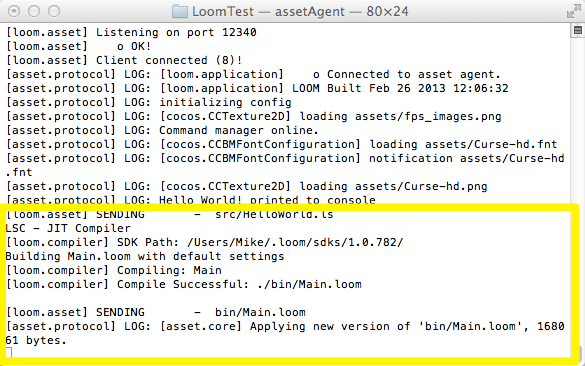
Now lets take a look at one of the cool features of Loom. Simply edit an .ls file in your text editor of choice and if you are currently running your project, if you flip back to the terminal window you will see:
Loom is automatically updating the code live as you make changes. This is very cool feature. Ironically though, in this particular case, it’s a useless one as all of our code runs only when the application is first started. However in more complicated apps, this will be a massive time saver.
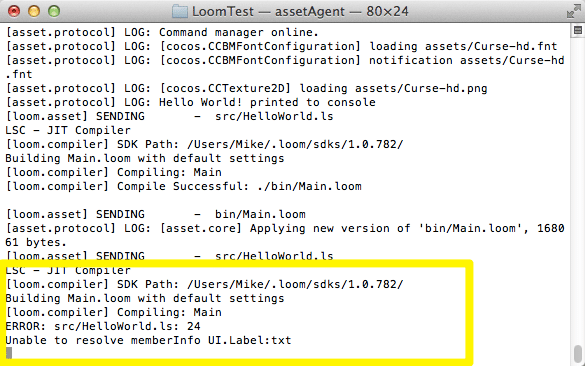
On top, this is also how you can easily detect errors… let’s go about creating one right now. Instead of label.Text, we are going to make an error, label.Txt. Save your code and see what happened in the Terminal window:
As you can see the error and line number are reported live in the Terminal without you having to stop and run your application again.
Pretty cool over all. In the next part, we will look at more real world code examples.
You can read the next part dealing with graphics right here.


