Introduction
Welcome to our first Programmer Art tutorial series. The ultimate goal in these tutorials is to instil a programmer with the capacity to create their own art assets, in this case using Blender. One thing I want to make clear right off the hop, this won’t teach you how to create *GOOD* art, that part takes many years of practice. What it will do however, is cover all of the bits you need to know to create “programmer art” for your game. Who knows, in the end way may even make an artist of you!
Over the series we will hopefully be covering general Blender navigation, modelling, texturing, animating and possibly rendering. Each of these topics could actually fill a book, so the focus here is purely functional in scope. I would say think of this as the Coles notes version of Blender, but apparently outside of Canada, that expression means nothing… So instead, think of this as Blender for Dummies, where I am in fact assuming you Dummies are actually rather clever! 🙂 This post is going to be an overview of Blender itself, the interface can be a bit daunting at first. If you are already somewhat comfortable with Blender, you may want to skip ahead.
Meet Blender
Blender for those of you that may not have encountered it before, is a free and open-source 3D modelling application available for Mac OS, Windows and Linux ( and more… ). It is a remarkably capable package containing tools for modelling, animating, paint, texturing, rendering and even editing video. Heck, Blender even includes a full featured Python powered game engine!
Blender has a bit of a reputation for being… difficult. In many ways, especially since more recent UI overhauls, this is mostly an unfair reputation. On the other hand, Blender is certainly different. If you have some experience with other 3D applications, you will find Blender a bit daunting at first. Don’t worry, once it clicks it gets a lot better. One of the big issues with Blender is a lot of the documentation out there is for Blender 2.4 and earlier and those versions were massively different.
Obviously before we begin, we need to get a copy of Blender. Simply head over to the download page and download the most recent version for your platform of choice. In this tutorial, I will be using 2.65a, simply because it is the most recent version. Blender updates on generally a 6 week schedule, so if your version is slightly newer, it shouldn’t be a huge difference.
So, if you haven’t already, download and install Blender. Once it’s installed, load it.
Welcome to the UI
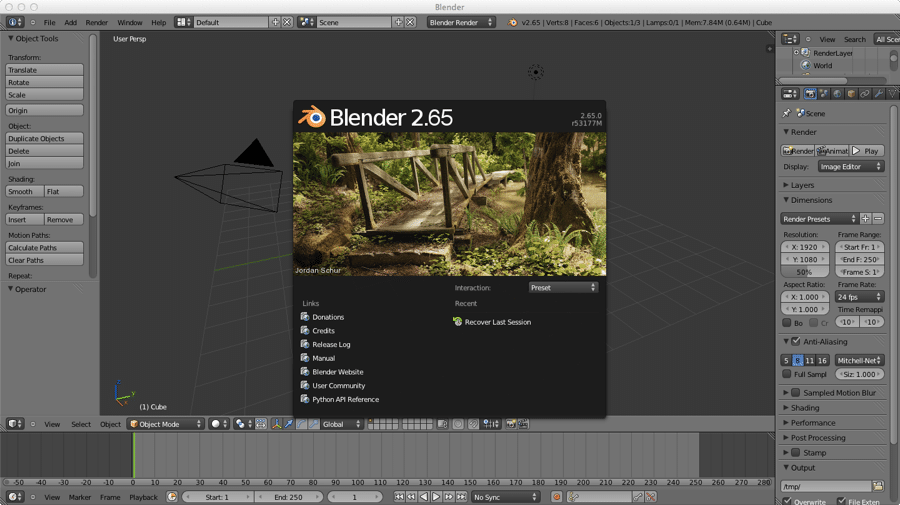
So, now that you have fired up Blender, you should see:
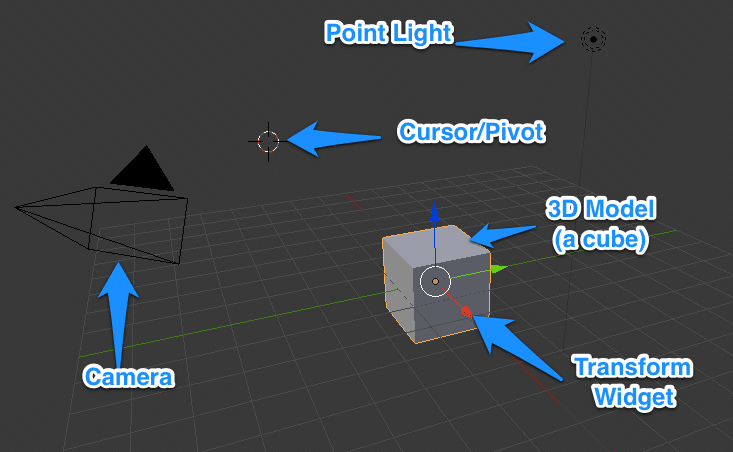
Clicking once will remove the splash screen. This leaves you with the default starting scene below, minus the pretty blue annotations that is.
Lot’s of stuff in there, each item labeled above.
The point light and camera are simply graphical icons for non-visible scene attributes, the Camera is used to render the scene from and a Point light, which you can think of similar to a light bulb in the real world. The transform widget is a very handy little guy that we will cover shortly.
The Cube is simply a 3D model so your scene doesn’t start outempty. The cursor can be thought of as a pivot point that transform are performed relative to, we will see it in detail later. Behind it all is a grid. This is simply for reference and can be turned off if you want. The thing to keep in mind, the grid isn’t actually part of your scene, its just there to assist you, like the rulers in Photoshop.
There are two very important things to be aware of right now:
1- The camera you see on screen, isn’t the same as the camera ( or perspective ) you use to view your scene. The camera ( seen above ), is used for rendering your 3D scene into an image or movie. If you are simply modelling or are ultimately exporting to a game engine like Unreal or Unity, you don’t need the camera at all. You manipulate your view of the world through a different means, that we will cover very soon. Simply put, if you aren’t rendering to an image or movie, you don’t really need a camera, although they can be useful for visualizing your results.
2- This is just the starting scene. At any time you can delete everything here. Go ahead if you went. Click in the scene and press the ‘A‘ key, which is the same as Select/DeSelect All. Then hit X to delete the selected items. You will see a prompt box like so:
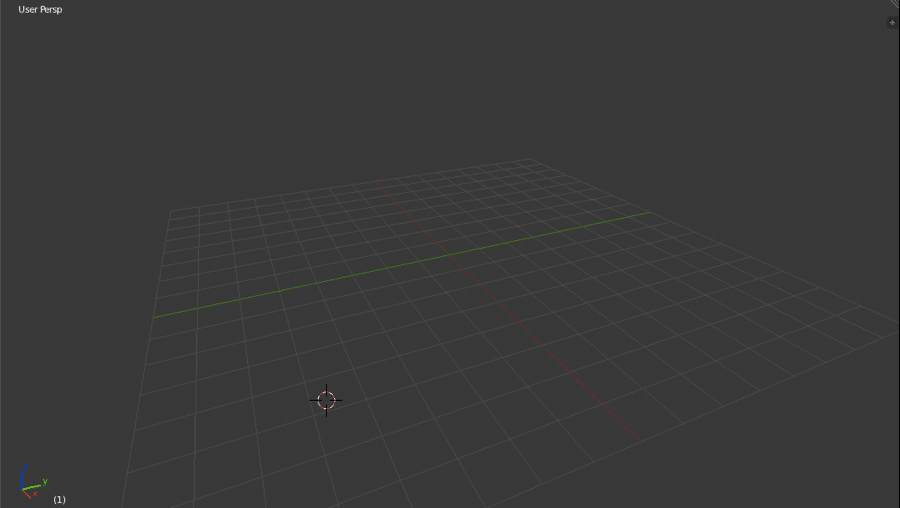
Either press X again, or click Delete, and voila:
A completely empty scene, minus of course the cursor/pivot and the grid.
If you prefer Blender start with an empty scene every time you start up, you can now save your changes. Select File->Save User Settings ( or CTRL + U ).
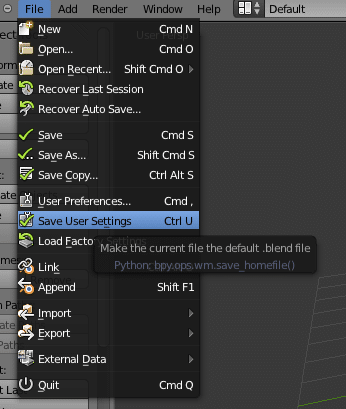
Keep in mind, Save User Settings will save all changes you have made to Blender as your defaults, such as key binding changes, window location, visibility and size. To go back to the original default if you mess something up, simply select Load Factory settings.
If you want to customize the Blender interface, take a look at this video I put together earlier. Just remember, if you mess things up, you can always start fresh by choosing Load Factory Settings. The following video is completely optional, as the process can be a little confusing. That said, the UI is amazingly flexible, as you will see. The video is available in 1080p if the text is hard to read.
A look around the interface
Blender is an amazingly customizable interface, you can turn it into just about whatever you want, but it is also very easy to screw things up. Any window can be split appear, changed, merged together, etc. The following video I made earlier shows how you can customize the interface to your liking. For now, I wouldn’t bother too much, it can be a rather confusing process and this tutorial will assume you are using the default settings.
Screen Layout Selection
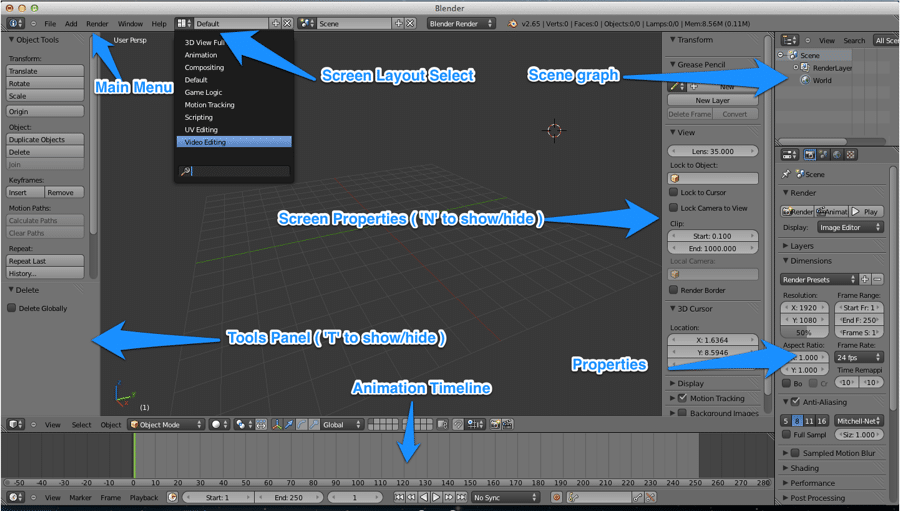
The Screen Layout selection can be used to select between various different layouts. The one displayed above is ‘Default’. As you are working on different aspects, you will switch between different modes, for example, the Animation layout is optimized towards animation tasks, UV Editing is for texturing tasks, etc.
Tools and Properties Panel
As mentioned in the diagram, you can toggle the left and right panel ( Tools and Properties ) by hitting the T or N key. The Tools panel will be used quite commonly, when you use a tool ( like a bevel for example ), if it requires input or has options, they will appear on the tools menu. The Screen Properties menu is used much less commonly, mostly to configure screen viewport settings, like texturing modes, size and scale settings, etc. You can also use it to fine tune the position of objects numerically.
Animation Timeline
This timeline is used during the animation process, we will cover it in detail later. You can dragon the window above it down or close it completely for now if you want. Refer to the earlier video for details on how to resize, split and merge windows.
Properties Windows
Yeah, it’s kinda confusing having two windows named properties, I know… This guy is important and you will be using it a lot. This is where textures are handled, special effects, modifiers, render settings and more are created, accessed and applied. We will deal with it various times in later tutorials.
Scene Graph
This is your scene in hierarchical form. You can use it to hide, select and delete various objects within your scene. Your scene is ultimately a tree of nodes, which in turn contain other nodes. In a complex scene, this will be a godsend. For simpler scenes and these tutorials, we will rarely use it.
Hotkeys used in this tutorial
KeyAction
| Key | Action |
|---|---|
| A | Select/Deselect All |
| X | Delete selected |
| T | Hide/Show Tools panel |
| N | Hide Show properties panel |
Coming Next
In the next tutorial we will learn how to navigate around the Blender UI.
On to next part

