
Not to make any assumptions about your mother’s computing abilities of course! My mother is flummoxed by powering a computer on and its all down hill from there, so perhaps not quite easy enough *my* mother could do it. But it is easy, really easy. Really. Easy. This is just one of those areas Moai really shines.
If you are unfamiliar with the concept, a tilemap is pretty straight forward. You have an image or series of images that hold the art for your game. In this example, we are going to use a regular top down ( not isometric ) perspective and our image map is composed of tiles 32×32 pixels in size. Your game map is then made up of a grid that says “at this location, draw this tile”.
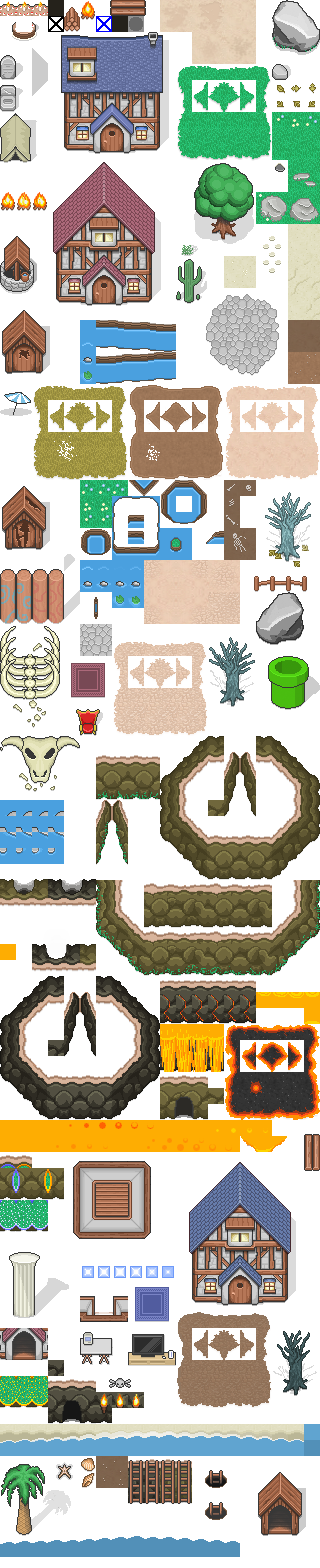
First, the topic of the image itself. That one, in the spirit of open source, I am ripping off someone else’s work! ![]() You may remember a while back Mozilla released a completely free HTML5 based MMO, BrowserQuest. Well, we are going to make use of one of the tilesheets from that project. This is the file right here (it is big). This is massive overkill, but I like massive overkill. Here is a shrunk down version of the image we are going to be working with:
You may remember a while back Mozilla released a completely free HTML5 based MMO, BrowserQuest. Well, we are going to make use of one of the tilesheets from that project. This is the file right here (it is big). This is massive overkill, but I like massive overkill. Here is a shrunk down version of the image we are going to be working with:

The image is composed of 20 columns of 32×32 images and 98 rows of them, for a grand total of 1,960 tile images or cells, in a single image. So, that covers our image, let’s take a look at the code:
screenWidth = MOAIEnvironment.screenWidth screenHeight = MOAIEnvironment.screenHeight if screenWidth == nil then screenWidth =1280 end if screenHeight == nil then screenHeight = 800 end MOAISim.openWindow("Window",screenWidth,screenHeight) local viewport = MOAIViewport.new() viewport:setSize(screenWidth,screenHeight) viewport:setScale(480,320) local layer = MOAILayer2D.new() layer:setViewport(viewport) MOAIRenderMgr.pushRenderPass(layer) local map = MOAIGrid.new() map:initRectGrid(15,10,32,32) map:setRow(10,0x0b,0x0c,0x0d,0x0b,0x0c,0x0b,0xc7,0xc7,0xc7,0xc7,0x0d,0x0b,0x0c,0x0d,0xc7) map:setRow(9,0x2e,0x2f,0x30,0x31,0x32,0x0b,0x0c,0x0d,0xc7,0x0c,0x0d,0x0b,0x0c,0x0d,0x0b) map:setRow(8,0x41,0x42,0x43,0x44,0x45,0x0b,0x0c,0x0d,0x0b,0x0c,0x0d,0x0b,0x0c,0x0d,0x0b) map:setRow(7,0x55,0x56,0x57,0x58,0x59,0x0b,0x0c,0x0d,0x0b,0x0c,0x0d,0x0b,0x0c,0x0d,0x0b) map:setRow(6,0x69,0x6a,0x6b,0x6c,0x6d,0x0b,0x0c,0x0d,0x0b,0x0c,0x0d,0x0b,0x0c,0x0d,0x0b) map:setRow(5,0x7d,0x7e,0x7f,0x80,0x81,0x0b,0x0c,0x0d,0x0b,0x0c,0x0d,0x0b,0x0c,0x0d,0x0b) map:setRow(4,0x91,0x92,0x93,0x94,0x95,0x0b,0x0c,0x0d,0xc7,0x0c,0x0d,0x0b,0x0c,0x0d,0x0b) map:setRow(3,0xa5,0xa6,0xa7,0xa8,0xa9,0x0b,0x0c,0xc7,0xc7,0x0c,0x0d,0x0b,0x0c,0x0d,0x0b) map:setRow(2,0xb9,0xba,0xbb,0xbc,0xbd,0xc7,0xc7,0xc7,0xc7,0xc7,0x0d,0x0b,0x0c,0x0d,0x0b) map:setRow(1,0xc2,0xc2,0xc2,0xc2,0xc2,0xc2,0xc2,0xc2,0xc2,0xc2,0xc2,0xc2,0xc2,0xc2,0xc2) local mapTiles = MOAITileDeck2D.new() mapTiles:setTexture("tilesheet.png") mapTiles:setSize(20,98) local prop = MOAIProp2D.new() prop:setDeck(mapTiles) prop:setGrid(map) prop:setLoc(-480/2,-320/2) -- functionally the same as above -- prop:setPiv(480/2,320/2) layer:insertProp(prop)
And if we run this code, we see:

Ok, that’s a pretty cool amount of stuff on screen, for not so much code! Let’s take a look at exactly what we did here. Once again from the top ( one of these examples I am going to do from the bottom! ). Once again, we are only going to look at the new bits, so if I fail to cover something, check out the prior tutorials, chances are I covered it then.
local viewport = MOAIViewport.new() viewport:setSize(screenWidth,screenHeight) viewport:setScale(480,320)
We’ve seen this many times before, but always in the past I’ve set setSize and setScale to the same value, this time I didn’t… why? Well the biggest reason is, I defined the grid of map values by hand, which was a gigantic pain in the butt for a screen made up of a 15×10 array of tiles ( 480/32==15, 320/32==10 ), let alone a 1280×800 screen! By setting the viewport to the actual resolution of your device, but setting the scale to your target resolution ( in this case, the iPhone 3g’s native resolution ), MOAI automatically handles the scaling for you. This is a nice easy way to support a number of different screen resolutions without having to code each one by hand.
Speaking of the map values:
local map = MOAIGrid.new() map:initRectGrid(15,10,32,32) map:setRow(10,0x0b,0x0c,0x0d,0x0b,0x0c,0x0b,0xc7,0xc7,0xc7,0xc7,0x0d,0x0b,0x0c,0x0d,0xc7) map:setRow(9,0x2e,0x2f,0x30,0x31,0x32,0x0b,0x0c,0x0d,0xc7,0x0c,0x0d,0x0b,0x0c,0x0d,0x0b) map:setRow(8,0x41,0x42,0x43,0x44,0x45,0x0b,0x0c,0x0d,0x0b,0x0c,0x0d,0x0b,0x0c,0x0d,0x0b) map:setRow(7,0x55,0x56,0x57,0x58,0x59,0x0b,0x0c,0x0d,0x0b,0x0c,0x0d,0x0b,0x0c,0x0d,0x0b) map:setRow(6,0x69,0x6a,0x6b,0x6c,0x6d,0x0b,0x0c,0x0d,0x0b,0x0c,0x0d,0x0b,0x0c,0x0d,0x0b) map:setRow(5,0x7d,0x7e,0x7f,0x80,0x81,0x0b,0x0c,0x0d,0x0b,0x0c,0x0d,0x0b,0x0c,0x0d,0x0b) map:setRow(4,0x91,0x92,0x93,0x94,0x95,0x0b,0x0c,0x0d,0xc7,0x0c,0x0d,0x0b,0x0c,0x0d,0x0b) map:setRow(3,0xa5,0xa6,0xa7,0xa8,0xa9,0x0b,0x0c,0xc7,0xc7,0x0c,0x0d,0x0b,0x0c,0x0d,0x0b) map:setRow(2,0xb9,0xba,0xbb,0xbc,0xbd,0xc7,0xc7,0xc7,0xc7,0xc7,0x0d,0x0b,0x0c,0x0d,0x0b) map:setRow(1,0xc2,0xc2,0xc2,0xc2,0xc2,0xc2,0xc2,0xc2,0xc2,0xc2,0xc2,0xc2,0xc2,0xc2,0xc2)
In the immortal words of Douglas Adams DON’T PANIC! This looks a lot scarier than it actually is. We are creating our map, which is a variable of type MOAIGrid. Think of a grid as a 2d array of sorts that holds references to the tiles at each location. Really that’s about what it does. So we start of by initializing with a call to initRectGrid() passing in the number of tiles ( 15×10 ) and the width and height of each tile ( 32,32 ). The next 10 lines are simply populating the grid with calls to setRow(), the first value is the row index, then what follows is a list of 32bit indexes in hexidecimal. This is where the scary comes in.
Basically the top left tile in our image map is at 1 ( 0x01 ) and there are 20 tiles per row in the image we used, so the first image in the second row is therefore at 21 ( row count * row width + offset == 1 * 20 + 1 == 21 ), which is then translated in to hex, which is 0x15.
So, basically we “draw” our map using image locations ( as a 1d index using the formula above, converted to hex ). The MOAIGrid itself, row 1 is the bottom most row, which is why our grid counts down from 10. Now let’s take a look at how we created our source image:
local mapTiles = MOAITileDeck2D.new() mapTiles:setTexture("tilesheet.png") mapTiles:setSize(20,98)
Pretty simple over all. We create a MOAITileDeck2D. Remember, a Deck is parlance for an image source, and in this case our source is a single image composed of dozens of tiles. We set the actual image with a call to setTexture() and pass in our filename tilesheet.png. We then set it’s size, letting it know it is made up of 20 columns and 98 rows of tiles.
local prop = MOAIProp2D.new() prop:setDeck(mapTiles) prop:setGrid(map) prop:setLoc(-480/2,-320/2) -- functionally the same as above -- prop:setPiv(480/2,320/2)
Neither MOAITileDeck2D or MOAIGrid are display items, for the we need to create a MOAIProp2D. We set it’s deck ( or source ) to our newly created MOAITileDeck2D mapTiles and it’s grid to our MOAIGrid map. Finally we set it’s position with a call to setLoc. This is an area of some possible confusion ( and why I showed the commented setPiv() as well ), because by default our prop will be at (0,0), which is the dead center of the screen. However, the pivot point of our prop in the case is actually the bottom left corner of our map. Therefore, we either need to move the pivot point to the center ( what the commented out code does ), or we position the prop offset from the center of the screen by half the width and height of the viewport.
You can actually accomplish a heck of a lot with just a bit of code. Obviously in your case, you want want to use a tool to generate the MOAIGrid indices, doing it by hand is a PITA ( trust me! ). Really though, the visual rendering of a top down RPG game just boiled down to a dozen or so lines of code! Perhaps most impressively, this just scratched the surface of what MOAIGrid can do.
Coming Soon
General Programming