In this section we look at how to do key framed animation. What exactly is keyframe animation? In simple terms, you define a few (*cough* key *cough*) frames of animation ( by posing or positioning your model ) and then the computer fills in the missing animation. It’s exceedingly handy as it greatly simplifies the animation process ( it would really suck if you had to update every single movement on every single frame! ) and it also reduces the amount of data you need to store. Fortunately, except for a few gotchas, keyframe animation is pretty simple in Blender.
Let’s jump right in.
Welcome to the Timeline
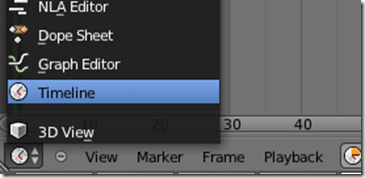
First thing we want to do is bring up a Timeline window:
The timeline presents the animation in your scene over time.
As you add keyframes, they will show up on the graph in Yellow. The currently selected frame is shown in green:
Notice how the legend or lower axis ( numbers across the bottom representing frames ) is much smaller in the second shot? That is because you can affect the granularity using the scroll wheel on your mouse. This is handy if you are working a lot less than the default 200 frames, or if you are creating an animation that is substantially longer. You can also can pan left and right holding the middle mouse button and dragging.
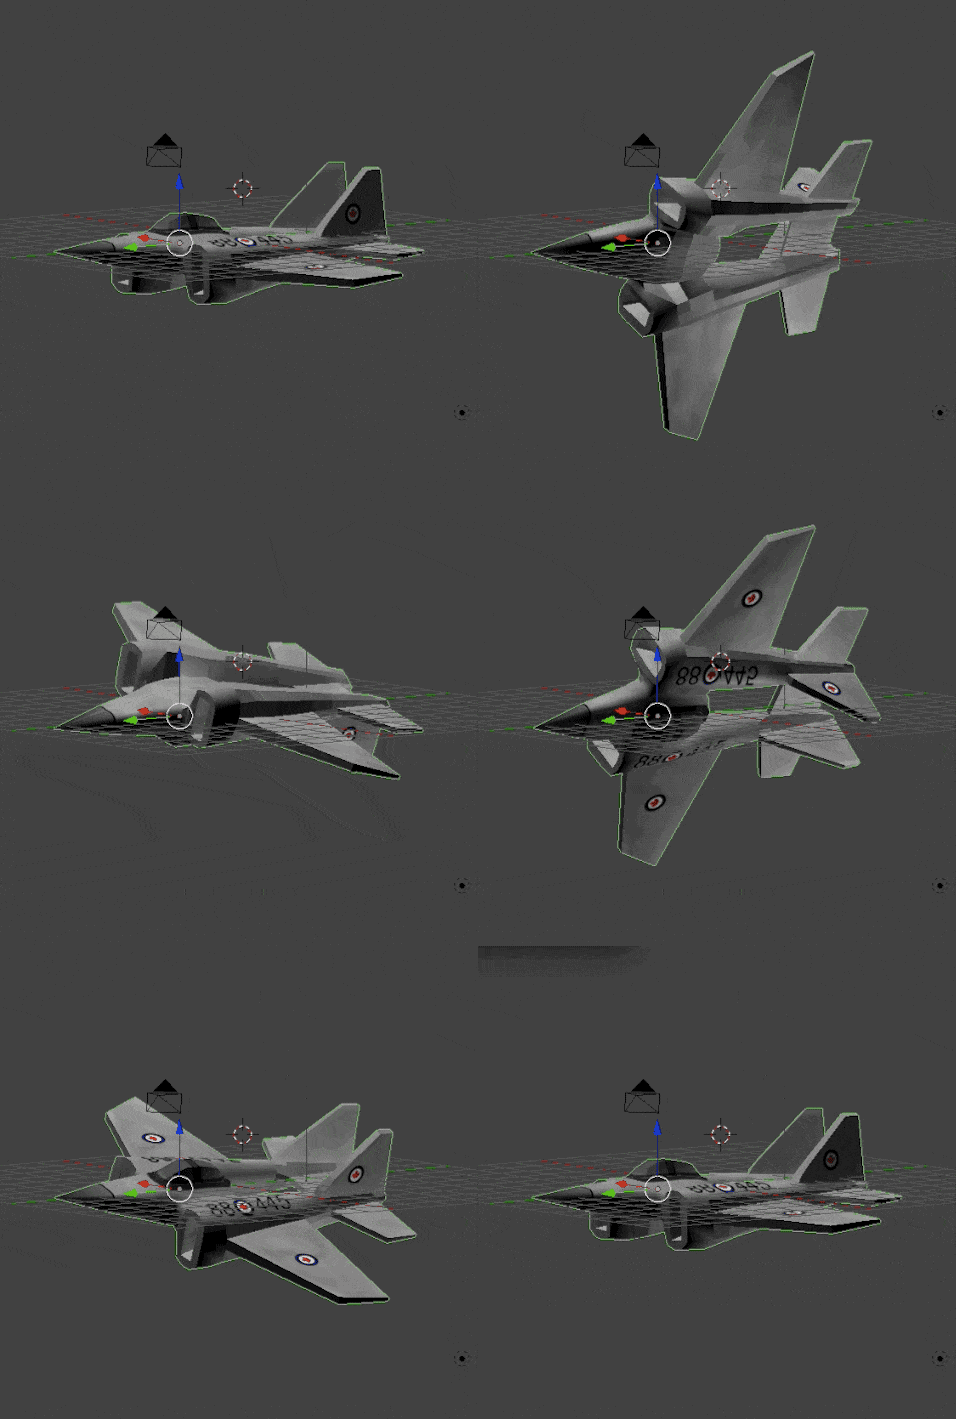
Let’s start by creating about the simplest animation possible. We want our sprite to rotate 360 degrees around the Y axis, representing a banked roll. To do this, we will create a total of four keyframes, one every 5th frames, one at the first frame and one at the last. We want our animation to take a total of 20 frames, so start by setting the end frame to 20.
Click in the end frame and enter 20. This is a dual function button, in the you can use the left or right arrows to increment the value or click in the center to enter a value.
You will notice the light gray portion of the timeline has shrunk to only include the active animation duration from frame 1 to frame 20.
Setting Keyframes
Now let’s set our first frame. We actually want to create a key at frame 1 of the jet in the position it is currently in.
First we want to make sure we are at Frame 1 in the timeline. You can accomplish this by either clicking at the 1 position in the timeline, or by typing 1 in the currently selected frame box ( beside the End frame entry in the menu bar ).
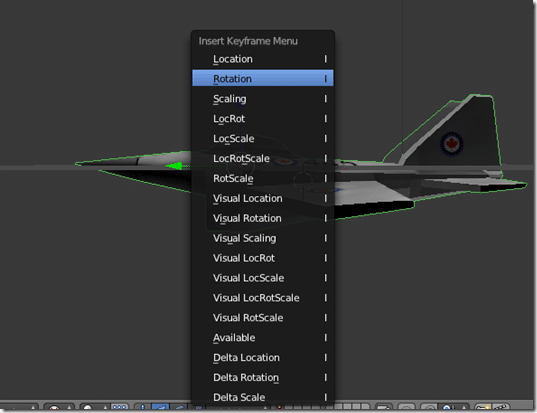
Once we’ve moved to position 1 on the timeline, we want to create a keyframe for our jet model. To do so, go into 3D View, in Object mode, and select the Jet model. Now hit i. This will bring up the Insert Keyframe Menu:
You need to tell it what information you want to keyframe on. In this case, it is only the rotation that we are changing, so we select Rotation. If you were instead translating the model you would select Location. Of course, if you were translating, rotating and scaling as part of your animation you would select LocRotScale. Again, in this case we just want Rotation.
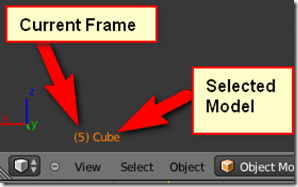
Now advance to frame 5 in the timeline. You will notice in the 3D view, as you advance frames in the timeline, it will be represented in the 3D View in a label at the bottom left corner of the window:
… yeah, I really should have renamed it to something other than Cube at this point eh?
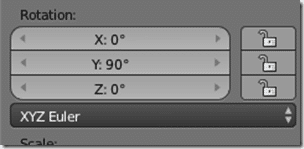
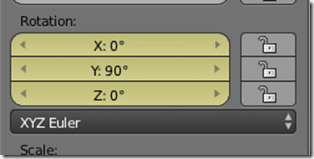
Anyways, once you are at Frame 5, in the 3D view bring up the properties panel, and set the Y rotation to 90 degrees:
When performing rotations for animation, it is very important you set them here, as if you rotate by hand it will often set it to –90 when you in fact meant 270! This is only applicable for rotations, for translation and scaling, feel free to use whatever method you want. Oddly enough, this behaviour varies from version to version. On my Mac if I perform 3x 90 degree rotations, the Y value gets set to 270 ( what we want ), while on my Windows install, it gets set to –90 ( which we certainly dont want ). So, better safe than sorry!
Now that we have updated the position, Press i and set a rotation key. Keep in mind, you need to perform the rotation BEFORE you set the key. Also, if you make a change later, you need to set another key. So if you say… changed Rotation to 89, the change would not take effect unless you set a new rotation key! Dont worry, keys will simply overwrite the old one.
Notice how the rotation field background is now yellow?
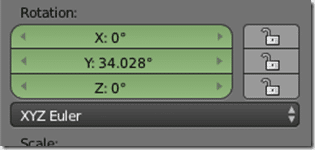
This shows you that this value has a keyframe controlling it. If you go to any frame in between ( such as frame 3 ) you will see that it is shown in green:
This indicates that it is an interpolated value… or in other words, the computer calculated it based on the keyframe before and after it.
Now repeat this process. Go to frame 10 in the timeline, set Y Rotation to 180, press i and select rotate. Now advance to frame 15, rotate to 270, set a keyframe, then finally advance to frame 20, rotate to 360 then set another key. Congratulations, your very first animation is complete! Press the Play icon on the timeline and you should see a smooth ( if somewhat fast ) animation of your jet rotating.
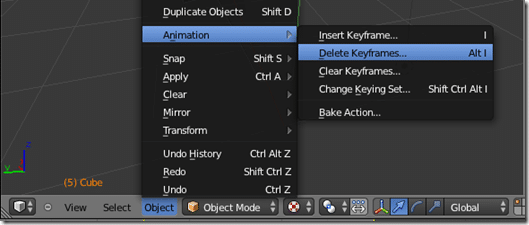
Of course, there is the possibility you could make a mistake and want to get rid of a keyframe. If that is the case, go to the frame you want to remove the keyframe from in the timeline. Then in 3D view with the object selected chose the Object menu –> Animation->Delete Keyframes… Then when prompted click Delete Keyframe.
If you instead want to get rid of all keyframes for the selected object, select Clear Keyframes… and once again, click the confirmation prompt.
Controlling animation playback rate
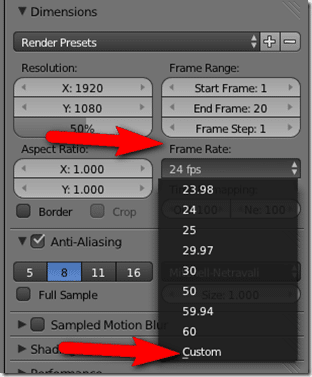
Now, the playback may be wayyyyy higher than you want it to be when you click the Play button in timeline. This is because by default Blender is set up to play and render animations at 24 frames per second. You can alter the playback speed, but it may not be where you expect it to be.
To change the playback speed, in the Properties panel select Render:
Now scroll down and locate Frame Rate and select Custom:
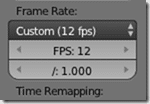
A new option will be made available allowing you to set the framerate to whatever you want. Here for example it is set to 12FPS
Now when I play in timeline ( or if I rendered to a movie ), it would play at half the previous speed.
A little more control
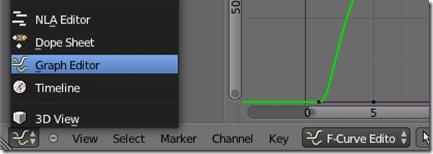
Sometimes you might find that you want a bit more control over how the frames are calculated between keyframes. Fortunately, exactly that functionality is available. You can take fine control of your animations using the Graph Editor
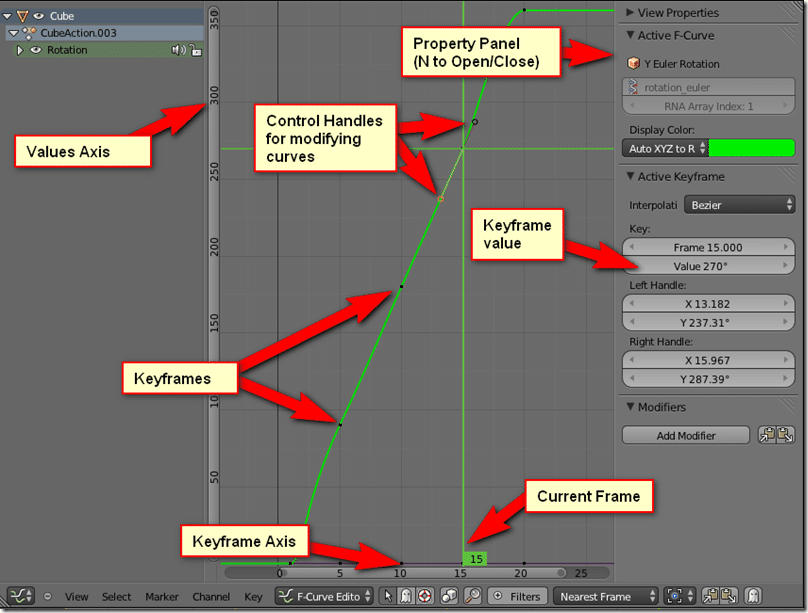
The user interface is initially pretty daunting, but isn’t all that bad actually.
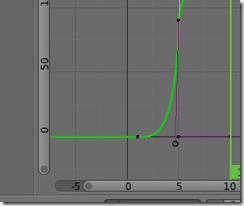
Basically the axis on the left shows the value ( in this case, rotation in degrees ), while the axis across the bottom illustrates the frames in the animation. You may notice the circle on each end of the axis, they can be used to increase or decrease the range of values displayed. Simply click and drag the circle on either end to expand or contract the axis range. The green line represents the amount of rotation over time.
Using the control handles for each point on the curve you can manipulate how the rotation will occur between key frames. Simply right click a keyframe ( black dots ) to select it. Then right click a handle and move the mouse to alter the curve. Once you’ve positioned it like you want, left click to commit. Right clicking again will instead cancel the change.
For example, the following change:
Would change the rotation, so that for the first couple frames there would be almost no rotation at all, then it would quickly rotate up to a total of 90 degrees by the next keyframe at position 5. You simply use F-Curves to fine tune the results if required.
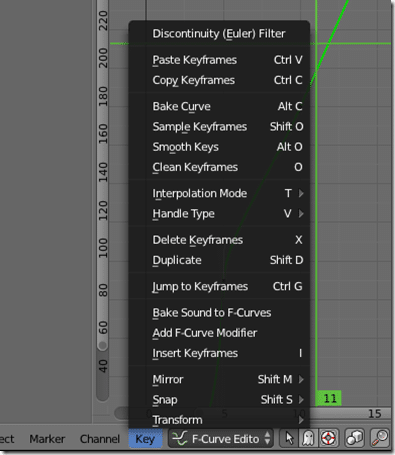
If you take a look at the Key menu, you can see you can control almost all aspects of keyframing in the Graph Editor including creating and deleting them.
Also remember, right now we are only doing a single action ( rotation ) on a single axis ( Y ). In a more advanced animation, there would be many more lines, all colour coded with the legend on the left hand panel.
In video form
I have a feeling that was a bit difficult to follow in text only form, so I’ve recorded a video going through the exact process I just described. There is no voice over or description beyond what was already mentioned above. So, if you had trouble following what I just explained, watch the entire process in action. Otherwise there is nothing else new in the video.
Next we move on to using the camera.
Click here for the Next Part

